Most people land on GitHub because someone sent them a repository link and said “clone this.” The routine from there is short. You put your work on a branch, then get that branch merged through a pull request. Everything else on the platform, issues and automation included, hangs off that loop.
It’s a big place now. GitHub’s Octoverse 2025 report counts more than 180 million developers and 630 million repositories on the platform.
Git itself runs on your computer and works offline. GitHub is the shared remote where changes get pushed, reviewed and merged, and it adds pull requests and issues on top of Git’s local version tracking, along with GitHub Actions for automation.
How do you set up a GitHub account?

Sign-up takes a couple of minutes. Pick an email address and a username at github.com, verify the email, switch on two-factor authentication, then connect Git to the account with an SSH key or a personal access token.
Beginners tend to stall at that last step, not at the form.
- Open github.com and select Sign up. Enter an email address, a password and a username.
- Confirm the email address with the code GitHub sends you.
- Choose the Free plan. It is enough to start.
- Turn on two-factor authentication in your account settings.
- Set your Git identity with git config –global user.name and git config –global user.email, using the email address attached to your GitHub account.
- Add an SSH key or create a personal access token so Git can authenticate your pushes.
Two-factor authentication
GitHub started requiring two-factor authentication from code contributors on March 13, 2023, rolling it out in groups through the end of that year (GitHub Blog, 2023).
There are plenty of ways to handle the second factor, and they differ a lot in how much they protect you.
- An authenticator app that produces time-based codes (TOTP). GitHub recommends this one first.
- A passkey, which signs you in without a password and covers the password and 2FA steps in one go.
- A hardware security key you plug in or tap.
- GitHub Mobile, where you approve the sign-in from the app.
- SMS, a texted code, meant for when an authenticator app isn’t possible.
Set up an authenticator app or SMS first. GitHub only lets you add a passkey, a security key or GitHub Mobile once one of those two is active.
Register two methods, not one. GitHub Docs suggests adding extra methods to reduce the risk of locking yourself out, and it recommends security keys as the backup rather than SMS.
SMS is the weak link. GitHub Docs says text messages can be intercepted, give no protection against phishing, arrive unreliably and are not supported in every country, so it recommends a TOTP app instead.
GitHub also asks for a 2FA check-up 28 days after you enable it, just to confirm the setup works.
SSH key or personal access token
Password logins for Git operations ended on August 13, 2021, so every push needs a token or an SSH key (GitHub Blog, 2020 announcement).
An SSH key gets generated once per machine, with the public half pasted into your account settings. It has no expiry date to keep track of, and it uses the git@github.com remote URL instead of the HTTPS one.
A personal access token goes in place of a password over HTTPS. Fine-grained tokens can be limited to specific repositories, but you’re capped at 50 fine-grained tokens per account, and they still do not cover Packages.
As of October 2026, GitHub Docs recommends fine-grained tokens over classic ones whenever possible, and recommends setting an expiration on every token. The 2020 notice listed a token over HTTPS as the recommended route, with SSH as the alternative, but both work.
On a personal laptop, SSH is the lower-maintenance pick. Tokens suit scripts, CI jobs and shared machines, where a repository-scoped credential that expires is the safer default.
If you go the key route, a guide to adding an SSH key to your GitHub account covers the generation and upload steps.
For the token route, this walkthrough on generating a personal access token shows where the settings live.
A push that fails with a password-authentication error means Git is still sending your account password. Swap the saved credential for a token, or switch the remote to the SSH URL.
How to create a repository on GitHub
Open the create menu at the top of any GitHub page and choose New repository. Name it, pick public or private visibility, turn on Add README, and select Create repository.

The terminal does the same job with gh repo create project-name –public, according to the GitHub Docs quickstart for repositories. Either way, the repository sits under one owner, a person or an organization.
Names only need to be unique within that owner, so short and descriptive works fine.
Choosing public or private visibility
A public repository can be viewed and cloned by anyone, which suits open source projects and portfolio work. A private one is visible only to you and the people you invite, so it fits client work and unreleased code.
Decide early. GitHub Docs notes that changing a repository’s visibility affects its forks, which get detached from the original when it goes private or public.
Starter files to add on day one
The creation form can add starter files for you, and it’s worth ticking them.
The README explains what the project does and how to run it. Write it in Markdown, and keep a Markdown cheat sheet open for headings, tables and code blocks.
A .gitignore file keeps build output, dependency folders and local secrets files out of Git. It has to exist before you commit the files you want ignored, because Git keeps tracking anything it already committed, as explained in this piece on how a gitignore file works.
Then the license, which people skip all the time. A public repository without one gives others no permission to reuse the code.
Which tool should you use: the web editor, GitHub Desktop, GitHub CLI or Git?
Start with the web editor or GitHub Desktop. Move to the GitHub CLI or plain Git once the workflow feels routine and you want speed or scripting.
| Tool | Interface | Best for | Stops being enough when |
|---|---|---|---|
| Web editor | Browser | README edits, typo fixes | A change spans many files |
| GitHub Desktop | Graphical app | First commits, visual diffs | You want to script steps |
| GitHub CLI (gh) | Terminal | Repositories, pull requests | You need low-level history work |
| Git command line | Terminal | Full control of history | Every flag arrives at once |
The tools overlap, and nothing stops you from mixing them inside one project.
Pros and cons of each tool
Web editor
The GitHub Docs quickstart shows the browser flow. Edit a file, then commit straight to main or open a new branch with a pull request.
There’s nothing to install, which is the whole appeal. It gets awkward once a change touches several files.
On any repository with other contributors, pick the new branch option, not the direct commit.
GitHub Desktop
GitHub Desktop is a free, open source graphical app for Windows and macOS that helps you work with repositories hosted on GitHub, per GitHub Docs. Its documentation covers squashing, cherry-picking and reordering commits, plus viewing and re-running checks, all inside the app.
If you pick it, a walkthrough on using GitHub Desktop takes you from install to first push.
You get visual diffs and no commands to memorize. The catch is that the app hides the commands, so less Git knowledge sticks.
GitHub CLI
The GitHub CLI handles repository and pull request tasks from the terminal, such as creating a repo with gh repo create or syncing a fork with gh repo sync. That last one stops when upstream changes conflict, according to GitHub Docs, so conflicts still end up in Git.
Setup and daily commands are covered in a guide to using the GitHub CLI.
Git on the command line
Plain Git gives you full control, and the skill carries over to every host, not only GitHub. The price is more flags and more ways to tangle history.
Skip the terminal on day one. The mental model of branches and pull requests matters more than the typing.
How does the GitHub workflow run from branch to merged pull request?
The loop goes in order. Clone the repository, create a branch, commit your changes, push the branch, open a pull request, then merge it after review.
- Clone: git clone followed by the repository URL.
- Branch: git switch -c feature-name.
- Commit: git add the changed files, then git commit -m “Add login form”.
- Push: git push -u origin feature-name.
- Open a pull request from the Pull requests tab, with your branch as the compare branch.
- Merge it with the Merge pull request button once review and checks pass.
GitHub’s Octoverse 2025 report counts 43.2 million pull requests merged per month on average, up 23% year over year. The pull request, not the commit, is the unit of work on the platform.
Clone and branch
Never work on the default branch.
A clone sets the remote called origin for you. If you started a project locally instead, connect it yourself with git remote add origin followed by the repository URL.
- Name the branch after the change, such as fix-login-redirect
- One branch per change, not one per week
Commit and push
Git commits in two stages. git add moves changes into the staging area, and git commit writes them to history with a message.
- Stage only the files that belong to one change
- Write messages in the imperative, so “Add login form” and not “Added login form”
- Commit often, since small commits are easier to review and revert
- Push the branch to origin when the change is ready for eyes
When a push is rejected or asks for credentials, a step-by-step guide to pushing to GitHub covers the usual causes.
Open, review and merge the pull request
Open the pull request against the base branch and describe what changed and why. A walkthrough on creating a pull request in GitHub shows each field on the form.
A draft pull request signals work in progress, and you switch it to ready when it is reviewable.
Further commits to the same branch land in the pull request automatically and re-run the checks, per the GitHub Docs pull request quickstart. Reviewers comment, suggest changes or request changes, and the repository’s README often spells out its own review rules.
When the work is approved, select Merge pull request. If the change is abandoned, close the pull request instead.
How do forks, issues and code review work for collaboration?
Forks let you propose changes to a project you cannot write to, issues track the work, and pull request reviews decide what gets merged. Use a fork when you lack write access and a branch when you have it.
| Attribute | Fork | Branch |
|---|---|---|
| Lives in | Your account | The original repository |
| Write access needed | No | Yes |
| Changes return via | Pull request from the fork | Pull request from the branch |
| Typical use | Open source contributions | Team projects |
Review works the same on both routes. Maintainers read the diff, leave comments, and approve or request changes.
Read the project’s contribution guidance before you open anything.
Contributing to open source with a fork
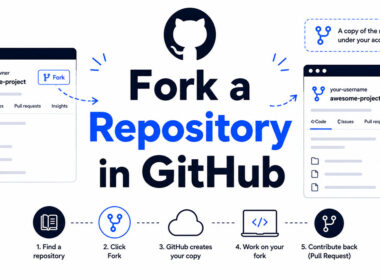
GitHub Docs defines a fork as a copy of a repository that you manage, so you can change a project without touching the original and send changes back through pull requests. A guide to forking a repository in GitHub covers the button and the clone that follows.
A fork goes stale as the original moves on. As of October 2026, GitHub Docs lists a few ways to sync it.
On the web, use the Sync fork dropdown above the file list. If upstream changes conflict, GitHub prompts you to open a pull request to resolve them. The GitHub CLI does it with gh repo sync plus your fork and branch name, though it cannot sync when there are conflicts.
With plain Git, add an upstream remote, fetch it, check out your default branch and merge upstream/main.
That command-line route updates only your local copy. Push afterwards, or the fork on GitHub stays behind.
Tracking work with issues and Projects
One issue holds one unit of work, whether that’s a bug report, a feature request or a plain task.
Labels sort issues by type, assignees name an owner, and milestones group them by release. Mention a teammate with @ to pull them into a thread or a review.
Projects turns issues and pull requests into a planning board grouped by status, and a guide on using GitHub Projects shows how to set one up.
Discussions is the place for open-ended questions that are not actionable work. If it has an owner and a finish line, it is an issue.
How do you automate tests and builds with GitHub Actions?
Add a YAML file under .github/workflows that names an event, a job and its steps, and GitHub runs it on a fresh virtual machine whenever that event fires. A test workflow usually triggers on push and pull request, checks out the code, sets up the language, and runs the test command.
That is a basic continuous integration setup. Every pull request gets built and tested before a reviewer opens it.
A workflow is a YAML file in .github/workflows, and a repository can hold several. Each one fires on an event, such as a push, a new pull request, a created issue, a schedule, a manual run or a REST API call.
Inside a workflow you define jobs. Jobs run in parallel unless you declare a dependency, and each job is a set of steps on one runner. A step is either a shell script or a reusable action such as actions/checkout, and the runner is a GitHub-hosted Ubuntu, Windows or macOS machine, or your own self-hosted one.
A matrix runs the same job across several operating systems or language versions. That is where the bill grows.
At overage rates, GitHub Docs prices a macOS minute at $0.062 against $0.006 for a two-core Linux minute, roughly ten times more (as of October 2026).
- Standard GitHub-hosted runners are free in public repositories, and self-hosted runners use no GitHub minutes
- Private repositories draw on the plan’s monthly quota, and the repository owner pays, not the person who triggered the run
- A failed run still consumes minutes, and a re-run consumes more
- With no payment method on file, usage stops once the quota runs out
Anyone with write access can run a repository’s workflows, so the owner of a private repository carries that cost.
YAML punishes bad indentation. One misaligned key and the workflow fails to load, so paste a stubborn file into a YAML validator before you push.
Unless the code targets another operating system, keep jobs on Linux.
How do you publish a static site with GitHub Pages?
Open the repository’s Settings, select Pages, choose a publishing source (a branch and folder, or GitHub Actions), and save. GitHub Pages serves static HTML, CSS and JavaScript straight from the repository and can run a build first, according to GitHub Docs.
- Confirm the branch you want to publish from exists and holds your site files at the root or in a /docs folder.
- Open the repository’s Settings tab.
- Select Pages in the Code and automation section of the sidebar.
- Under Build and deployment, set Source to Deploy from a branch.
- Pick the branch, then the folder: / (root) or /docs.
- Select Save and wait for the deployment to finish.
| Property | User or organization site | Project site |
|---|---|---|
| Repository | Named your-username.github.io | Any repository |
| Default address | your-username.github.io | your-username.github.io/repository-name |
| Limit | One per account | One per repository |
Publishing from a branch is the simplest route when you don’t need control over the build.
The GitHub Actions source makes more sense for builds other than Jekyll, or when you don’t want a dedicated branch holding compiled files. A walkthrough on deploying to GitHub Pages covers that path for framework builds.
Published sites cannot exceed 1 GB, and GitHub applies soft limits of 100 GB of bandwidth per month and 10 builds per hour (GitHub Docs). The build limit does not apply when a custom Actions workflow publishes the site.
Pages has some real limits, so read these before you commit to it.
- Online businesses, e-commerce and SaaS sites are not allowed, and pages should never handle passwords or card numbers
- On GitHub Free, Pages works for public repositories only
- Where a plan does allow Pages from a private repository, the published site is still public
- Commits pushed by a workflow using GITHUB\_TOKEN do not trigger a Pages build
- A repository with symbolic links needs the GitHub Actions source
- Delete the /docs folder you chose as the source and the build fails
How do you protect a repository with branch protection and security alerts?
Protect the default branch with a rule that requires an approved pull request and passing status checks, then turn on Dependabot alerts and secret scanning wherever your plan allows them. On GitHub Free, branch protection rules work only on public repositories (GitHub Docs).
A branch protection rule can require a set number of approving reviews, optionally from code owners, along with passing status checks and resolved review conversations. It can also demand signed commits, linear history or a merge queue.
By default, every rule blocks force pushes and deletion of the matching branches.
Administrators are exempt unless you tick the setting that applies the rule to them as well.
Only one branch protection rule applies to a branch at a time, which makes overlapping rules hard to reason about. Rulesets lift that restriction.
If you require specific status checks, keep job names unique across workflows. GitHub Docs warns that duplicate names produce ambiguous results and can block pull requests from merging.
Required approvals change what reviewers do on every pull request, and a guide to approving a pull request in GitHub shows the review box in detail.
Which security features you get depends on the plan, and on whether the repository is public.
| Feature | Public repositories | Private repositories |
|---|---|---|
| Dependabot alerts and updates | Free | Free |
| Branch protection rules | Free | Pro, Team or Enterprise |
| Secret scanning alerts | Free, on by default | Needs GitHub Secret Protection |
| Push protection | Free, on by default | Needs GitHub Secret Protection |
| Code scanning | Free, but you switch it on | Needs GitHub Code Security |
Dependabot alerts flag dependencies with known vulnerabilities, security updates open pull requests that fix them, and version updates keep everything current. All of it comes with every plan.
Push protection blocks a push that contains a detected credential, and bypassing the block generates an alert, as of October 2026 per GitHub Docs.
Better to keep keys out of the repository entirely, and a guide to hiding an API key in GitHub shows the usual patterns.
What do the GitHub Free, Team and Enterprise plans include?
GitHub Free covers individuals and open source projects, Team adds review and branch controls for private repositories, and Enterprise adds single sign-on, audit logging and compliance tooling. Solo developers who need protected branches in private repositories also have GitHub Pro, a personal-account plan (GitHub Docs).
| Plan | Best for | Notable additions |
|---|---|---|
| Free | Solo work, open source | Unlimited private repositories with a limited feature set |
| Team | Small teams on private code | Required reviewers, protected branches, code owners, email support |
| Enterprise | Large organizations | SAML single sign-on, audit log streaming, data residency, enterprise support |
The numbers below come from GitHub’s plans documentation and pricing page as of October 2026.
- Free costs $0 and includes 2,000 Actions minutes per month and 500 MB of Packages storage
- Team is $4 per user per month, with 3,000 minutes and 2 GB of storage
- Enterprise starts from $21 per user per month, with 50,000 minutes and 50 GB of storage
The pricing page attaches “for the first 12 months” and an asterisk to both paid prices, so read that footnote before budgeting. GitHub’s archived December 2020 plans page listed Team at the same $4 with no such qualifier.
The minute allowances match those archived 2020 pages, so they have held since at least then.
Stay on Free until a private repository needs required reviews or protected branches. That is the point where the paid plans start earning their per-seat price.
What goes wrong when you use GitHub, and how do you fix it?
Most GitHub failures come down to expired credentials, rejected pushes, merge conflicts, commits on the wrong branch, or leaked secrets. Each shows a recognizable message, and each has a documented fix.
| Symptom | Cause | Fix |
|---|---|---|
| Authentication failed on a push that worked last month | The personal access token expired | Create a new token, replace the saved credential |
| ! [rejected] main -> main (non-fast-forward) | Someone pushed to the branch first | Run git pull, resolve what it flags, push again |
| CONFLICT (content): Merge conflict in a file | Competing edits to the same line | Resolve, commit, push |
| GH006: Protected branch update failed | Direct push to a protected branch | Push a feature branch, open a pull request |
| A credential shows up in a commit | A key or token was staged by accident | Revoke it first, then clean up |
Rejected pushes and merge conflicts
GitHub Docs describes a non-fast-forward rejection as Git refusing to push because it would lose someone else’s commits. git pull fetches and merges in one step, which fixes it in most cases.
A merge conflict is a different problem. GitHub disables the Merge pull request button until every conflict is resolved. Simple line conflicts can be settled in the browser, as a guide to resolving conflicts in GitHub shows.
Complex ones need a local clone, and a walkthrough on resolving merge conflicts in Git covers that route.
Wrong branch and leaked secrets
Committed to main by mistake and not pushed? Create a branch at the current commit with git branch fix-name, then move main back with git reset –hard origin/main.
Reset discards uncommitted work, so stash anything you still need first.
If a credential leaks, treat the key as compromised and revoke it before anything else. Deleting the file in a new commit leaves the secret in history, so revoking is the only real fix.
GitHub FAQ
How does GitHub compare with GitLab and Bitbucket?
All three host Git repositories and add code review, issue tracking and CI. The vocabulary differs a little. GitHub and Bitbucket use pull requests, while GitLab calls them merge requests.
GitHub Docs includes a comparison page for GitLab, Bitbucket and Jenkins.
How do you undo a commit on GitHub?
Use git revert for any commit that is already pushed. It adds a new commit that cancels the old one, so shared history stays intact.
git reset rewrites history and suits only local commits nobody has pulled. For the full walkthrough, see this guide on reverting to a previous commit.
Can you delete a GitHub repository?
Yes, with admin permissions on the repository, through its Settings page. Deleting a private repository also deletes all of its forks, while forks of a public repository survive, so check who has forked it first.
A walkthrough on deleting a repository in GitHub covers the steps, and GitHub Docs lists a separate procedure for restoring deleted repositories, which works for some of them within 90 days.
How do you search for code, issues and repositories on GitHub?
Type a query into the search bar and narrow it with qualifiers. repo:owner/name limits results to one repository, is:issue or is:pr limits the type, and label:bug filters by label.
GitHub’s search documentation lists every modifier.
What is GitHub Copilot, and is it free?
GitHub Copilot is an AI coding assistant that suggests code inside the editor. It is sold as an add-on, though GitHub’s pricing page lists a free start with up to 2,000 completions per month (as of October 2026).
What to Set Up First on a Real Project
On a new project, do the work in a fixed order. Account security comes first, then a protected default branch, then one automated test workflow. Each step makes the next one enforceable.
- Two-factor authentication and an SSH key
- A GitHub Actions workflow that runs the tests
- Branch protection requiring that workflow and one review
The workflow comes before the protection rule so the rule has a test result to require.
Required reviews carry a trade-off. Every merge waits on another person, so a solo maintainer should require status checks only.
Plan limits and prices shift, and this sequence reflects GitHub’s documentation as verified in October 2026.
A Git cheat sheet keeps the daily commands within reach.

- How to Run a React App in VS Code Step by Step - October 23, 2026
- Transactional or marketing email: which messages your app should send itself - October 23, 2026
- How Software Teams Write SOPs for Releases and Deployments - October 22, 2026