One settings change turns your private project into something the entire developer community can see, clone, and build on.
Knowing how to make a repository public in GitHub is a basic skill, but the process has real consequences: commit history exposure, GitHub Actions billing changes, secret scanning activation, and fork behavior that doesn’t reverse cleanly.
This guide covers every method available, including the web UI, GitHub CLI, and REST API, plus what to audit before you change repository visibility and what actually happens the moment you do.
What Does It Mean to Make a GitHub Repository Public
Making a GitHub repository public means changing its visibility setting so that anyone on the internet can view, clone, and fork it, without needing an account or an invitation.
This is different from simply adding collaborators. Public visibility removes access restrictions entirely. The repository becomes discoverable through GitHub search, Google, and any tool that indexes public code.
Public repositories now make up 63% of all projects on GitHub, according to GitHub’s 2025 Octoverse report. That’s 395 million public repositories hosting over 1.12 billion contributions in a single year.
What a Public Repository Exposes
Everything in the repository becomes visible:
- All files, folders, and their full revision history
- Every commit, branch, and tag
- Issues, pull requests, and comments
- Wiki pages and GitHub Pages content
- GitHub Actions workflow logs and history
Repository traffic data (views, clones, referring sites) also becomes visible to the repository owner once the repo is public.
What Stays Private After Going Public
Key difference: not everything changes with visibility.
Dependabot alerts, secret scanning results, and security advisories remain private to repository owners and collaborators. Private forks created before the visibility change stay private. Collaborator access settings don’t reset.
Workflow file paths from reusable workflows shared across an organization do appear in public logs. That’s worth knowing before you flip the switch on a repository that uses internal shared workflows.
What Happens to a Repository When You Make It Public

The repository visibility change takes effect immediately. No propagation delay, no grace period.
According to GitHub’s Octoverse 2025 data, developers created 230+ new repositories every minute in 2025. A significant share of those are repositories that started private and moved public as projects matured.
GitHub Actions Billing Impact
GitHub Actions usage is free for standard GitHub-hosted runners in public repositories, with no minute limits (GitHub Docs). In 2025, developers used 11.5 billion Actions minutes in public projects for free, representing roughly $184 million in compute (GitHub, 2025).
Moving from private to public removes your Actions billing overhead entirely for standard runners. That’s a real cost benefit for active CI/CD pipelines.
Secret Scanning Activation
GitHub secret scanning runs automatically on all public repositories at no cost.
This matters more than most people realize. GitGuardian detected 23.8 million new hardcoded secrets on public GitHub repositories in 2024, a 25% increase year over year. GitHub’s own reporting puts total secrets leaked across the platform at 39 million in 2024.
When a repository goes public, GitHub scans the entire Git history across all branches for exposed API keys, tokens, and passwords. Partners like AWS and Google Cloud are notified automatically if their credentials appear.
Forks and Stars Behavior
Any forks created while the repository is public remain public even if you later switch back to private. Stars and watchers accumulate from the moment the repo becomes public.
One tricky part: if you revert to private, those stars and watchers don’t carry over. GitHub’s CLI documentation notes that making a repo public again after going private won’t restore previous star counts or watcher data, which affects repository ranking signals.

What Are the Requirements to Make a Repository Public on GitHub
Not every GitHub account can change repository visibility. 3 conditions must be met before the option becomes available.
| Requirement | Details | Where to Check |
|---|---|---|
| Repository ownership | You must be the repository owner or have admin-level permissions | Settings → Collaborators & teams |
| Organization policy | Organization administrators can restrict repository visibility changes | Organization settings → Member privileges |
| Enterprise policy | GitHub Enterprise administrators can disable public repositories or restrict visibility settings | Enterprise admin console |
Personal Account Permissions
On a personal account, only the account owner can change repository visibility. Collaborators with write access cannot, even if they have full push access to the codebase.
This is one of those things that trips people up. A contributor can push code, open pull requests, and merge branches. They can’t touch visibility settings.
Organization Account Restrictions
Organization owners can configure member privileges so that only owners can change repository visibility. This setting lives under the organization’s Member privileges page.
If you’re a member trying to make an org-owned repository public and the option is grayed out or missing, this is almost certainly why. You’ll need to ask an org owner, not just any admin.
GitHub Enterprise Considerations
GitHub Enterprise Cloud and Server add a third layer. Enterprise administrators can set policies that prevent public repositories entirely within the enterprise, or restrict visibility changes to specific roles.
Repositories in an enterprise with an “internal” visibility setting (visible to all enterprise members but not the public) are a separate visibility tier. Internal repos cannot be made public through the standard settings flow without an admin override.
How to Make a Repository Public on GitHub Using the Web Interface
The web interface is the most common method. The full process takes under 60 seconds once you’re in the right settings page.
Go to the repository. Click Settings in the top navigation bar (you need admin access for this tab to appear). Scroll to the bottom of the General settings page until you reach the Danger Zone section.
How to Make a Repository Public From a Personal Account
Click “Change visibility” inside the Danger Zone. A modal dialog appears with visibility options.
Select Public. GitHub shows a warning listing what becomes visible. Read it. Then click “I want to make this repository public” and type the full repository name to confirm. Click the green confirmation button.
The change is immediate. There’s no undo prompt. The repository is public the moment you confirm.
How to Make a Repository Public From an Organization Account
The steps are identical, but 2 additional things can block you:
- Member privilege restriction: the “Change visibility” button may not appear at all if the org restricts this to owners only
- Two-factor authentication requirement: some organizations require 2FA to be active before changing sensitive settings
If you’re an org owner making the change, the flow is the same as a personal account. The confirmation dialog may include additional warnings about GitHub Actions workflow exposure specific to organization repositories.
How to Make a Repository Public Using GitHub CLI
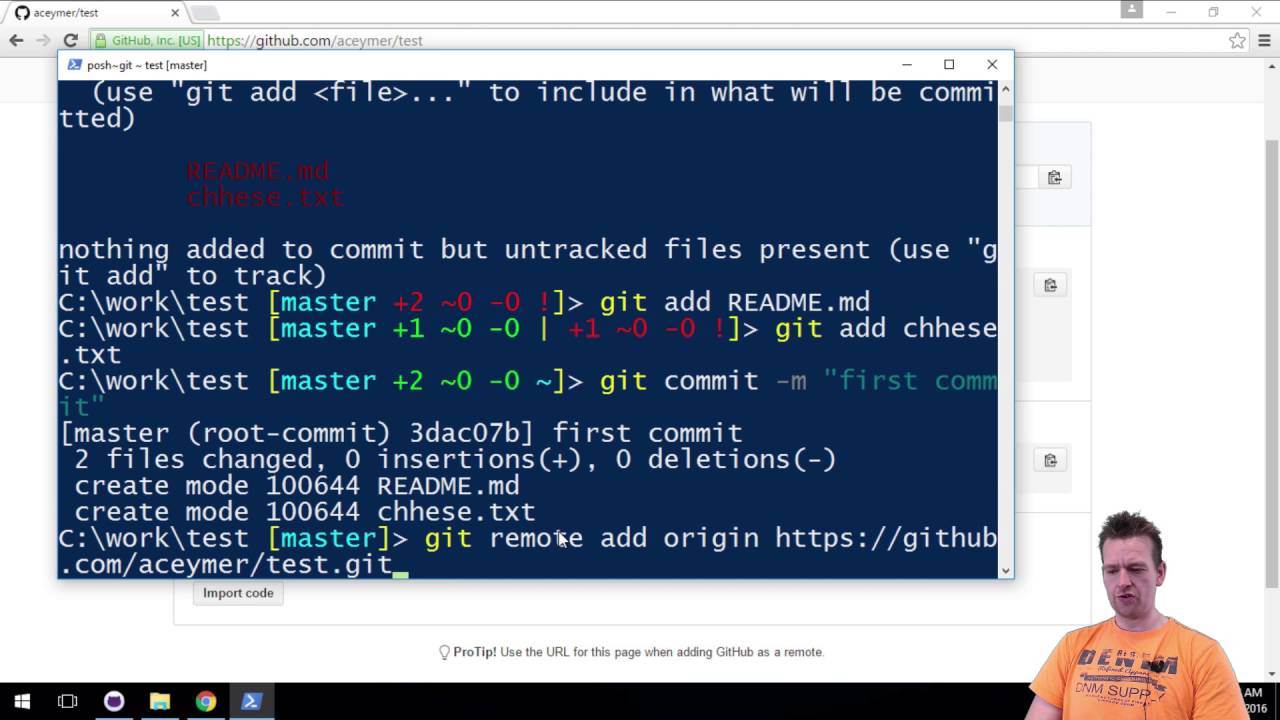
The GitHub CLI method is faster for developers who work in the terminal and need to change visibility without opening a browser. It’s also the right approach when scripting visibility changes across multiple repositories.
First, install the GitHub CLI and authenticate with gh auth login.
The Exact Command
Run this command to make a repository public:
gh repo edit OWNER/REPO --visibility public
Replace OWNER with your GitHub username or organization name and REPO with the repository name.
No confirmation prompt appears by default. The command executes immediately. Unlike the web UI, there’s no “type your repo name to confirm” step. That’s both faster and more dangerous if you run it on the wrong repo.
Verifying the Change via CLI
Confirm the visibility change with:
gh repo view OWNER/REPO --json visibility
The output returns {“visibility”:”public”} if the change applied correctly. You can also run gh repo view OWNER/REPO for a full summary that includes visibility status alongside the description, topics, and default branch.
How to Make a Repository Public Using the GitHub REST API
The REST API method is the right choice when managing repository visibility programmatically, inside scripts, CI/CD pipelines, or internal tooling.
The Endpoint and Request
Endpoint: PATCH /repos/{owner}/{repo}
Required body:
{ "private": false }
Example curl request:
curl -L -X PATCH -H "Accept: application/vnd.github+json" -H "Authorization: Bearer YOUR_TOKEN" https://api.github.com/repos/OWNER/REPO -d '{"private":false}'
Authentication Token Requirements
The personal access token (PAT) must include the repo scope for private-to-public changes on personal repositories.
For organization repositories, the token owner must have admin access to the repository. Fine-grained tokens require the “Administration” repository permission set to “Read and write.”
The API response returns the full updated repository object. Check the private field in the response. A value of false confirms the repository is now public. A 403 response means insufficient permissions or an org policy is blocking the change.
How to Make Multiple Repositories Public at Once
GitHub has no native bulk visibility control in the web UI. No checkbox, no batch action. Each repository requires a separate settings change if you use the browser.
The practical approach is scripting via GitHub CLI or the REST API.
Using GitHub CLI With a Shell Loop
List repositories first, then iterate:
List all private repos for your account
gh repo list OWNER –visibility private –json name –jq ‘.[].name’
Make all of them public (use with caution)
gh repo list OWNER –visibility private –json name –jq ‘.[].name’ | xargs -I {} gh repo edit OWNER/{} –visibility public
Run the list command first and review the output before piping it to the edit command. There’s no undo.
Using the REST API for Org-Wide Changes
For organizations, use the API to page through repositories and update them in a loop. The GET /orgs/{org}/repos endpoint accepts a type=private parameter, giving you a filtered list to work from.
GitHub rate limits API requests at 5,000 per hour for authenticated users. For large organizations with hundreds of repositories, build in a delay between requests to avoid hitting that ceiling.
Microsoft used a similar scripted approach when migrating dozens of internal projects to public open source repositories on GitHub, batching visibility changes through the API rather than updating each repository manually.
What to Check Before Making a Repository Public
Don’t flip the switch first and audit later. Once a repository is public, the commit history is visible immediately, and automated scanners harvest exposed secrets within minutes of exposure (GitGuardian, 2024).
Snyk’s 2025 analysis found 28.65 million hardcoded secrets added to public GitHub repositories in a single year. The pre-publish audit is the only reliable way to avoid being part of that number.
Scanning Commit History for Exposed Secrets
Deleting a file in a new commit does not remove it from Git history. Every prior commit remains accessible via git log, the GitHub API, and cached forks.
3 tools cover this well before going public:
- gitleaks: fast regex-based scanner, runs locally against full history
- truffleHog: entropy analysis plus pattern matching across all branches
- BFG Repo Cleaner: rewrites history to permanently remove matched files or strings
If a scan finds something, revoke the credential first, then rewrite history with git filter-repo or BFG. Removing it from the codebase without revoking it is not enough.
Reviewing the .gitignore File
Check before publishing, not after.
Common files that belong in .gitignore but frequently get missed:
- .env and .env. files
- Private key files (.pem, .key, .p12)
- Local config files with database connection strings
Adding something to .gitignore only stops future commits. If the file was already committed at any point, it’s in the history. Run a scan regardless.
Checking Issues, Pull Requests, and Dependencies
Issues and pull requests go public with the repository. Scan open and closed items for internal references: IP addresses, internal hostnames, environment names, or employee names that shouldn’t be public-facing.
Dependency files like package.json, requirements.txt, and Gemfile may reference internal package registries or private npm scopes. Those references become visible and can expose internal infrastructure details.
Uber’s 2016 breach started with AWS credentials committed to a public GitHub repository, exposing data belonging to 57 million users and drivers. Revoke first, then clean history.
How to Reverse a Public Repository Back to Private

The visibility change is reversible. The path back is identical to the path forward: Settings > Danger Zone > Change visibility.
But some consequences of going public don’t undo themselves when you switch back.
What Gets Permanently Affected
GitHub’s documentation is direct on this: stars and watchers are permanently erased when a repository switches from public to private.
If the repo goes public again later, those stars and watchers are gone. There’s no restore path. This affects repository ranking signals, which matters for discoverability in GitHub search.
Public forks created while the repository was public remain public after you revert. They become a separate, independent repository network, no longer connected to your (now private) upstream. You cannot force-delete forks you don’t own.
The Step-by-Step Revert Process
Same location, reversed action:
- Go to repository Settings
- Scroll to Danger Zone
- Click “Change visibility”
- Select “Private”
- Type the repository name to confirm
GitHub Pages sites hosted from the repository get automatically unpublished when the repo goes private. If you had a custom domain configured, remove or update the DNS records first to prevent a domain takeover.
Billing and Feature Changes After Reverting
GitHub Advanced Security features like code scanning stop working on private repositories unless the owning organization has GitHub Advanced Security enabled.
GitHub Actions billing resumes for private repositories once the visibility reverts. Standard runners go back to consuming your plan’s included minutes quota instead of running free.
The dependency graph and Dependabot alerts stay active in read-only mode even after switching to private. Those don’t go dark with the visibility change.
Why a Repository Visibility Change May Fail
The “Change visibility” option doesn’t always work. 4 distinct blockers can prevent the change from completing.
| Blocker | Symptom | Where to Fix |
|---|---|---|
| Insufficient permissions | Settings tab missing or visibility option is grayed out | Request admin access from repository owner |
| Organization member privilege restriction | Visibility change option is missing for non-owners | Organization Settings → Member privileges |
| Enterprise policy block | Change reverts automatically or visibility option is unavailable | GitHub Enterprise admin console → Policies |
| Internal visibility tier | Only private/internal visibility options are shown | Enterprise admin override required |
Permission and Organization Errors
If the Settings tab is missing entirely, you don’t have admin access to the repository. Collaborator-level access, even with full write permissions, does not include visibility controls.
Organization member privilege restrictions are the second most common blocker. If the “Change visibility” button appears but produces an error on submit, check the organization’s Member privileges page. The setting “Allow members to change repository visibility” may be disabled, restricting the action to organization owners only.
GitHub Enterprise and Policy Restrictions
GitHub Enterprise introduced repository management policies covering visibility restriction as a standalone control (GitHub Changelog, December 2024).
Enterprise admins can now apply a “Restrict visibility” policy that blocks public repository creation or visibility changes across the entire enterprise. If you’re inside a GitHub Enterprise account and public repositories have been disabled at the policy level, the only path forward is contacting your enterprise administrator.
GitHub Enterprise Cloud and Enterprise Server handle this slightly differently. On Enterprise Server, the site admin console has a separate repository visibility setting under “Repository creation” that controls which visibility types are allowed at all. On Enterprise Cloud, the Policies section in the enterprise settings panel covers this.
The internal visibility tier is specific to enterprise accounts. Internal repositories are visible to all enterprise members but not to the public. They cannot be made public through the standard UI without an enterprise-level policy change.
FAQ on How To Make A Repository Public in GitHub
Can anyone make a GitHub repository public?
Only the repository owner or a user with admin-level access can change repository visibility. Collaborators with write access cannot. Organization members may also be restricted by org-level member privilege settings.
Does making a repository public expose the full commit history?
Yes. Every commit, branch, and tag becomes visible immediately. Nothing in the Git history is hidden. If credentials were committed at any point, they are now public and should be considered compromised.
Will GitHub Actions still work after changing repository visibility to public?
Yes, and the billing changes too. GitHub Actions minutes are free for standard runners on public repositories. You stop consuming your plan’s included minute quota the moment the visibility change takes effect.
Can I reverse a public repository back to private?
Yes, through Settings > Danger Zone > Change visibility. But stars and watchers are permanently erased when you switch to private. Public forks created during that period remain public and become independent repositories.
What happens to forks when I make a repository public?
Existing private forks become disconnected from the repository and form their own independent networks. New forks created after the visibility change are public by default. Fork visibility cannot be changed by the upstream owner.
Do I need to scan for secrets before making a repository public?
Absolutely. Threat actors harvest exposed credentials within minutes of a repository going public. Use tools like gitleaks or truffleHog to scan the full git log before changing repository visibility.
How do I make a repository public using GitHub CLI?
Run gh repo edit OWNER/REPO –visibility public. No confirmation prompt appears, so double-check the repository name first. Verify the change with gh repo view OWNER/REPO –json visibility after running the command.
Can an organization block members from making repositories public?
Yes. Organization owners can restrict visibility changes to owners only via Member privileges settings. GitHub Enterprise adds another layer, where enterprise admins can apply a “Restrict visibility” policy across all organizations.
Does secret scanning run automatically on public repositories?
Yes. GitHub secret scanning activates automatically on all public repositories at no cost. It scans the entire commit history across all branches. Partner providers like AWS and Google Cloud are notified automatically when their credentials are detected.
Can I make multiple repositories public at once?
Not through the GitHub web UI. Use the GitHub CLI with a shell loop or the REST API PATCH /repos/{owner}/{repo} endpoint with “private”: false to batch visibility changes programmatically.
Conclusion
This conclusion is for an article presenting how to make a repository public in GitHub, a process that looks simple but carries real technical weight.
Whether you use the web UI, the GitHub Desktop settings, or the PATCH /repos REST API endpoint, the visibility change is immediate and affects billing, secret scanning, Actions minutes, and fork behavior all at once.
Audit your commit history before changing repository access control. Tools like gitleaks catch exposed credentials that live silently in old branches.
Public repositories make up 63% of all projects on GitHub. Joining that space responsibly means understanding what you’re opening up, not just how to open it.

- MongoDB Cheat Sheet - October 20, 2026
- Adding AI Video Generation to a Software Product: Architecture, Cost Guardrails and QA - October 20, 2026
- Show Hidden Characters, Spaces, and Line Endings in Notepad++ - October 19, 2026