Most developers still switch between the terminal and a browser dozens of times a day. That context switching adds up.
Learning how to install GitHub CLI puts pull requests, issues, and repository management directly inside your shell environment, next to the code you are already working with.
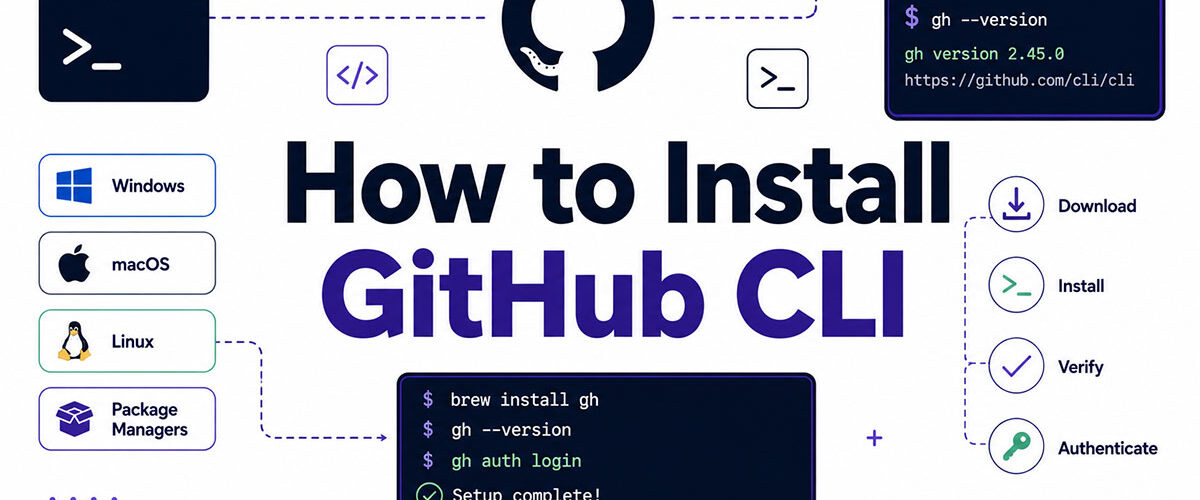
This guide covers the full installation process across Windows, macOS, Linux, and ChromeOS, using every supported package manager: winget, Homebrew, apt, dnf, Scoop, and more.
You will also find steps for verifying the install, running gh auth login, keeping gh updated, and removing it cleanly when needed.
What Is GitHub CLI
GitHub CLI (gh) is a command-line tool that brings GitHub’s core features directly into your terminal. It lets you manage pull requests, issues, repositories, and GitHub Actions workflows without leaving your shell environment.
The tool is distinct from Git itself. Git handles version control and local repository operations. gh is a separate layer on top of Git that handles GitHub-specific tasks like creating pull requests, managing issues, and authenticating with your GitHub account.
GitHub CLI is not a replacement for Git. Both need to be installed and running on your system. Removing one breaks the other’s usefulness entirely.
GitHub hosts over 180 million developers and 630 million repositories as of 2025 (CoinLaw). At that scale, switching between a browser and a terminal constantly adds friction. The gh tool solves that by keeping the entire GitHub workflow inside one environment.
The tool is 100% free and open-source. Source code lives at github.com/cli/cli. The current stable release is version 2.x, maintained actively by GitHub’s engineering team.
How GitHub CLI Differs from Git
Git: local version control, commits, branches, merging, pushing, pulling.
GitHub CLI (gh): GitHub-platform features, pull request creation, issue tracking, repo management, authentication, Actions triggering.
| Feature | Git | GitHub CLI (gh) |
|---|---|---|
| Commit and push code | Yes | No |
| Create pull requests | No | Yes |
| Manage GitHub issues | No | Yes |
| Authenticate with GitHub | Indirect (via credential helper) | Direct (gh auth login) |
| Trigger GitHub Actions | No |
Think of it this way: you use Git to work with code, and you use gh to work with GitHub. They solve different problems in the same developer environment.
What Are the System Requirements for GitHub CLI
GitHub CLI supports macOS, Windows, and Linux, as well as GitHub.com, GitHub Enterprise Cloud, and GitHub Enterprise Server 2.20 and above (GitHub CLI official docs). ChromeOS is also supported through its Linux development environment.
Before installing gh, confirm these prerequisites are in place. Missing any one of them causes the install or auth flow to fail.
Git must be installed separately. GitHub CLI does not bundle Git. If git --version returns an error, install Git first before proceeding with gh.
- Windows: Windows 10 version 1809 (build 17763) or later
- macOS: macOS 10.15 (Catalina) or later
- Linux: Debian, Ubuntu, Fedora, RHEL, openSUSE, Amazon Linux, CentOS
- ChromeOS: Linux development environment (Crostini) enabled
No minimum RAM or CPU beyond OS requirements. Network access is needed for the auth flow and any post-install repo operations.
There are no conflicting dependencies with standard developer toolchains. If you already have a web development IDE and terminal configured, gh installs without issues.
How to Install GitHub CLI on Windows
Windows supports 3 installation methods for gh. All 3 set the PATH automatically. No manual environment variable configuration is required after the install finishes.
93.87% of developers worldwide use Git as their primary source control system as of 2025 (CommandLinux). Most of them work across Windows and Linux environments, which is exactly where these 3 methods cover the most ground.
Installing GitHub CLI with winget
Winget is the recommended method for Windows 10 22H2 and Windows 11 users. It ships as part of the App Installer, so no separate download is needed on modern systems.

Open PowerShell or Command Prompt and run:
winget install --id GitHub.cli --source winget
Winget pulls the latest stable .msi from GitHub releases and adds gh.exe to your PATH automatically. No admin elevation is required.
Installing GitHub CLI with Scoop
Best for: developers who prefer a clean install with no system-level changes.
Scoop installs everything under %USERPROFILE%scoopapps, which keeps your system PATH untouched. Useful if you manage multiple tool versions or share a machine.
Install Scoop first if you don’t have it:
Set-ExecutionPolicy RemoteSigned -Scope CurrentUser -Force iwr -useb get.scoop.sh | iex
Then install gh:
scoop install gh
Installing GitHub CLI via MSI Installer
No package manager required. Download the latest .msi file from cli.github.com, run it, and follow the installer prompts.
The MSI sets PATH automatically during installation. This method works for any Windows 10+ machine, including air-gapped environments where winget or Scoop are not available.
Updating via MSI means downloading and running the new installer manually each time. If you want automatic updates, winget is the better choice.
How to Install GitHub CLI on macOS

macOS supports 2 primary installation methods: Homebrew and MacPorts. Both handle dependencies automatically and work on both Apple Silicon (M1/M2/M3) and Intel Macs. No architecture flags or separate downloads are needed.
Installing GitHub CLI with Homebrew
Homebrew is the most common method used by macOS developers. If you already have Homebrew set up for other tools, this is one command:
brew install gh
Homebrew places gh in /opt/homebrew/bin on Apple Silicon or /usr/local/bin on Intel. Both are already in your shell PATH. The install also handles shell completions automatically.
To update later: brew upgrade gh.
Installing GitHub CLI with MacPorts
MacPorts users: swap Homebrew for the MacPorts equivalent. The result is the same binary, different package ecosystem.
sudo port install gh
MacPorts requires sudo because it installs to /opt/local/bin. Both Homebrew and MacPorts manage all dependencies internally, so there is nothing else to configure post-install.
How to Install GitHub CLI on Linux

Linux installation depends on your distribution’s package manager. GitHub maintains official packages at packages.github.com, and the install process involves adding that repository before running the package manager command.
Stack Overflow’s 2024 Developer Survey (65,437 responses) shows 27.7% of developers use Ubuntu for both personal and professional work. That makes the Debian/Ubuntu apt method the most commonly used Linux install path by a large margin.
Installing on Debian and Ubuntu
Add the GitHub CLI apt repository and install:
sudo apt update sudo apt install gh
If the package is not found, you may need to add the official apt repository first. The full setup instructions, including the GPG key step, are at cli.github.com/manual/installation.
Installing on Fedora and RHEL
Package manager: dnf
Command: sudo dnf install gh
Applies to: Fedora, RHEL, Amazon Linux, CentOS Stream
As with Debian, GitHub maintains an official dnf repository. Add the repo first, then run the install command. The full repo setup instructions are in GitHub’s official Linux installation docs.
Installing on openSUSE
openSUSE uses zypper. The install process follows the same pattern as Debian and Fedora: add the GitHub CLI repository, then run the package install.
sudo zypper install gh
SUSE Enterprise Linux follows the same steps. Check the official GitHub CLI Linux docs for the current repository URL specific to your SUSE version.
Installing via Conda
Conda works across any Linux distribution and is especially useful on systems where you don’t have root access or need to isolate tools by environment.
conda install gh --channel conda-forge
The conda-forge channel is required. Installing without specifying it will fail because gh is not in the default Conda channel. This method also works on macOS and Windows if Conda is your primary package manager.
How to Install GitHub CLI on ChromeOS

ChromeOS does not support gh natively. Installation requires the Linux development environment (Crostini) to be active first. Most ChromeOS devices from 2020 onwards have this available built-in (GitHub Docs).
To enable the Linux environment: open Settings, go to Advanced, click Developers, then turn on the Linux development environment.
Once Linux is running, gh installs exactly like Debian/Ubuntu:
sudo apt update sudo apt install gh
The Linux environment on ChromeOS runs a Debian container. Everything from the Debian installation section applies here without changes.
Older ChromeOS devices that don’t support Crostini can use Termux from the Google Play Store as an alternative terminal. Inside Termux, use pkg install gh to install GitHub CLI directly.
How to Verify the GitHub CLI Installation

After install, run one command to confirm gh is working and on your PATH:
gh --version
A successful install prints the version string: gh version 2.x.x (YYYY-MM-DD).
If you see command not found, the binary is not on your PATH. This happens most often after manual installs or in shell environments that don’t reload automatically. Restart your terminal first. If the error persists, check that the directory containing gh is listed in your $PATH or %PATH%.
Run gh –help as a secondary check. It lists all available commands and confirms the shell can locate and execute the binary correctly.
| Check | Command | Expected Output |
|---|---|---|
| Version check | gh --version | gh version 2.x.x (date) |
| Help output | gh --help | List of available commands |
| Auth status (post-login) | gh auth status | Logged in to github.com as [username] |
If gh –version works but gh auth status returns an error, the binary is installed correctly. The next step is authentication, not reinstallation.
GitHub Actions runners have gh pre-installed and updated weekly. If you’re running commands inside a CI pipeline, skip the install step and go straight to gh auth status to confirm the token is set.
How to Authenticate GitHub CLI After Installation
Authentication is required before gh can interact with GitHub. The binary installs without credentials. Running any GitHub-specific command before authenticating returns an error.
Run the interactive auth flow:
gh auth login
gh supports 2 authentication methods: browser-based OAuth (default) and a personal access token. Both store credentials securely. The browser method is faster for most developers. The token method is better for headless environments and CI pipelines.
How Does Browser-Based OAuth Work
Select “GitHub.com” and “Login with a web browser” when prompted. gh opens github.com automatically and displays a one-time code.
- Enter the code in the browser when prompted
- Authorize the GitHub CLI OAuth app
- Return to the terminal
Token storage: gh writes credentials to the system keychain when one is available. On systems without a keychain, the token falls back to ~/.config/gh/hosts.yml in plain text (GitHub CLI docs).
Run gh auth status to confirm the active session. Output shows the logged-in account and the scopes attached to the token.
How Does Personal Access Token Authentication Work
PAT auth is the right choice for automation, GitHub Actions, and environments where a browser is not available.
Generate a token at github.com under Settings > Developer settings > Personal access tokens. The minimum required scopes are: repo, read:org, and gist (GitHub CLI manual).
Pass the token to gh:
gh auth login --with-token < mytoken.txt
For GitHub Actions specifically, set GH_TOKEN: ${{ github.token }} as an environment variable. That skips the interactive flow entirely.
GitHub has required token-based authentication for all Git operations since August 13, 2021. Password authentication no longer works (GitHub community docs). PATs and OAuth tokens are the 2 accepted methods.
How to Authenticate Against GitHub Enterprise Server
Enterprise authentication uses the same command, with one extra flag:
gh auth login --hostname enterprise.internal
Replace enterprise.internal with your GitHub Enterprise Server hostname. gh supports simultaneous authentication to multiple hosts. Token scopes may differ on Enterprise Server depending on the organization’s SSO settings.
GitHub CLI is supported on GitHub Enterprise Server 2.20 and above (GitHub CLI official docs).
How to Update GitHub CLI

The update command depends on the package manager used during installation. Using a different manager to update than the one used to install will cause conflicts or install a duplicate binary.
Developers spend only 32% of their time actually writing code, with the rest going to meetings, debugging, and administrative tasks, according to research cited by 42Works. Keeping tools like gh current is part of reducing that overhead, since outdated versions miss performance fixes and new command support.
| Install Method | Update Command |
|---|---|
winget | winget upgrade --id GitHub.cli |
Scoop | scoop update gh |
Homebrew | brew upgrade gh |
apt (Debian/Ubuntu) | sudo apt update && sudo apt upgrade gh |
dnf (Fedora/RHEL) | sudo dnf upgrade gh |
| MSI installer | Download and run the latest .msi installer from cli.github.com |
Confirm the updated version with gh –version after any upgrade.
MSI users only: there is no automatic update path. You have to download the new installer manually each time a release comes out. If that friction is annoying, switch to winget.
GitHub Actions runners update gh weekly automatically. No manual update step is needed inside CI pipelines unless a specific version is required.
How to Uninstall GitHub CLI

Uninstalling gh through the same package manager used for installation removes the binary and cleans PATH entries automatically.
Config files are not removed automatically by any uninstall method. The directory ~/.config/gh/ on macOS and Linux, or %APPDATA%GitHub CLI on Windows, stays behind. Delete it manually if you want a full removal.
Uninstall Commands by Platform
One command per platform. No confirmation prompts on most systems.
- winget: winget uninstall –id GitHub.cli
- Scoop: scoop uninstall gh
- Homebrew: brew uninstall gh
- apt: sudo apt remove gh
- dnf: sudo dnf remove gh
- MSI installer: uninstall via Windows Settings > Apps
- Conda: conda remove gh
How to Remove Leftover Config Files
After uninstalling the binary, the auth token and host config remain on disk.
macOS and Linux:
rm -rf ~/.config/gh/
Windows (PowerShell):
Remove-Item -Recurse -Force "$env:APPDATAGitHub CLI"
This removes the stored OAuth token, the hosts.yml file, and any shell completion scripts added during setup. If you reinstall gh later, running gh auth login creates a fresh config from scratch.
Worth knowing: the git cheat sheet covers the most common Git commands used alongside gh in daily git workflow tasks, which is where gh adds the most value post-install.
FAQ on How to Install GitHub CLI
Does GitHub CLI come with Git?
No. GitHub CLI and Git are separate tools. Git must already be installed on your system before gh works. Run git –version to confirm. If the command fails, install Git first before proceeding.
What is the fastest way to install GitHub CLI on Windows?
Run winget install –id GitHub.cli in PowerShell. Winget handles the download, install, and PATH setup automatically. No admin rights needed. Works on Windows 10 version 1809 and later.
How do I install GitHub CLI on macOS?
Use Homebrew: brew install gh. It works on both Apple Silicon and Intel Macs without any extra flags. MacPorts users run sudo port install gh instead. Both methods handle dependencies automatically.
How do I install GitHub CLI on Ubuntu?
Add the official GitHub CLI apt repository, then run sudo apt install gh. The full repository setup steps, including the GPG key, are at cli.github.com/manual/installation. Works on all supported Ubuntu releases.
Can I install GitHub CLI on ChromeOS?
Yes, but only through the Linux development environment (Crostini). Enable it in Settings > Developers, then follow the Debian/Ubuntu apt install steps exactly. Older devices without Crostini can use Termux from the Play Store.
How do I verify the GitHub CLI installation worked?
Run gh –version. A successful install prints gh version 2.x.x with a date. If you see command not found, the binary is not on your PATH. Restart your terminal and try again.
Do I need to authenticate after installing GitHub CLI?
Yes. Run gh auth login right after install. Without authentication, gh cannot access any GitHub resources. The browser-based OAuth flow is the quickest option. Use a personal access token for headless or CI environments.
How do I update GitHub CLI?
Use the same package manager you installed with. brew upgrade gh for Homebrew, winget upgrade –id GitHub.cli for winget, sudo apt upgrade gh for apt. MSI users must download and run the new installer manually.
How do I uninstall GitHub CLI?
Run the removal command for your package manager: brew uninstall gh, winget uninstall –id GitHub.cli, or sudo apt remove gh. Config files at ~/.config/gh/ remain on disk. Delete that directory manually for a full removal.
Can GitHub CLI be used with GitHub Enterprise Server?
Yes. GitHub CLI supports GitHub Enterprise Server 2.20 and above. Authenticate with gh auth login –hostname your-enterprise-hostname. You can stay logged into github.com and an Enterprise Server instance at the same time.
Conclusion
This conclusion is for an article presenting the full gh installation process across every major platform and package manager.
Whether you used winget, Homebrew, apt, or dnf, the steps are the same from here: verify with gh –version, authenticate with gh auth login, and keep the binary current through your package manager.
The config file at ~/.config/gh/hosts.yml stores your token and host settings. Know where it lives.
From pull request creation to source control management straight from the terminal, gh removes the friction between your git repository and GitHub’s platform.
The setup takes under five minutes. The time it saves compounds daily.

- How Software Teams Write SOPs for Releases and Deployments - October 22, 2026
- Notepad++ Android Options: Apps That Come Close - October 21, 2026
- Data Management Services: A Practical Guide for Growing Companies - October 21, 2026