Every project starts somewhere. For most developers today, it starts with a GitHub repository.
GitHub hosts over 630 million repositories and 180 million developers worldwide. Knowing how to create a repository in GitHub is one of the first practical skills that separates developers who ship from developers who just write code locally.
This guide covers everything from setting up your first repo using the web interface, to creating one via the GitHub CLI or the command line. You will also learn how to configure a README, set up a .gitignore file, manage collaborator access, and understand the difference between forking and creating a new repository.
No prior Git experience required. Just a GitHub account and a project worth building.
What Is a GitHub Repository?
A GitHub repository is a storage space where a project’s files, folders, commit history, and branches all live together in one place. It tracks every change made to every file over time using Git, the underlying version control system that powers the platform.
Think of it as the single source of truth for your codebase. Every file addition, edit, or deletion gets recorded with a commit, a timestamp, and an author.
GitHub now hosts over 630 million repositories, with 121 million new projects added in 2025 alone (GitHub Octoverse, 2025). That number reflects how central repository-based workflows have become across every type of software development.
What Does a GitHub Repository Contain?
Core components inside every repository:
- Branches: Parallel lines of development, with
mainas the default in most new repos - Commits: Snapshots of the project at a specific point, each with a unique SHA hash
- README.md: The first file visitors see, rendered automatically on the repo homepage
- .gitignore: Tells Git which files to exclude from version tracking
- License file: Defines the legal terms under which others can use or distribute the code
Not all of these are required. A repository can technically exist with zero files. But repos without a README and a license tend to confuse contributors fast.
Public Repository vs. Private Repository
Visibility is set at creation and can be changed later. The choice affects who can see, clone, and fork the project.
| Setting | Who Can See It | Who Can Contribute | Best For |
|---|---|---|---|
| Public | Anyone on the internet | Anyone via fork + pull request | GitHub open-source projects, portfolios |
| Private | You + invited collaborators | Only added collaborators | Client work, internal tools, early-stage builds |
GitHub data shows 81.5% of all contributions in 2025 happened in private repositories (GitHub Octoverse, 2025). Most professional work stays private by default.
What Are the Requirements to Create a GitHub Repository?

You need 3 things before creating a repository: a verified GitHub account, a chosen repository name, and a decision on visibility. That’s it for the minimum setup.
A few extra decisions come up during creation that are worth thinking through beforehand, not after.
GitHub Account and Plan Requirements
GitHub Free supports unlimited public and private repositories. GitHub Pro, Team, and Enterprise add features like advanced code review tools, required reviewers, and protected branch rules.
92% of Fortune 100 companies use GitHub Enterprise in their development workflows (GitHub, 2025). For individuals and small teams, Free is usually enough to start.
The account must have a verified email address before you can create a repository or push commits.
Repository Naming Rules
GitHub enforces specific naming constraints. Get these wrong and the form will reject the name outright.
- No spaces (use hyphens or underscores instead)
- No special characters except
-,_, and. - Maximum 100 characters
- Names are case-insensitive on GitHub’s end
The repository URL will always follow the pattern: github.com/username/repository-name. Whatever name you pick becomes part of every link shared from that repo.
Decisions to Make Before Clicking Create
Visibility: Public or private. Hard to undo carelessly if sensitive files are involved.
Initialize with README: Adds a README.md file immediately, which makes the repo non-empty and ready to clone. Starting empty requires pushing at least one commit before cloning works correctly.
.gitignore template: GitHub offers language-specific templates (Node, Python, Java, etc.). Skipping this means build artifacts, .env files, and IDE configs will show up in every commit unless you add the file manually later.
License: MIT, Apache 2.0, and GPL are the most common choices for open-source work. No license means no one can legally use or distribute the code without permission.
How to Create a Repository in GitHub Using the Web Interface

The web interface is the most common starting point. No terminal, no tooling, no setup required beyond a browser and a GitHub account.
The full process takes under 2 minutes.
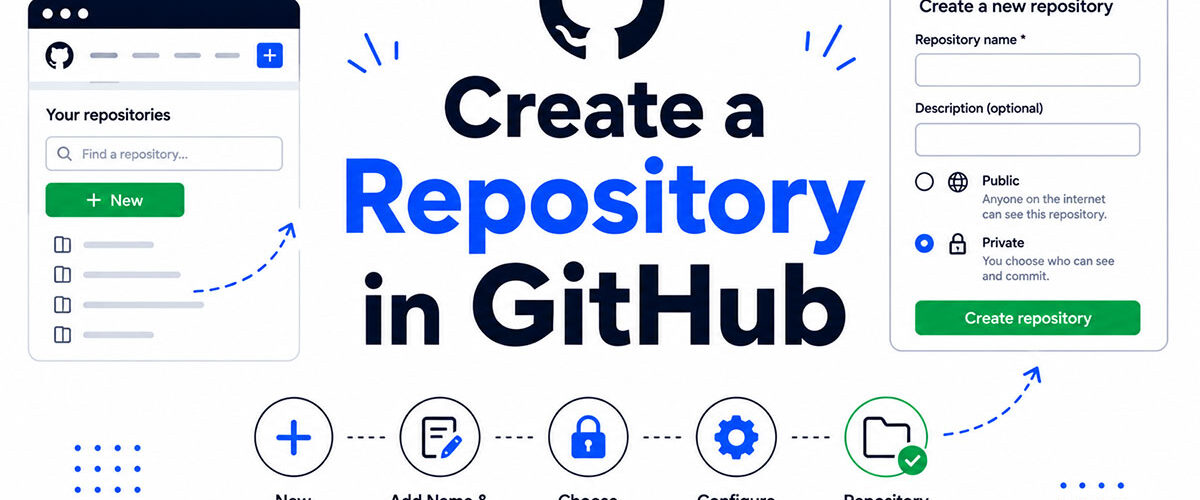
Step-by-Step: New Repository From the Browser
- Log in to github.com
- Click the “+” icon in the top-right corner
- Select “New repository” from the dropdown
- Enter a repository name (follow the naming rules above)
- Add an optional description (this appears under the repo name on the homepage)
- Choose Public or Private visibility
- Check the boxes for README, .gitignore, and/or license if needed
- Click “Create repository”
GitHub redirects immediately to the new repository page. The URL is live and shareable as soon as creation completes.
Initializing With a README vs. Starting Empty
Initialize with README is the right call for most people. It creates a non-empty repository that can be cloned immediately using git clone [URL].
Starting empty means the repository has no files and no default branch. GitHub displays a setup guide with push instructions, but the repo cannot be cloned until at least one commit exists.
Microsoft’s open-source repositories, including VS Code and PowerToys, all initialize with README files, license files, and contributing guidelines from day one. That pattern reflects standard practice for any repo that expects contributors.
Choosing Between Public and Private Visibility
Public repositories are indexed by search engines and visible to anyone. Forks can be created by anyone without permission.
Private repositories require an explicit collaborator invitation for access. Only invited users can view files, clone the repo, or submit pull requests directly.
Visibility can be changed later under Settings > General > Danger Zone. Switching from private to public exposes the entire commit history, including any accidentally committed secrets before a .gitignore was in place.
How to Create a GitHub Repository Using GitHub CLI
The GitHub CLI (called gh) lets you create repositories without opening a browser. It is useful for developers who spend most of their time in the terminal and want to stay there during setup.
Developers using CLI tools save an average of 45.5% of time previously spent navigating web interfaces (GitHub Engineering Blog, 2025).
Installing and Authenticating GitHub CLI
Install on macOS: brew install gh
Install on Windows: winget install --id GitHub.cli
Install on Linux (Debian/Ubuntu): sudo apt install gh
After installation, run gh auth login and follow the prompts. You can authenticate via browser (recommended) or by pasting a personal access token. Without this step, all gh repo commands will fail with an authentication error.
Full installation instructions are covered in the GitHub CLI usage guide.
Creating a Repository With gh Commands
The core command is straightforward:
gh repo create my-project --publicOr for a private repository:
gh repo create my-project --privateUseful flags to combine:
--add-readme: Adds a README.md on creation--gitignore Node: Applies the Node .gitignore template--license mit: Adds an MIT license file--clone: Clones the new repository to your current directory immediately after creation
The output confirms the repository URL and, if --clone was used, the local path where the folder was created.
How to Create a GitHub Repository From Git on the Command Line

This method is for situations where the project already exists locally. You have code on your machine, and you want to push it to a new GitHub repository without starting from scratch on the web.
The process involves 2 steps: create the remote repository on GitHub first, then connect the local folder to it.
Initializing a Local Project With Git
Open a terminal inside the project folder and run:
git initThis creates a hidden .git directory that starts tracking changes. The folder is now a local Git repository, but it has no connection to GitHub yet.
Stage all existing files and make the first commit:
git add .
git commit -m "Initial commit"
Understanding what git init does under the hood matters here. It does not create a branch until the first commit is made, which is why the git add and git commit steps come before connecting to the remote.
Connecting the Local Repository to GitHub
Create an empty repository on GitHub first (no README, no .gitignore, no license). Then link it:
git remote add origin https://github.com/username/repository-name.gitPush the local commits to GitHub:
git push -u origin mainThe -u flag sets the upstream tracking reference. After this, plain git push and git pull will work without specifying the remote and branch each time.
Common issue: If the default branch is master instead of main, the push command needs to match. Run git branch to check the current branch name before pushing.
HTTPS vs. SSH for Remote URLs
| Method | Authentication | Setup Time | Best For |
|---|---|---|---|
| HTTPS | Username + personal access token | Fast, no extra setup | Quick access, occasional contributors |
| SSH | SSH key pair stored on your machine | 10–15 min one-time setup | Daily pushes, passwordless workflow |
Most active developers switch to SSH after the first week. The one-time key setup pays off quickly. See the full guide on how to add an SSH key to GitHub for the exact steps.
How to Clone a Repository After Creating It

Cloning downloads a full copy of the remote repository to your local machine. It copies all files, branches, commit history, and the remote origin link.
Run the following command with either the HTTPS or SSH URL from the repository page:
git clone https://github.com/username/repository-name.gitOr with SSH:
git clone git@github.com:username/repository-name.gitGit creates a new folder with the repository name in the current directory. That folder is already connected to the remote origin, so git push and git pull work immediately without any further configuration.
Full details are in the guide on how to clone a GitHub repository, including how to clone into a custom folder name.
Where to Find the Clone URL
On any repository page, click the green “Code” button. GitHub shows 3 options: HTTPS, SSH, and GitHub CLI. Each gives a one-line command ready to paste into a terminal.
HTTPS URLs look like: https://github.com/username/repo.git
SSH URLs look like: git@github.com:username/repo.git
GitHub CLI clone syntax: gh repo clone username/repo
Cloning vs. Forking: Key Difference
Cloning creates a local copy. Forking creates a copy under your own GitHub account with a link back to the original.
Clone when: you own the repo or are an added collaborator.
Fork when: you want to contribute to someone else’s project. About 55% of open-source projects require contributors to fork before submitting a pull request (Hutte, 2024).
What Is a README File and How to Add It to a GitHub Repository?
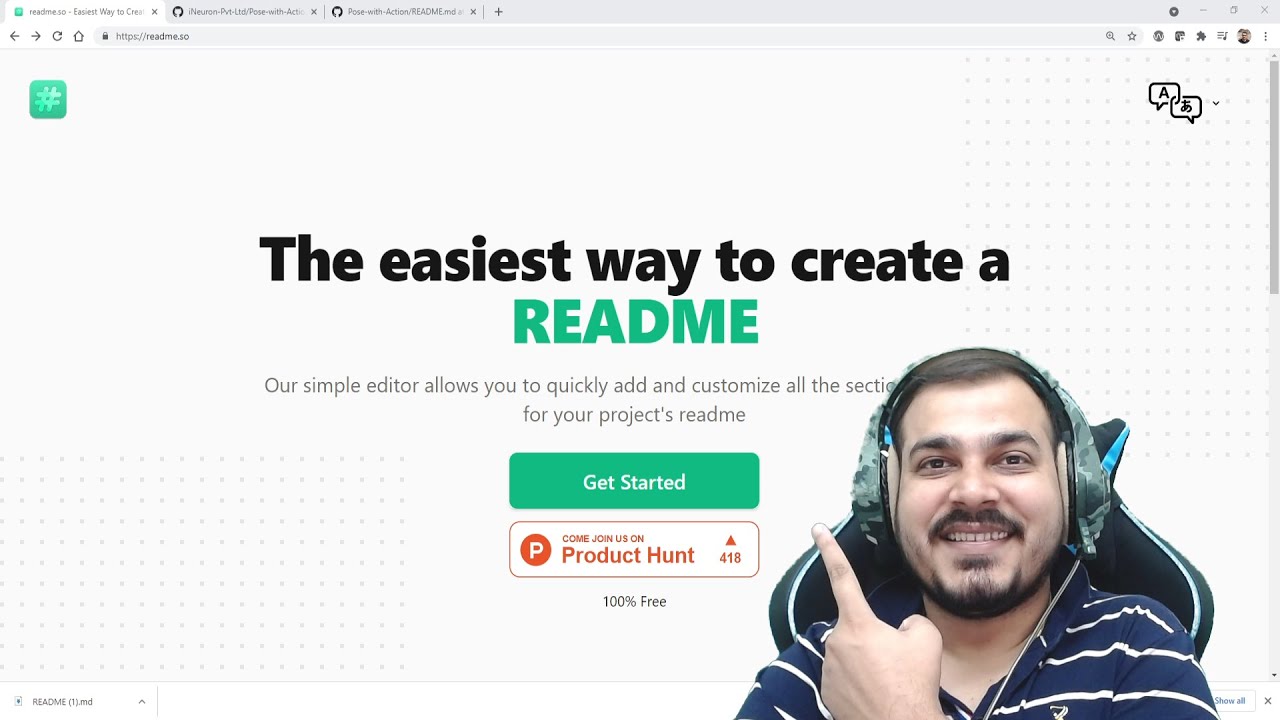
A README.md file is the first thing anyone sees when they visit a repository. GitHub renders it automatically on the repo homepage directly below the file list.
GitHub’s own documentation recommends adding a README to every repository, calling it the primary way to communicate what a project does and how to use it.
What to Include in a README
Minimum viable README sections:
- Project title and one-line description
- Installation steps
- Basic usage example
- License type
Larger projects add contribution guidelines, a changelog, badges (build status, coverage, version), and links to full documentation. The freeCodeCamp repository README is a good reference for a well-structured open-source project README.
Adding a README to an Existing Repository
If the README was not added at creation, adding it takes one step. Create a file named README.md in the root directory of the repository, write content in Markdown, then commit and push.
echo "# My Project" >> README.md
git add README.md
git commit -m "Add README"
git push
GitHub detects the file on the next page load and renders it immediately. No additional configuration is needed.
What Is a .gitignore File and Which Template to Use?
A .gitignore file tells Git which files and folders to skip when tracking changes. Without one, every git add . command risks staging build artifacts, IDE configs, and sensitive credentials alongside your actual source code.
GitHub’s secret scanning tool detected leaked credentials in 4 million repositories in 2025, up from 3.5 million the previous year (GitHub Security, 2025). Most of those exposures started as accidental commits that a proper .gitignore would have blocked.
What the .gitignore File Actually Does
Files already committed are not retroactively ignored.
Adding a pattern to .gitignore after a file has been committed does nothing. Git continues tracking that file. To stop tracking it, you need to run git rm --cached filename and then commit the removal separately.
The .gitignore file lives in the root directory of the repository. It is committed and versioned like any other file, which means all collaborators share the same ignore rules automatically on the next pull.
Choosing the Right .gitignore Template
GitHub’s official gitignore repository contains language-specific templates for over 100 languages, frameworks, and tools. The template chooser in the repository creation form pulls directly from this collection.
Common templates and what they cover:
- Node: ignores
node_modules/,dist/,npm-debug.log - Python: ignores
__pycache__/,*.pyc,.venv/,.env - Java: ignores
.class,target/,.idea/
Pick the template that matches your primary language at creation time, then add project-specific entries manually afterward.
Files That Should Always Be in .gitignore
4 categories of files belong in every .gitignore regardless of language:
- Environment files (
.env,config.json,credentials.txt) - Dependency folders (
node_modules/,.venv/,vendor/) - Build artifacts (
dist/,build/,*.o,*.class) - OS-generated files (
.DS_Store,Thumbs.db)
Note: .gitignore is not a security tool on its own. A collaborator can delete or edit the file. Sensitive data should live in a secrets manager or environment variable system, not just be excluded via .gitignore.
How to Add Collaborators to a GitHub Repository

Adding a collaborator gives another GitHub user direct access to push to your repository. For private repositories on personal accounts, every collaborator must be explicitly invited.
GitHub released repository collaborator support for Enterprise Managed Users in May 2024, allowing enterprise developers to be added directly to a repository without becoming a full organization member (GitHub Changelog, 2024).
How to Invite a Collaborator
The path is: repository Settings > Collaborators > Add people.
Type the GitHub username or email address in the search field. Select the user from the results and click the invite button. GitHub sends an email invitation. The invited user must accept before gaining any access.
GitHub caps collaborator invitations at a set number per 24-hour period. If you need to add a large team at once, creating a GitHub Organization removes that limitation and adds team-level permission management.
Permission Levels: Personal vs. Organization Repositories
| Context | Available Roles | Notes |
|---|---|---|
| Personal repository | Write only | No read-only or admin roles for collaborators |
| GitHub Organization repository | Read, Triage, Write, Maintain, Admin | Full role spectrum available |
Personal account repositories offer only 2 permission levels: you (owner) and collaborators (write access). Organization repositories support 5 roles, from Read (view only) up to Admin (full control including deletion), per GitHub’s official documentation.
Removing a Collaborator
Go to Settings > Collaborators, find the user, and click Remove. Access is revoked immediately.
For private repositories, forked repos created by the removed collaborator are also deleted automatically. Local clones they made are not deleted and remain on their machine. Keep this in mind before removing someone from a project with sensitive code.
What Is the Difference Between Forking and Creating a New Repository?
Forking copies someone else’s repository into your own GitHub account with a link back to the original. Creating a new repository starts fresh with no upstream connection and zero commit history.
In 2024, GitHub recorded an all-time high of 1.4 million new developers contributing to open-source projects for the first time (GitHub Octoverse, 2024). The majority of those contributions started with a fork.
When to Fork
Fork when you want to contribute changes back to a project you do not own.
The fork preserves a permanent link to the original repository. After making changes in your fork, you submit a pull request to propose merging those changes into the source project. The original repo maintainer reviews and accepts or rejects the changes.
About 55% of open-source projects require contributors to fork before submitting pull requests, not push directly to a shared branch (Hutte, 2024).
When to Create a New Repository
New repository. No upstream. No shared history. Your project from day one.
Create a new repository when building an original project, starting a client build, or setting up internal tooling that has no parent codebase on GitHub. The commit history belongs entirely to you, and there is no “upstream” to sync changes from or contribute back to.
Key Differences Side by Side
| Attribute | Fork | New Repository |
|---|---|---|
| Commit history | Inherits full history from original repository | Starts with a clean slate |
| Upstream link | Linked to source repository on GitHub | No upstream relationship |
| Pull requests | Can submit pull requests back to original repository | No automatic upstream target |
| Deletion of original | Fork relationship may be affected depending on repository state | Fully independent repository |
One thing that trips people up: forked repositories do not automatically stay in sync with the original. GitHub added a “Sync fork” button to handle this, but it requires a manual action. The flutter/flutter repository is one of the most actively forked on GitHub, and keeping forks up to date with its frequent commits requires regular sync actions.
How to Delete or Rename a GitHub Repository

Both actions live under Settings > General in the repository. Both have consequences that are worth understanding before clicking confirm.
How to Rename a Repository
Path: Settings > General > Repository Name > type new name > Rename.
GitHub auto-creates redirects for all existing URLs immediately after renaming. Git clone, fetch, and push operations using the old URL continue to work and get silently forwarded to the new location (GitHub Docs, 2024).
3 things that do NOT redirect automatically after a rename:
- GitHub Actions workflows that reference the old repository name as a hardcoded path
- Local clones (update with
git remote set-url origin [new URL]) - GitHub Pages project site URLs
If a new repository is later created under the old name, the redirects stop working permanently. That is a real problem for any repo with external links or package references pointing to the original URL.
How to Delete a Repository
Deletion is permanent. No undo.
Path: Settings > Danger Zone > Delete this repository. GitHub requires you to type the full repository name to confirm. The deletion removes all files, commit history, issues, pull requests, and release artifacts in one action.
What is NOT deleted: forks created by other users before deletion. Forks become independent repositories and lose their upstream link, but they survive. Local clones on any machine also remain untouched.
The guide on how to delete a repository in GitHub covers recovery options and pre-deletion checklist steps worth going through before confirming.
Rename vs. Delete: Decision Reference
Rename when: the project scope or ownership has changed but the codebase, issues, and history are still needed.
Delete when: the project is fully abandoned, all forks are accounted for, and no external systems depend on the repository URL. Archiving the repository first is a safer middle ground. It makes the repo read-only while keeping the URL and all history intact.
FAQ on How To Create A Repository In Github
Do I need a paid GitHub account to create a repository?
No. GitHub Free supports unlimited public and private repositories. Paid plans like GitHub Pro and GitHub Team add features like advanced code review tools and protected branch rules, but basic repository creation costs nothing.
What is the difference between a public and private repository?
A public repository is visible to anyone on the internet. A private repository restricts access to you and invited collaborators only. Visibility can be changed later in repository Settings, but switching from private to public exposes your full commit history.
Should I initialize my repository with a README?
Yes, in most cases. Initializing with a README creates a non-empty repository that can be cloned immediately. Starting empty requires pushing at least one local commit before git clone works correctly.
What is a .gitignore file and do I need one?
A .gitignore file tells Git which files to exclude from version tracking. You almost always need one. Without it, build artifacts, dependency folders like node_modules/, and sensitive .env files will end up committed to your repository.
How do I create a repository using the command line?
Run git init inside your local project folder, create an empty remote repository on GitHub, then connect them using git remote add origin [URL]. Push your first commit with git push -u origin main.
What is the GitHub CLI and how does it help?
The GitHub CLI (called gh) lets you create repositories directly from your terminal without opening a browser. The command gh repo create my-project --public --clone creates the repository and clones it locally in one step.
Can I change my repository name after creating it?
Yes. Go to Settings > General > Repository Name and type the new name. GitHub auto-redirects old URLs, but local clones need to be updated manually using git remote set-url origin [new URL].
What is the difference between forking and creating a new repository?
Forking copies an existing repository into your account with a link back to the original, preserving commit history. Creating a new repository starts completely fresh with zero history and no upstream connection. Use forks for open-source contributions.
How do I add collaborators to my repository?
Go to Settings > Collaborators > Add people. Search by GitHub username or email, select the user, and send the invitation. The collaborator must accept before gaining access. Private repositories on personal accounts grant write access only.
What happens when I delete a GitHub repository?
Deletion is permanent and removes all files, commit history, issues, and pull requests. Forks created by other users before deletion survive as independent repositories. Local clones on any machine are also unaffected, but there is no way to recover a deleted repository.
Conclusion
This conclusion is for an article presenting the full process of creating a GitHub repository, from initial setup to managing collaborators and understanding your visibility settings.
Whether you used the web interface, the GitHub CLI, or pushed a local project via git remote add origin, the core workflow is the same. Initialize, configure, and push.
A well-structured repository with a proper README, a .gitignore file, and the right access controls sets the foundation for clean version control and smooth collaboration.
Get the default branch, commit history, and repository settings right from day one. Fixing those later is always more work than doing them upfront.
Now go build something worth committing to.

- Show Hidden Characters, Spaces, and Line Endings in Notepad++ - October 19, 2026
- Military and Defense UI/UX Design Services Firms to Know in 2026 - October 19, 2026
- How to Manage Your Google Play Subscriptions - October 17, 2026