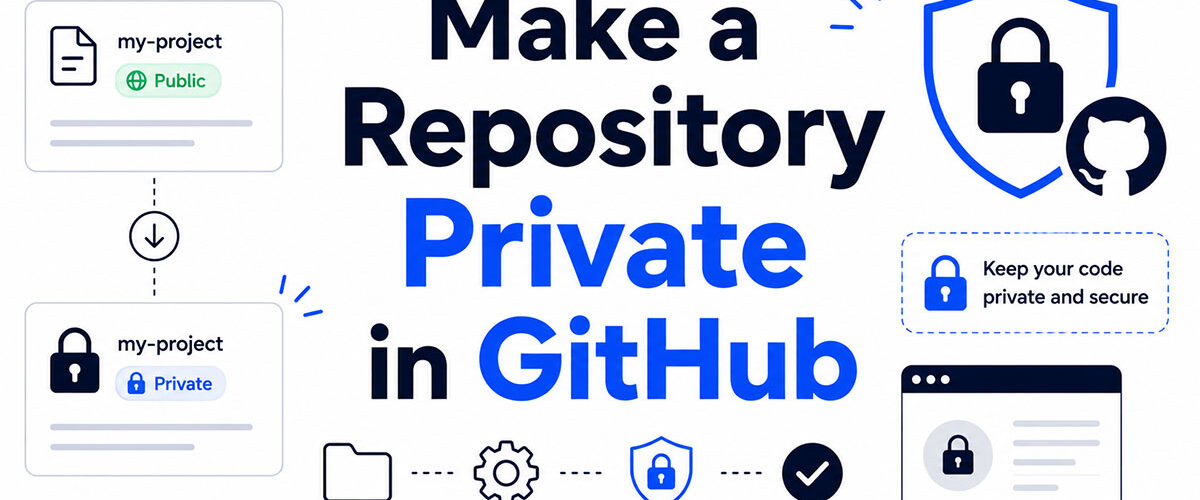
Leaving the wrong repository public can expose your source code, API keys, or proprietary logic to anyone on the internet.
Knowing how to make a repository private in GitHub is a basic but critical part of managing repository access control, whether you’re working solo or inside an organization.
This guide covers every method available: the web interface, Git CLI, REST API, and bulk scripting approaches. You’ll also learn what actually changes when you switch visibility, who has permission to do it, and how to handle edge cases like forked repositories.
What Is a Private Repository in GitHub?

A private repository in GitHub is a repository that is only visible to the owner and users who have been explicitly invited as collaborators. No one else can view, clone, or fork it.
GitHub offers 3 visibility levels for repositories: public, private, and internal. Internal visibility is only available on GitHub Enterprise Cloud and GitHub Enterprise Server, where it limits access to members of the same enterprise or organization.
| Visibility | Who Can See It | Available On |
|---|---|---|
| Public | Anyone on GitHub | All plans |
| Private | Repository owner and invited collaborators only | All plans |
| Internal | Members within the same enterprise or organization | GitHub Enterprise Cloud and Server only |
GitHub made unlimited private repositories available on free accounts in January 2019, removing the previous limit of 3 private repos per free user.
Private repos still consume your GitHub Actions minutes and storage quota. On the Free plan, you get 2,000 Actions minutes per month across all private repos combined. Public repos run Actions for free with no limit.
According to GitHub’s Octoverse 2025 report, 81.5% of all contributions on GitHub happen inside private repositories, despite public repos making up 63% of the total count. Most real development work happens behind closed doors.
Understanding what GitHub is and how its visibility model works is the foundation for managing repository access properly, whether you’re a solo developer or part of a large engineering team.
What Happens When You Make a Repository Private?
Switching a repo from public to private triggers several changes at once. Some are reversible. Some are not.
What Changes Immediately
Stars and watchers are permanently deleted. GitHub’s documentation confirms that these cannot be restored even if you make the repo public again later. This affects the repo’s ranking in GitHub’s search results.
The 4 main visibility-change effects you need to know before proceeding:
- All stars and watchers are wiped and cannot be recovered
- Any published GitHub Pages site on the repo becomes inaccessible on free plans
- Non-collaborators attempting to access the URL will get a 404 response
- GitHub removes the repo from the GitHub Archive Program
Issues, pull requests, commit history, and branches remain completely intact internally. Nothing inside the repo is deleted.
What Happens to Forks
Public forks made before the visibility change are not deleted. They get detached from the original repo and placed into a new, independent fork network. Fork owners keep their copies and can continue working on them without needing access to the now-private upstream.
Key difference: If you later delete a private repo, all of its private forks are also deleted. That behavior does not apply here, where the original was previously public.
Custom Dependabot alert rules will be disabled after the switch unless you have GitHub Code Security enabled. The dependency graph and standard Dependabot alerts stay active with read-only analysis permissions.
GitHub Pages Behavior
Free plan users lose their GitHub Pages site the moment the repo goes private. GitHub unpublishes it automatically.
If you had a custom domain pointed at the Pages site, remove your DNS records before switching visibility. Leaving them pointing at an unpublished site creates a risk of domain takeover by someone else claiming that subdomain on GitHub.
GitHub Enterprise Cloud and paid plans with GitHub Pages enabled for private repos do not face this restriction.
How to Make a Repository Private on GitHub (Web Interface)

The web UI method works for any GitHub account. No additional tools required. You need admin permissions on the repo to complete it.
Step-by-Step Process
Navigate to the main page of your repository. Open the Settings tab at the top of the repo page. If you don’t see the Settings tab directly, look for it inside the dropdown that appears when the tab bar overflows.
Once inside Settings, stay on the General page (the default landing page). Scroll all the way to the bottom of the page until you reach the section labeled “Danger Zone.”
Full path: github.com/[username]/[repo-name] > Settings > General > Danger Zone
Inside the Danger Zone section:
- Click “Change visibility”
- Select “Make private” from the options
- Type the full repository name in the confirmation field exactly as shown
- Click the red “I understand, change repository visibility” button
The change takes effect immediately. The repo header will show a lock icon next to the repository name confirming private status.
Who Can Do This
Only 2 roles can change visibility on a personal repository: the repo owner and any user the owner has granted admin-level access. Collaborators with write or triage roles cannot access the Danger Zone settings.
If you’re working inside an organization on GitHub, additional permission requirements apply. Organization owners can restrict which members are allowed to change repo visibility at all. That restriction is set separately in organization-level settings.
How to Make a Repository Private Using GitHub CLI
The GitHub CLI method is faster for developers already working in the terminal. It requires gh installed and authenticated.
The Command
Basic syntax:
gh repo edit [owner]/[repo-name] --visibility private --accept-visibility-change-consequences
The –accept-visibility-change-consequences flag is required when running the command non-interactively (for example, inside a script or CI pipeline). Without it, the command will fail in automated contexts.
When run interactively in a terminal session, the CLI prompts you to confirm the consequences before proceeding. You’ll see a warning about permanent loss of stars and watchers before the change is applied.
Checking the Result
Verify the change with:
gh repo view [owner]/[repo-name] --json visibility
This returns {“visibility”:”PRIVATE”} on success. You can also learn more about using the GitHub CLI for other repo management tasks beyond visibility changes.
Version Requirements and Notes
gh version 2.0+ supports the –visibility flag on gh repo edit. The –accept-visibility-change-consequences flag was added later as a safeguard for non-interactive use.
The command works the same for personal repos and organization repos, assuming you have the correct admin permissions. For org repos, your authenticated GitHub account must hold Owner or admin-level access on that specific repo.
If you need to install the CLI first, the GitHub CLI installation guide covers setup steps for macOS, Windows, and Linux.
How to Make a Repository Private Using the GitHub API
The REST API approach is the right choice when managing visibility changes programmatically, especially across multiple repos or inside automated workflows.
Endpoint and Request
Endpoint: PATCH /repos/{owner}/{repo}
Request body: {“private”: true}
Example curl command:
curl -X PATCH -H "Authorization: Bearer YOURTOKEN" -H "Accept: application/vnd.github+json" https://api.github.com/repos/{owner}/{repo} -d '{"private": true}'
Token Requirements
A classic Personal Access Token (PAT) needs the repo scope to change repository visibility. A token without this scope can only access public information and will return a 403 or 422 error on this endpoint.
GitHub now recommends fine-grained PATs over classic tokens. Fine-grained tokens give you tighter control, scoping access to specific repositories rather than everything the user can access. For visibility changes, the fine-grained token needs the Administration (read and write) repository permission.
| Token Type | Required Permission | Scope |
|---|---|---|
| Classic PAT | Full repository access | repo |
| Fine-grained PAT | Repository administration access | Administration: read and write |
| GitHub App | Repository administration access | Administration: read and write |
API Response and Error Codes
A successful request returns HTTP 200 with the full updated repository object. The private field in the response JSON will read true.
Common failure responses:
- 401: Token is missing or invalid
- 403: Token lacks the required scope
- 422: Validation failed, often because the user lacks admin rights on the repo or the request body is malformed
Understanding API versioning matters here. GitHub’s REST API is versioned via the X-GitHub-Api-Version header. The current stable version as of 2025 is 2022-11-28. Always specify it in requests to avoid deprecated behavior.
How to Make a Repository Private in a GitHub Organization

Organization repos have additional permission layers compared to personal repos. The process looks the same on the surface, but what can block you is different.
Required Permissions
To change visibility on an organization repo, you need Owner or Admin role within the organization, plus admin-level access to the specific repository. Having write access to a repo inside an org is not enough.
Organization owners can block members from changing repo visibility entirely. That policy lives at: Organization Settings > Member privileges > Repository visibility change. If this is disabled, only org owners can make repos private, regardless of individual repo permissions.
How Organization Policies Affect Visibility Changes
GitHub Enterprise Cloud adds a third visibility option: internal. Internal repos are visible to all enterprise members but not to the public. The path from public to private on an Enterprise account may require going through internal visibility first, depending on how the enterprise admin has configured the policies.
When an internal repo is converted to private, GitHub removes forks belonging to any user who no longer has access to the newly private repo. That’s different from the public-to-private fork behavior covered earlier, where public forks survive as independent repos.
Enterprise Managed Users (EMUs) operate under stricter controls. Visibility changes for EMU-owned repos may be restricted at the enterprise policy level, overriding even organization owner permissions.
Steps for Organization Repos
The navigation path is the same as for personal repos:
- Open the org repo on GitHub
- Go to Settings > General > Danger Zone
- Click “Change visibility” and select “Make private”
- Type the repo name to confirm
If the “Change visibility” option is greyed out, the org policy has restricted this action for your role. Contact an org owner to either make the change or update the member privilege settings.
Many teams use GitHub as part of a broader source control management setup, where visibility policies are defined at the organization level and enforced consistently across all repos.
How to Make Multiple Repositories Private at Once
GitHub has no native bulk visibility change feature in the web UI. Changing dozens of repos one at a time through the settings page is tedious. There are 3 practical approaches for bulk changes.
GitHub CLI Script Approach
This is the fastest method for most developers. The GitHub CLI supports looping through repos and applying visibility changes in sequence.
Basic shell script for a personal account:
gh repo list [username] --limit 100 --json name --jq '.[].name' | while read repo; do gh repo edit [username]/$repo --visibility private --accept-visibility-change-consequences done
Note: The –accept-visibility-change-consequences flag is required here because the command runs non-interactively inside the loop. Without it, the CLI will exit with an error on each repo.
GitHub REST API Batch Approach
For more control, use the PATCH /repos/{owner}/{repo} endpoint inside a loop. This works well when you need conditional logic, like only making repos private if they haven’t been updated in 90+ days or match a specific naming pattern.
Python example structure:
import requests
repos = [“repo1”, “repo2”, “repo3”] headers = {“Authorization”: “Bearer YOURTOKEN”, “Accept”: “application/vnd.github+json”}
for repo in repos: requests.patch( f”https://api.github.com/repos/[owner]/{repo}”, headers=headers, json={“private”: True} )
Be aware of GitHub’s API rate limiting. Authenticated requests allow 5,000 requests per hour. A bulk script changing 200 repos won’t hit this limit, but enterprise-scale operations with thousands of repos need rate-limit handling built in.
GitHub Actions Workflow Approach
When to use it: Scheduled bulk visibility management, like automatically making repos private after a set period of inactivity.
A GitHub Actions workflow can call the REST API on a cron schedule, looping through repos based on criteria you define. This is useful for teams enforcing visibility policies automatically rather than relying on manual audits.
The GitHub Actions runner authenticates using GITHUBTOKEN or a PAT stored as a repository secret, depending on whether the repos being changed are inside the same organization as the workflow.
Who Can Change a Repository’s Visibility?

Visibility control is tied to repo ownership and role level. Getting this wrong is the most common reason the Danger Zone option appears greyed out or inaccessible.
| Context | Who Can Change Visibility | Minimum Role Required |
|---|---|---|
| Personal repository | Repository owner only | Owner |
| Organization repository | Organization owners and repository admins | Admin access on the repository |
| Enterprise repository | Controlled by enterprise policies and administrators | Organization owner or higher |
Personal Repository Permissions
Only the account owner can change the visibility of a personal repository. Collaborators added to a personal repo receive write access at most. They can push code but cannot touch repo settings, including visibility.
GitHub confirmed in a February 2024 community discussion that assigning admin rights to collaborators on personal repos is no longer supported. That level of delegation is only possible inside organization-owned repositories.
Organization Repository Permissions
GitHub defines 5 role levels for organization repos: Read, Triage, Write, Maintain, Admin. Only the Admin role unlocks access to visibility settings.
Maintain-level users can manage releases, push to protected branches, and lock conversations. They cannot touch the Danger Zone.
Organization owners can restrict all members from changing visibility, regardless of their repo role. That policy is set at: Organization Settings > Member privileges. When it’s off, even a repo admin hits a wall.
GitHub Apps and OAuth Apps
Required permission for API-based changes: Administration (read + write) at the repository level.
A GitHub App or OAuth App without this permission returns HTTP 422 with the message “Visibility can’t be changed by this user,” even if the token owner has admin access on that repo. The app’s own permission set is evaluated separately from the user’s role.
Fine-grained PATs work the same way. The token needs the Administration: read + write permission scoped to the target repository, not just broad repo scope.
How to Make a Forked Repository Private
GitHub does not allow making a fork of a public repository private. The restriction is by design. Forks inherit the visibility of the upstream repo, and you cannot change a fork’s visibility while it remains connected to that upstream network.
Why GitHub Blocks This
The reason is a pull request visibility problem. If a fork were private, its code would be hidden from reviewers during the PR process against the public upstream, creating a security and collaboration conflict GitHub has not resolved natively.
A GitHub community discussion from November 2025 confirmed this restriction is still in place and unlikely to change soon. The Settings page for a fork will show “For security reasons, you cannot change the visibility of a fork.”
The Bare Clone Workaround
The standard workaround is to duplicate the repo rather than fork it. This creates an independent private repo with no connection to the upstream fork network.
Steps using git clone:
- Create a new private repo on GitHub (empty, no README)
- Run: git clone –bare https://github.com/[original-owner]/[repo].git
- Enter the cloned directory: cd [repo].git
- Mirror-push to your new private repo: git push –mirror https://github.com/[you]/[private-repo].git
- Delete the local bare clone: cd .. && rm -rf [repo].git
The result is a private duplicate with full commit history, branches, and tags. It has no upstream connection, so you won’t get automatic updates from the original. To pull future changes, add the original as a remote:
git remote add upstream https://github.com/[original-owner]/[repo].git
The “Leave Fork Network” Option
Newer alternative: GitHub added a “Leave fork network” option inside the Danger Zone of fork settings.
After leaving the network, the repo becomes a standalone repository and the visibility restriction is lifted. Wait roughly 1 minute after detaching before attempting the visibility change. This is the cleaner option if you want to keep the repo on GitHub without the bare clone process.
Teams at companies like GitGuardian use private duplicates as part of their internal security policy for auditing sensitive forks of public dependency repos before they’re used in production.
How to Verify a Repository Is Private
There are 3 ways to confirm the visibility change applied correctly. Use at least 2 of them, especially after bulk changes via script.
Web UI Check
After making the repo private, the repository header shows a lock icon next to the repo name. The label beneath the repo name also changes from “Public” to “Private.”
The most reliable UI test: open an incognito or private browser window and navigate to the repo URL directly. A properly private repo returns a 404 page for unauthenticated visitors, not the repo contents. If the repo loads, the change did not apply or the repo is still public.
GitHub CLI Check
Run this command:
gh repo view [owner]/[repo-name] --json visibility
Expected output: {“visibility”:”PRIVATE”}
Alternative: gh repo view [owner]/[repo-name] displays a summary that includes the visibility status in plain text at the top of the output.
GitHub API Check
Send a GET request to the repository endpoint:
curl -H "Authorization: Bearer YOURTOKEN" https://api.github.com/repos/{owner}/{repo}
The response JSON includes “private”: true if the visibility change was successful. If the token lacks the repo scope and the repo is private, you’ll receive a 404 instead of the repo object, which also confirms it’s private from a non-authorized perspective.
For teams running automated compliance checks, a Python script that iterates through repos and checks the private field via the REST API is a common approach. This pairs well with continuous integration pipelines that audit repo visibility on a schedule.
Common Errors When Making a Repository Private
Most failures fall into 4 categories: permission issues, fork restrictions, feature conflicts, and API errors. Here’s what each looks like and how to fix it.
Permission and Access Errors
“Must be an owner” or greyed-out Danger Zone: The logged-in user lacks admin rights on the repo. For personal repos, only the account owner can proceed. For org repos, the user needs the Admin role on that specific repo, not just write access.
Fix: Ask the repo owner to either make the change or explicitly grant admin-level access to the repo via Settings > Collaborators & teams.
Fork Visibility Restriction
Attempting to make a forked repo private returns: “For security reasons, you cannot change the visibility of a fork.”
Fix: Use the bare clone method or the “Leave fork network” option described in the previous section. There is no direct fix because this is intentional platform behavior, not a bug.
GitHub Pages Warning
Free plan users see a warning that their GitHub Pages site will be unpublished when changing to private. This is not an error but a consequence that stops some users mid-process.
If you have a custom domain pointed at the Pages site, remove the DNS record first. Leaving it creates a domain takeover risk after the site goes offline.
API and Script Errors
Common API failure codes when changing visibility programmatically:
- 401 Unauthorized: Token is invalid or expired
- 403 Forbidden: Token lacks repo scope or Administration write permission
- 422 Unprocessable Entity: Most common. Covers “Visibility can’t be changed by this user,” org policy blocks, and fork restriction errors
The 422 error message varies. “Visibility can’t be changed by this user” usually points to a permission issue on the token or app side. “Failed to update visibility. A previous repository operation is still in progress” means a prior visibility change is queued but not complete yet. Wait 60 seconds and retry.
In the GitHub CLI, running gh repo edit –visibility private in a non-interactive script without –accept-visibility-change-consequences exits with an error. Adding the flag is required for any automated or scripted use.
Teams managing large repo inventories often build this error handling into their build pipeline or deployment automation to catch visibility misconfigurations before they reach production environments.
FAQ on How To Make A Repository Private In Github
Can I make a GitHub repository private for free?
Yes. GitHub removed the limit on private repositories for free accounts in January 2019. You can create unlimited private repos on the Free plan. GitHub Actions minutes and storage quotas still apply to private repos.
Will my commit history be visible after making a repo private?
No. Once the repository visibility changes to private, the commit history is only accessible to the owner and invited collaborators. Anyone outside that list gets a 404 when hitting the repo URL.
Do I lose my stars when I make a repo private?
Yes, permanently. GitHub removes all stars and watchers tied to users who lose access. These cannot be restored, even if you switch the repo back to public later. This affects the repo’s ranking in GitHub search.
Can I make a forked repository private?
Not directly. GitHub blocks visibility changes on forks of public repos. The workaround is to either use the “Leave fork network” option in Danger Zone settings, or duplicate the repo using git clone –bare and push to a new private repo.
What happens to my GitHub Pages site when I make a repo private?
On the Free plan, the site is automatically unpublished. If you have a custom domain pointing at the Pages site, remove the DNS record first to avoid a domain takeover risk after the site goes offline.
Who can change repository visibility in a GitHub organization?
Only users with the Admin role on that specific repo, or organization owners. Write, Triage, and Maintain roles cannot access Danger Zone settings. Organization owners can also disable visibility changes for all members entirely.
How do I make a repo private using the GitHub CLI?
Run gh repo edit [owner]/[repo] –visibility private –accept-visibility-change-consequences. The –accept-visibility-change-consequences flag is required in non-interactive or scripted contexts, otherwise the command exits with an error.
How do I make multiple repositories private at once?
GitHub has no native bulk visibility UI. Use a GitHub CLI script that loops through repos with gh repo list and applies gh repo edit –visibility private to each, or use the REST API endpoint PATCH /repos/{owner}/{repo} inside a loop.
What API endpoint changes repository visibility to private?
Use PATCH /repos/{owner}/{repo} with the request body {“private”: true}. Authentication requires a Personal Access Token with the repo scope for classic tokens, or Administration read+write permission for fine-grained tokens.
How do I verify a repository is actually private?
Check for the lock icon next to the repo name in the GitHub UI. Run gh repo view [repo] –json visibility in the CLI, or send a GET /repos/{owner}/{repo} API request and confirm “private”: true in the response.
Conclusion
This conclusion is for an article presenting how to make a repository private in GitHub, covering every method from the web UI to the REST API and bulk CLI scripting.
Changing repository visibility is straightforward once you understand the permission requirements and what breaks in the process.
Stars are gone permanently. Forks of public repos stay public. GitHub Pages goes offline on free plans. Knowing these side effects before you click confirm saves headaches later.
For teams managing dozens of repos, the source control approach matters: script the changes via the PATCH /repos endpoint or GitHub CLI rather than clicking through settings one repo at a time.
Private repositories now account for 81.5% of all contributions on GitHub. Most real development already happens behind closed doors.

- venv vs conda vs poetry: Which One for Which Project - October 9, 2026
- How to Prepare for a Web Design Project Before Hiring an Agency - October 9, 2026
- How to Delete a Python venv Without Breaking Your Project - October 7, 2026