
Over 93% of developers use Git. If you write code and don’t know how to use Git, you’re already behind.
Git is the distributed version control system that powers nearly every modern software project, from solo side hustles to codebases at Google and Microsoft. It tracks every change, lets teams work in parallel, and makes rolling back mistakes painless.
This guide covers everything from installation and your first commit to branching strategies, merge conflict resolution, and the recovery commands that save you when things go wrong. Whether you’re setting up Git for the first time or tightening up your workflow, you’ll walk away with the practical knowledge to use Git with confidence on real projects.
What Is Git

Git is a distributed version control system that tracks changes across files in a project. Linus Torvalds built it in 2005 to manage the Linux kernel after the existing tooling fell apart.
Unlike older centralized systems like Subversion (SVN) or Perforce, Git gives every developer a full copy of the repository on their local machine. You don’t need a network connection to commit, view history, or create branches.
The Stack Overflow Developer Survey consistently reports that 93% of developers use Git as their primary version control system. That figure has climbed steadily from 87.1% in 2016, according to RhodeCode’s 2025 analysis.
GitHub alone hosts over 400 million repositories and serves more than 150 million developers worldwide. GitLab and Bitbucket hold meaningful shares too, but Git is the shared foundation underneath all of them.
Fortune Business Insights valued the global version control systems market at $1.03 billion in 2024, projecting it to reach $2.66 billion by 2030. That growth tracks directly with the rising demand for collaborative software development tools across industries.
How Git Tracks Changes
Git doesn’t store file differences the way older systems do. It takes snapshots of the entire project state at each commit, then links those snapshots together.
Every snapshot gets a unique SHA-1 hash. This hash acts as both an identifier and an integrity check. If even a single byte changes, the hash changes completely.
Three areas matter here:
- The working directory holds the files you’re actually editing
- The staging area (also called the index) holds changes you’ve marked for the next commit
- The repository stores the full history of committed snapshots
This three-stage architecture is what makes Git flexible. You can selectively stage some changes while leaving others out, giving you fine control over what goes into each commit.
Git vs. Other Version Control Systems
| Feature | Git (Distributed) | SVN (Centralized) | Perforce (Centralized) |
|---|---|---|---|
| Local commits | Yes, full offline support | No, requires server | Limited offline mode |
| Branching speed | Nearly instant | Slower, server-dependent | Moderate |
| Full history locally | Yes | No | No |
| Primary user base | Most industries | Legacy enterprise, government | Game dev, large binaries |
Perforce still holds ground in game development and industries that handle massive binary assets. SVN lingers in some government and financial environments. But for the vast majority of software development workflows, Git is the default.
RhodeCode research notes that Git-based systems represent 93.87% of developer usage as of 2025. The remaining share splits across SVN, Mercurial, and a handful of commercial alternatives.
How to Install Git on Windows, macOS, and Linux

Installation takes about two minutes on any operating system. The process varies slightly per platform, but the result is the same: a working git binary you can run from the command line.
The command line remains the primary way developers interact with Git. The 2022 Stack Overflow survey confirmed this, with CLI usage far outpacing GUI alternatives.
Windows: Download the official installer from git-scm.com. It bundles Git Bash (a Unix-like terminal) and optional GUI tools. During setup, you’ll choose your default editor and path environment settings.
macOS: The fastest route is running xcode-select --install in Terminal, which installs Git as part of Xcode Command Line Tools. If you use Homebrew, brew install git works too.
Linux: Use your distribution’s package manager. Ubuntu and Debian run sudo apt install git. Fedora uses sudo dnf install git. Arch-based systems use sudo pacman -S git.
After installation, verify with:
git --version
If that returns a version number, you’re good. Now configure your identity. These details attach to every commit you make:
git config --global user.name "Your Name" git config --global user.email "you@example.com"
Took me a while early on to realize these aren’t login credentials. They’re just metadata labels. Your Git configuration stores these globally in a .gitconfig file in your home directory.
You can pick your preferred web development IDE as the default editor too. Visual Studio Code is the most popular choice according to the Stack Overflow 2025 survey, which found it maintaining the top spot for the fourth year running.
How to Create and Clone a Git Repository

Every Git project starts one of two ways. You either create a new repository from scratch or copy an existing one from a remote source.
The approach depends on whether you’re starting fresh or joining a project that already exists on GitHub, GitLab, or Bitbucket.
Starting a New Repository with git init
Run this inside any folder:
git init
That command creates a hidden .git directory containing everything Git needs to track your project. The git init command doesn’t add or commit anything by itself. It just sets up the tracking infrastructure.
The .git folder holds your commit history, branch pointers, configuration, and object database. Delete it and your entire version history disappears. Don’t touch it unless you know what you’re doing.
From here, the typical next step is adding a remote connection to a hosting platform so you can push your work later.
Cloning an Existing Repository

HTTPS clone:
git clone https://github.com/user/repo.git
SSH clone:
git clone git@github.com:user/repo.git
The git clone operation downloads the full repository, including all branches and commit history. You get a complete local copy, not just the latest version of the files.
HTTPS works out of the box but asks for credentials on each push. SSH requires a key pair setup but handles authentication silently after that. Most teams prefer SSH for daily work. Here’s a guide on adding an SSH key to GitHub if you haven’t done that yet.
GitHub reported over 5 billion contributions across repositories in 2024. That volume of code moving between local machines and remote servers shows just how central cloning and pushing have become in every codebase.
Core Git Commands for Everyday Work

Most of your time with Git comes down to five or six commands repeated throughout the day. Learn these and you’ll handle 90% of daily version control without thinking about it.
The Stage-Commit Cycle
This is the rhythm. You edit files, stage the ones you want to save, then commit them with a message.
git status shows what’s changed. Modified files, new files, deleted files. It tells you what’s tracked and what isn’t.
git add filename.js moves a specific file to the staging area. git add . stages everything at once (be careful with that one).
git commit -m "Fix login validation bug" saves the staged changes as a new snapshot in your local history.
Understanding staging in Git is what separates people who use Git from people who understand it. The staging area lets you break large changes into focused, logical commits instead of dumping everything at once.
Writing Useful Commit Messages
Good commit messages answer “what changed and why” in one line.
- “Add email validation to signup form” tells you something
- “Fixed stuff” tells you nothing
- “WIP” is fine for personal branches but shouldn’t hit the main branch
The convention most teams follow: imperative mood, present tense, under 72 characters. “Fix bug” not “Fixed bug.” “Add feature” not “Adding feature.”
Hutte research found that 60% of developers have accidentally committed unintended files or secrets to their repository. Clear commit habits catch these mistakes earlier through better code review processes.
Ignoring Files with .gitignore
Not everything belongs in version control. Build artifacts, environment variables, dependency folders. All of these should stay out of your commits.
A .gitignore file tells Git which files and directories to skip. Place it in your project root.
Common patterns:
node_modules/for JavaScript dependencies.envfor environment secretspycache/for Python bytecodebuild/ordist/for compiled output
GitHub exposed 12.8 million secrets in public repositories in 2023, a 28% increase from the prior year. A properly configured .gitignore file won’t solve everything, but it’s your first defense against accidentally pushing API keys or database passwords.
How Git Branching Works

Branching is the single feature that makes Git worth using. It lets multiple people (or just you on different tasks) work in parallel without stepping on each other’s code.
A branch in Git is just a lightweight pointer to a specific commit. Creating one doesn’t copy files or duplicate your project. It costs almost nothing in terms of time or disk space.
Hutte research shows that 87% of Git users have encountered merge conflicts at some point, which makes understanding branches a prerequisite for working on any team.
Create a new branch:
git branch feature-login
Switch to it:
git switch feature-login
Or do both in one step:
git switch -c feature-login
The older git checkout -b syntax still works, but git switch was introduced specifically for branch operations to reduce confusion. The git checkout command had been overloaded with too many responsibilities (switching branches, restoring files, detaching HEAD).
Naming conventions most teams follow:
feature/for new functionalitybugfix/for fixeshotfix/for urgent production patchesrelease/for preparing a new version
After a branch merges back into the main line, delete it. Stale branches pile up fast and make your repository harder to read. Learn how to delete a branch in Git as early as possible. It’s one of those small habits that keeps your project clean.
The concept of Git branches is where most beginners have their “aha” moment. Once branching clicks, the rest of Git starts making sense.
How to Merge Branches and Resolve Conflicts

Merging is how separate lines of work come back together. You’ve finished a feature on its own branch, and now you want that code in the main branch.
It sounds simple. And sometimes it is. But when two people edit the same lines in the same file, Git can’t decide which version to keep. That’s a merge conflict.
Fast-Forward vs. Three-Way Merge
| Merge Type | When It Happens | Result |
|---|---|---|
| Fast-forward | Main hasn’t changed since branch was created | Pointer moves forward, no merge commit |
| Three-way | Both branches have new commits | New merge commit combining both histories |
A fast-forward merge is the cleanest scenario. Git just slides the main branch pointer forward to include your commits. No extra merge commit needed.
When both branches have diverged, Git performs a three-way merge. It compares the common ancestor commit with the tips of both branches and creates a new commit that combines them. The git merge command handles this automatically when there are no conflicts.
Resolving Merge Conflicts Step by Step
A Stack Overflow study found that 42% of developers encounter code conflicts at least once a week. They’re not rare edge cases. They’re part of the job.
When a conflict happens, Git marks the affected files with conflict markers:
<<<<<<< HEAD your changes here ======= their changes here >>>>>>> feature-branch
Resolution process:
- Open the conflicted file
- Find the conflict markers
- Decide which changes to keep (or combine both)
- Remove all marker lines
- Stage the resolved file with
git add - Commit the resolution
Hutte data indicates that 80% of developers have successfully resolved merge conflicts using external merge tools. VS Code’s built-in conflict editor, IntelliJ’s three-way merge view, and dedicated tools like Meld all make this easier than editing markers by hand.
Here’s a full walkthrough on resolving merge conflicts in Git if you want the deeper version.
Merge vs. Rebase
This is where teams get opinionated. Both accomplish the same goal (integrating changes from one branch into another) but the resulting history looks different.
Merge preserves the full branching history. You see exactly when a branch was created and when it was merged back. The trade-off is a noisier commit log.
Rebase rewrites the commit history to make it look like your changes were applied on top of the latest main branch. Cleaner log, but it alters commit hashes.
The general rule: rebase your own private branches freely. Never rebase commits that have already been pushed to a shared branch. A git rebase gone wrong on a public branch can ruin everyone’s day.
Hutte research found that 55% of developers find rebase challenging and error-prone. If your team doesn’t have strong Git experience, sticking with merge is usually safer.
And if you’ve ever accidentally force-pushed over a colleague’s work, you’re among the 45% of developers who’ve been burned by that exact scenario.
Working with Remote Repositories

Git on your local machine is useful. Git connected to a remote server is where collaboration happens.
A remote repository is a version of your project hosted on a server, typically on GitHub, GitLab, or Bitbucket. Your local repository talks to it through push and pull operations.
Link a local project to a remote with:
git remote add origin https://github.com/user/repo.git
The word “origin” is just a convention. It’s the default name for the primary remote, but you can name it whatever you want. The origin reference in Git is the alias your local repo uses to communicate with the remote server.
Pushing code sends your local commits to the remote:
git push origin main
Pulling code downloads remote changes and merges them into your local branch:
git pull origin main
Here’s where it gets tricky. git pull actually does two things at once: it runs git fetch (download the changes) and then git merge (combine them with your local work). Most developers don’t realize that until they run into unexpected merge behavior.
The git fetch command on its own is safer. It downloads everything from the remote without touching your working files. You get to inspect the changes first, then decide how to merge them.
GitHub reported that developers made over 5 billion contributions in 2024. That volume runs through push and pull operations across millions of repositories, making these commands the backbone of team-based source control management.
Google, Microsoft, and thousands of successful startups all depend on remote repository workflows to coordinate distributed teams. Over 90% of Fortune 100 companies use GitHub in their development pipelines, according to Kinsta research.
Git Workflows Used by Development Teams

Git doesn’t force a specific workflow. That flexibility is both its strength and the source of most team arguments about how branches should work.
A Git workflow defines how your team creates branches, integrates changes, and ships releases. Pick the wrong one for your team size and you’ll fight the process instead of shipping code.
A 2025 study published on arXiv found that 84% of surveyed developers use branch-based workflows, while only 12% prefer trunk-based approaches. The choice depends heavily on team size and experience level.
| Workflow | Best For | Trade-Off |
|---|---|---|
| Feature Branch | Small to mid-size teams | Simple but requires discipline |
| Gitflow | Versioned releases, mobile apps | Structured but adds overhead |
| GitHub Flow | Web apps with continuous deployment | Lightweight but needs strong CI |
| Trunk-Based | Senior teams, fast-paced projects | Fast but risky without test coverage |
Feature Branch Workflow
The most common starting point for most teams. Each new feature or fix gets its own branch off main. When the work is done, it merges back through a pull request.
The simplicity is the appeal. You don’t need extra long-lived branches or complex naming conventions. Just branch, code, review, merge.
According to the 2024 DORA State of DevOps Report, teams with well-defined workflows show significantly better continuous integration outcomes and faster delivery performance.
Gitflow
Vincent Driessen introduced this model in 2010, and it shaped how an entire generation of developers thought about branching.
Branch structure:
mainholds production-ready codedevelopserves as the integration branchfeature/branches fork off developrelease/branches stabilize upcoming versionshotfix/*branches patch production issues
Atlassian’s own documentation now calls Gitflow a “legacy” model. It works well for apps with scheduled releases (think mobile apps or enterprise software) but adds too much overhead for teams doing continuous deployment.
Trunk-Based Development
Everyone commits directly to the main branch. Short-lived feature branches (a day or two, max) are allowed, but long-lived branches are not.
The arXiv study found that trunk-based development favors experienced, smaller teams, while branch-based models suit larger and less experienced groups better.
Key requirement: strong automated testing. Without a solid build pipeline catching bugs before they hit main, trunk-based development gets dangerous fast.
Companies like Google and Meta operate on trunk-based workflows at massive scale, but they also have testing infrastructure that most teams can only dream about.
GitHub Flow
One rule: main is always deployable. That’s the entire philosophy.
Create a branch, make changes, open a pull request, get a review, merge, deploy. GitHub’s internal data shows the median time from PR open to merge is about 6 hours for teams using this workflow effectively.
It sits between Gitflow’s structure and trunk-based development’s speed. If you’re building web apps and deploying continuously, GitHub Flow is probably what you want.
How to Undo Changes in Git

Mistakes happen. You commit the wrong file, push broken code, or accidentally delete a branch you still needed. Git has recovery tools for all of these situations.
Hutte research found that 65% of developers have accidentally lost a commit or changes in their Git history at some point. Another 58% have deleted a branch or commits by mistake.
The good news: Git almost never permanently destroys data. If you committed it, you can probably get it back.
Reset vs. Revert
| Command | What It Does | When to Use |
|---|---|---|
| git reset | Moves branch pointer backward | Local, unpushed commits only |
| git revert | Creates a new commit that undoes changes | Public, already-pushed commits |
The git reset command rewrites history. It moves the branch pointer backward and can discard commits entirely. Three modes matter here: --soft keeps your changes staged, --mixed (default) unstages them, and --hard deletes everything.
The git revert command is the safe option for shared branches. Instead of erasing history, it adds a new commit that undoes the changes from a previous one. Your teammates’ work stays intact.
Rule of thumb: If you’ve already pushed it, use revert. If it’s still local, reset is fine. Here’s a deeper look at how to revert a commit in Git.
Using git stash for Work in Progress
You’re halfway through a feature when someone asks you to check a bug on another branch. You can’t switch branches with uncommitted changes cluttering the working directory.
Git stash saves your uncommitted work temporarily, giving you a clean slate. Switch branches, do what you need, then come back and run git stash pop to restore your changes.
Hutte data shows that 28% of developers have lost work when using stash. The common mistake is stashing and then forgetting about it, or stashing multiple times without labels. Use git stash save "description" to keep things organized.
Recovering Lost Work with git reflog
This is the command most developers don’t learn until they need it badly.
git reflog shows a log of every move your HEAD pointer has made. Every commit, checkout, reset, rebase. Even actions that remove commits from git log still show up in reflog.
Hutte research indicates 65% of developers have recovered lost commits using reflog or similar commands. Reflog entries persist for 90 days by default before Git prunes them.
The recovery process is simple: find the commit hash in reflog, then git reset --hard <hash> to restore your branch to that point. Or create a new branch at that commit with git checkout -b recovery <hash>.
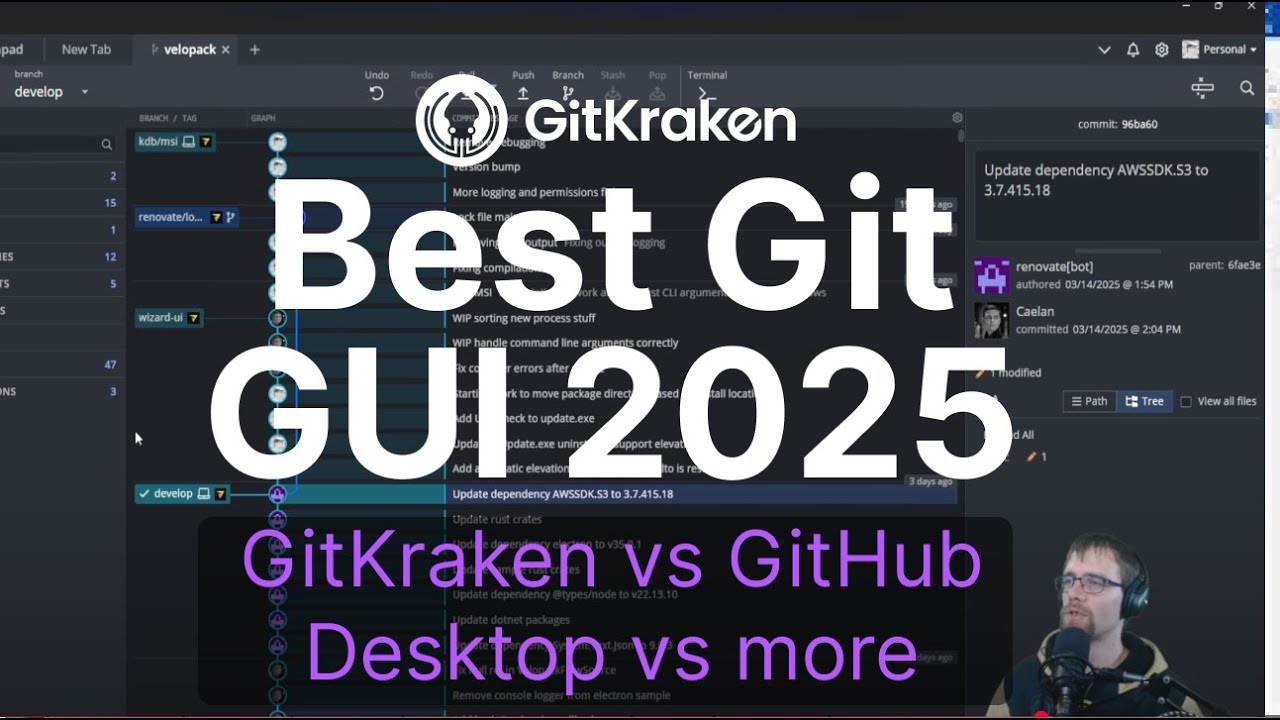
Git Tools and GUI Clients
The command line is where Git lives. But not every task is faster or clearer in a terminal window.
GUI clients and editor integrations add visual context that plain text can’t match. Branch graphs, diff viewers, inline blame annotations. These tools help you see relationships between commits, files, and contributors at a glance.
The 2025 Stack Overflow survey confirmed Visual Studio Code as the most popular code editor for the fourth consecutive year. Its built-in Git integration handles staging, committing, branching, and conflict resolution without leaving the editor.
VS Code and GitLens
Built-in Git support: VS Code ships with source control features out of the box. Stage changes, view diffs, commit files, and switch branches from the sidebar. No extension required for basics.
The GitLens extension adds the deeper stuff. Inline blame annotations showing who changed each line, a commit graph for visual history, and repository-wide search. GitKraken reports the extension is trusted by over 40 million developers.
Here’s how to connect VS Code to GitHub if you haven’t set that up yet.
Standalone GUI Clients
GitHub Desktop: Free, simple, designed for GitHub users. Good for beginners who want to skip the command line entirely. Lacks advanced features like interactive rebase.
Sourcetree: Atlassian’s free client with strong Bitbucket integration. Supports Gitflow out of the box. Visual branch graphs and a clear diff viewer.
GitKraken: Cross-platform, polished interface with a visual commit graph and built-in merge conflict editor. The paid tier adds deeper integrations with GitHub, GitLab, and Azure DevOps.
Geeky Gadgets research suggests over 70% of developers use some form of Git GUI client alongside (or instead of) the command line.
Built-In Power Tools Most People Ignore
Git bisect uses binary search to find the exact commit that introduced a bug. You mark a known good commit and a known bad one, and Git walks you through the commits in between until it isolates the problem.
Git blame shows who last modified each line of a file. Despite the aggressive name, it’s really a debugging and context tool. When a line of code looks wrong, blame tells you who wrote it and when.
Git aliases save keystrokes on commands you type dozens of times a day. Add them to your .gitconfig:
git config --global alias.co checkoutgit config --global alias.br branchgit config --global alias.st status
These small tweaks add up. Especially if you’re spending half your day inside a terminal connected to a project’s Git repository.
For teams practicing DevOps, the combination of CLI skills, GUI tools, and automation through GitHub Actions or similar CI systems is what turns Git from a versioning tool into a full deployment pipeline.
FAQ on How To Use Git
What is Git and why do developers use it?
Git is a distributed version control system created by Linus Torvalds in 2005. It tracks file changes, supports parallel development through branching, and lets teams collaborate on the same codebase without overwriting each other’s work.
How do I install Git on my computer?
On Windows, download the installer from git-scm.com. macOS users can run xcode-select --install. Linux users install through their package manager with sudo apt install git or equivalent. Verify with git --version.
What is the difference between Git and GitHub?
Git is the version control tool that runs locally on your machine. GitHub is a cloud hosting platform for Git repositories. GitLab and Bitbucket are alternatives. Git works without any of them.
How do I create my first Git repository?
Run git init inside any project folder. This creates a hidden .git directory that tracks all changes. Then add files with git add . and save your first snapshot with git commit -m "Initial commit".
What are the basic Git commands I need to know?
The daily essentials are git status, git add, git commit, git push, and git pull. Add git branch and git merge once you start working with others. These cover about 90% of everyday tasks.
How does branching work in Git?
A branch is a lightweight pointer to a commit. Create one with git switch -c branch-name, work independently, then merge it back into main. Branching is nearly instant and costs almost nothing in disk space.
How do I resolve a merge conflict?
Open the conflicted file, find the conflict markers (<<<<<<<, =======, >>>>>>>), choose which changes to keep, remove the markers, then stage and commit. Tools like VS Code make this visual and faster.
What is the difference between git pull and git fetch?
Git pull downloads remote changes and merges them immediately. Git fetch only downloads without merging. Fetch is safer when you want to review incoming changes before combining them with your local work.
How do I undo a commit in Git?
Use git revert for commits already pushed to a shared branch. It creates a new commit that reverses the changes. For local unpushed commits, git reset moves the branch pointer backward. Always check with git log first.
What is a .gitignore file and why do I need one?
A .gitignore file tells Git which files to skip when tracking changes. Dependencies, environment variables, and build output don’t belong in version control. Configuring it properly prevents accidental exposure of sensitive data.
Conclusion
Learning how to use Git is less about memorizing commands and more about building habits. The stage-commit-push cycle becomes second nature after a few weeks of consistent practice.
Start with the basics. Create a repository, make commits with clear messages, and get comfortable switching between branches. Once that feels routine, layer in merge conflict resolution, remote collaboration through pull requests, and recovery tools like reflog.
Pick a workflow that fits your team size. Don’t overcomplicate things with Gitflow if GitHub Flow handles your release cadence just fine.
The real skill isn’t knowing every Git command. It’s knowing which five or six you need daily, and understanding what happens when you run them. That confidence comes from practice, not reading.
Set up a test repository today. Break things on purpose. Then fix them. That’s how Git actually clicks.
Many of his resources are available on various design marketplaces and for free on Codepen.
Over the years, he's worked with a range of clients and contributed to design publications like Design Your Way, Designmodo, WebDesignerDepot, WPDean, Speckyboy, and Slider Revolution among others.
- How to Make a Repository Public in GitHub - July 14, 2026
- Production Incident Communication Without Separate Monitoring and Status-Page Systems - July 13, 2026
- How to Set Up Subscriptions on Google Play (Developer Guide) - July 12, 2026


