Every production incident you have ever seen started with someone pushing directly to main.
Knowing how to create a branch in GitHub is the single habit that separates clean, reviewable code from the kind of commit history nobody wants to explain at 2am.
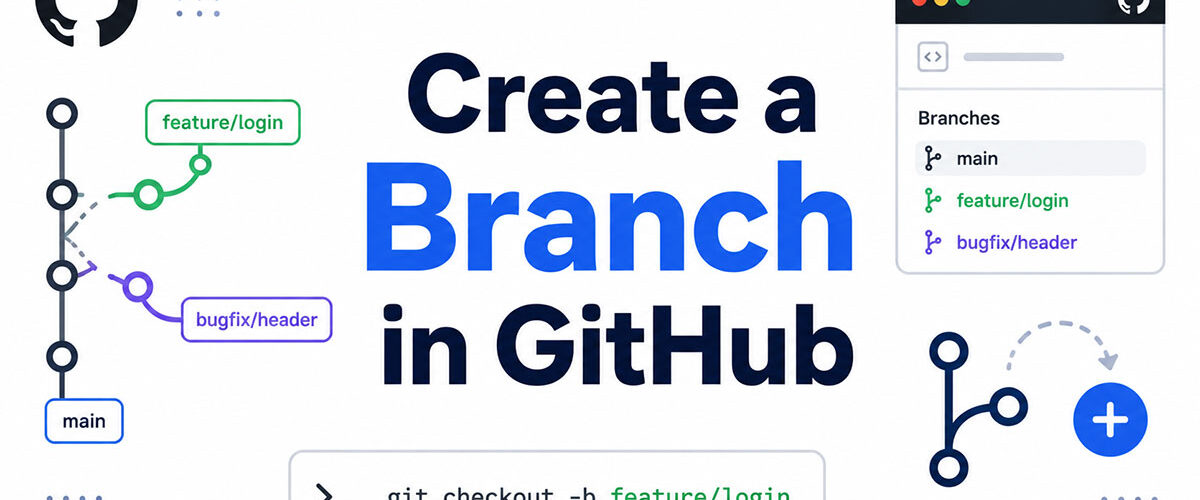
Branches keep your work isolated. They protect the default branch, make the software development process more collaborative, and give every feature, fix, or hotfix its own space to live until it is ready to merge.
This guide covers every method: the GitHub web interface, the Git command line, GitHub Desktop, the GitHub CLI, and branching directly from issues and pull requests.
What Is a Branch in GitHub?

A branch in GitHub is a parallel version of a git repository that exists independently from the main codebase. It lets you make changes, commit them, and test them without touching the code others depend on.
Every repository starts with a default branch, typically called main (previously master in older setups). When you create a new branch, Git places a pointer at the current commit and tracks all new commits on that branch separately.
The local branch lives on your machine. The remote branch lives on GitHub. They stay separate until you push or pull between them.
Branches are central to how version control works in team environments. Over 90% of software developers use Git, according to Hutte’s Git-based development statistics, and branching is one of the first workflows they learn.
3 things a branch tracks:
- Its own commit history from the point of divergence
- The relationship to its upstream tracking branch
- Changes staged and committed locally until pushed
Understanding what a branch actually is makes the creation steps much easier to follow. If you want a broader look at what a Git branch is and how it fits into the version control model, that context helps before jumping into methods.
What Does Creating a Branch in GitHub Actually Do?

Creating a branch does not copy files. Git uses a snapshot model, so a new branch is just a pointer to the current HEAD commit.
No files are duplicated. No storage doubles. Git records a reference to the exact commit you branched from, and all new commits after that are tracked separately on the new branch.
| What Happens | What Does NOT Happen |
|---|---|
A new branch pointer is created at the current HEAD commit | Repository files are not duplicated |
| New commits are recorded on the new branch | Storage usage does not double |
| The branch exists locally until pushed to a remote | CI/CD workflows do not run until a push occurs |
| Upstream tracking is configured after the first push | The original base branch remains unchanged |
The branch stays local until you explicitly push it to the remote repository on GitHub. That push creates the remote branch and sets the upstream tracking relationship between your local branch and origin.
One thing developers miss early on: GitHub Actions and CI/CD pipelines do not trigger on branch creation alone. The pipeline runs when a push event occurs, not the moment the branch exists.
Google’s engineering teams standardized on trunk-based development partly because of how lightweight branch creation is in Git. Branches cost almost nothing to create, which makes short-lived feature branches practical even in large codebases.
How to Create a Branch in GitHub Using the Web Interface

The web interface is the fastest method when you do not have Git installed locally or when you are making a quick change directly in the browser. No terminal, no setup.
Steps to create a branch on GitHub.com
Go to your repository on GitHub.com. Find the branch switcher dropdown near the top-left of the file list. It shows the current branch name (usually main).
Click the dropdown. Type a new branch name in the search box. GitHub will show a prompt: “Create branch: your-branch-name from ‘main'”. Click it to confirm.
The branch is created immediately on the remote. No push needed since it was never local.
Branching from main vs. branching from another branch
Default behavior: GitHub branches from whatever branch you currently have selected in the dropdown.
If you need to branch from a specific commit or a non-default branch, switch to that branch first in the dropdown, then create the new one. The new branch will point to that branch’s latest commit as its base.
Limitations of the web interface
The web interface creates the branch on the remote only. Your local clone does not know about it until you run git fetch or git pull.
- No terminal commands available
- Cannot branch from a specific commit hash
- Editing is limited to single-file changes in the browser editor
For most developers doing real feature work, this is a starting point, not a daily workflow. You will still need to pull the branch locally before writing and testing code. That said, it works well for documentation fixes, README updates, or quick configuration changes.
How to Create a Branch in GitHub Using Git on the Command Line
The Git CLI is where most day-to-day branch creation happens. GitHub holds 67.8% of VCS platform users overall (CommandLinux, 2024), and the majority of those users work primarily through the terminal.
There are 3 commands to know, and they behave differently.
git branch vs. git checkout -b vs. git switch -c
| Command | Creates Branch | Switches to It | Notes |
|---|---|---|---|
git branch <name> | Yes | No | Creates the branch only and keeps you on the current branch |
git checkout -b <name> | Yes | Yes | Older syntax that is still widely used |
git switch -c <name> | Yes | Yes | Newer and more focused syntax introduced in Git 2.23 |
In practice, git checkout -b is what you’ll see in most tutorials and team wikis because it has been around since early Git versions. git switch -c is cleaner but not universal yet, especially on older systems or older build automation scripts.
58% of developers have accidentally deleted a branch or commits at some point, according to Hutte’s data. Running git branch first to list existing branches before creating a new one helps avoid duplicate names and confusion.
How to push a local branch to GitHub
Creating a branch locally does not put it on GitHub. You need an explicit push.
git push -u origin <branch-name>
The -u flag sets the upstream tracking relationship. After running this once, future git push and git pull commands on that branch know where to send and receive changes without you specifying the remote and branch name every time.
Without -u, you would need to type git push origin every single time. It is a small thing, but skipping it gets annoying fast on branches you push to regularly.
Verify the branch exists on GitHub after pushing: check the branch dropdown on the repository page, or run git branch -r to list remote branches from your terminal.
How to Create a Branch in GitHub Desktop

GitHub Desktop is the official GUI client for GitHub. It handles the push-and-track setup automatically, which is why many developers newer to Git prefer it for branch management.
Creating a branch in GitHub Desktop
Step 1: Open your repository in GitHub Desktop.
Step 2: Click the Current Branch dropdown at the top center of the app.
Step 3: Click “New Branch.” Type the branch name and choose the base branch you want to diverge from.
Step 4: Click “Create Branch.” The branch exists locally at this point.
Step 5: Click “Publish Branch” to push it to GitHub. This also sets the upstream tracking automatically, the same thing git push -u does in the terminal.
Syncing across machines
Once the branch is published, other machines with the same repository cloned can fetch it.
In GitHub Desktop, clicking “Fetch origin” updates the branch list and pulls any remote branches that do not yet exist locally. This is the equivalent of running git fetch in the terminal.
GitHub Desktop does not give you access to commands like git rebase or git stash, but for straightforward branch creation, commit, push, and pull workflows, it covers most day-to-day needs without requiring terminal access. Teams doing more with GitHub Desktop will eventually hit its limits and move to the CLI or an IDE integration.
How to Create a Branch from a Specific Commit or Tag

Sometimes you do not want to branch from the latest commit. Hotfixes, rollbacks, and release branches often need to start from a specific point in history.
Branch from a specific commit:
git branch <branch-name> <commit-hash>
This creates the branch at that exact commit without switching to it. Add -b or use git switch -c if you want to switch immediately.
Branch from a tag
Tags mark specific points in the commit history, usually release versions. Branching from a tag is common in projects using semantic versioning.
git checkout -b <branch-name> <tag-name>
Example: git checkout -b hotfix/login-bug v2.3.1 creates a hotfix branch at the exact state of version 2.3.1.
Verify the base before branching
Before branching from a commit or tag, confirm you have the right starting point.
- Run git log –oneline
to see the commit history with short hashes
- Run git tag
to list available tags
- Run git show
to inspect what changed at that commit
This step matters more than it seems. Branching from the wrong commit in a hotfix scenario means shipping code that either misses critical context or includes changes that should not be in a patch release. Always verify first.
The difference between this and branching from HEAD is simply where the pointer starts. Once the branch is created, behavior is identical. New commits track to the new branch, and the original commit or tag remains unchanged.
How to Create a Branch Directly from a GitHub Issue or Pull Request
GitHub added a native “Create a branch” feature directly inside issues. It links the branch to the issue automatically, which keeps project tracking clean without extra manual steps.
Creating a branch from a GitHub Issue
Open any issue in your repository. On the right sidebar, find the Development section. Click “Create a branch.”
GitHub suggests a branch name based on the issue title and number, for example 42-fix-login-redirect. You can keep it or change it.
Choose the base branch and whether to check out locally or work in GitHub Codespaces.
Once created, the branch appears in the issue sidebar under “Development,” and the issue shows as linked. In GitHub Projects, this connection updates cards and board columns automatically when the branch’s pull request changes status.
Creating a branch from a pull request
You can branch from an open pull request to do iterative review work without modifying the PR branch directly.
- Open the pull request
- Click the branch name link near the top of the PR
- This takes you to the branch view where you can create a new branch from it
This is useful when a reviewer wants to test a fix or propose a change without commenting. They create a branch, push a change, and open a separate PR that targets the original feature branch.
Why this matters for team workflows
Manually named branches with no issue link create traceability gaps. When a branch name like fix-stuff appears in the repository weeks later, nobody knows what it was for or whether it can be deleted.
Linking branches to issues through GitHub Projects connects the work to a ticket, a milestone, and a team member. The Git workflow stays organized without relying on everyone to follow naming conventions manually.
According to the 2024 State of Git Collaboration Report by JetBrains and GitKraken, unclear priorities and missing context are among the top challenges for development teams. Linking branches to issues directly addresses both.
What Are the Branch Naming Conventions for GitHub?
Branch names are not just labels. They drive CI/CD triggers, show up in pull request titles, and tell teammates what a branch does at a glance, without opening a single file.
78% of organizations enforce branch protection to prevent force-push disasters, according to Hutte’s Git-based development statistics. Naming conventions are a natural companion to that. They only work if the whole team uses them consistently.
Common branch name prefixes
Most teams settle on a small set of prefixes that cover the majority of their work.
| Prefix | Use Case | Example |
|---|---|---|
feature/ | New functionality or enhancements | feature/user-auth |
fix/ or bugfix/ | Bug fixes and corrections | fix/login-redirect |
hotfix/ | Urgent production patches | hotfix/payment-api-timeout |
release/ | Release preparation and stabilization | release/v2.4.0 |
chore/ | Maintenance tasks and dependency updates | chore/update-node-deps |
Teams using Jira, Linear, or GitHub Issues often append the ticket number: feature/PROJ-42-search-filter. This auto-links the branch to the issue in many project management tools and makes the commit history traceable months later.
Characters to avoid in branch names
Avoid these in every branch name:
- Spaces (use hyphens instead)
- Special characters like @
,#,~,^,:
- Uppercase letters (causes issues on case-insensitive file systems)
- Consecutive hyphens (feature–login
is harder to read)
Stick to lowercase letters, numbers, hyphens, and forward slashes for the prefix separator. That is the format that survives across macOS, Linux, Windows, shell scripts, and CI/CD pipelines without surprises.
How naming connects to CI/CD pipelines
Branch names feed directly into GitHub Actions workflow triggers. A workflow that deploys to staging only when a branch matches staging/ depends entirely on the name following that pattern.
Medium’s engineering team documented how structured branch names reduced ambiguity in their deployment pipeline. Branches named inconsistently triggered the wrong environments, which caused production deployments from branches that were still in review. Standardizing on release/ for production-bound branches fixed that.
A git workflow without documented naming rules is one contributor away from chaos. Write it down in the contributing guide. Put it in the PR template. Make it impossible to miss.
How to Create a Branch in GitHub Using the GitHub CLI
The GitHub CLI (gh) is a separate tool from Git. It is GitHub-aware from the start, meaning it understands repositories, pull requests, issues, and Actions without you providing context manually on every command.
GitHub CLI supports over 25 commands and more than 200 subcommands, covering most GitHub workflows directly from the terminal (GitHub CLI documentation).
Setting up GitHub CLI
Install on macOS: brew install gh
Install on Windows: winget install GitHub.cli
Install on Linux: follow the instructions on the official GitHub CLI releases page.
After installation, run gh auth login to authenticate. The interactive prompt walks you through OAuth or a token-based login. Once done, gh knows which GitHub account and repositories to work with.
How gh branch creation differs from git
gh does not have a direct gh branch create command (as of 2024). Branch creation still uses git switch -c or git checkout -b. Where gh actually shines is the surrounding workflow.
Key difference from raw Git: gh is remote-aware by default. It knows your repository context without you specifying origin on every command.
Using gh issue develop to create a branch from an issue
This is where gh genuinely saves time. Instead of going to the browser to create an issue-linked branch, run:
gh issue develop 42 --checkout
GitHub creates the branch tied to issue #42, names it automatically based on the issue title (e.g., 42-fix-login-redirect), and checks it out locally in one step.
- Branch is linked to the issue automatically
- No browser required
- Upstream tracking is set on creation
For teams using GitHub CLI in their daily workflow, this command replaces 4-5 manual steps.
gh vs. raw git commands: when to use each
Use raw git for: branch creation, commits, rebasing, stashing, anything version-control-specific.
Use gh for: pull requests, issue-linked branches, checking CI status, merging PRs, and anything that involves the GitHub platform itself.
The two tools complement each other. Trying to do everything in gh is limiting. Trying to do GitHub-specific tasks in raw git means extra steps every time. A good source control management workflow uses both.
How to Manage Branch Protections After Creating a Branch

Branch protection rules define what can and cannot happen to a branch in a GitHub repository. They run at merge time, not at branch creation time, but they are set up before a branch ever comes in for review.
According to Hutte’s Git-based development data, 78% of organizations enforce branch protection to avoid force-push disasters. For teams on GitHub Team or Enterprise plans, rulesets extend this across multiple repositories at once.
Setting up branch protection in repository settings
Go to your repository on GitHub. Click Settings, then Branches in the left sidebar. Under “Branch protection rules,” click “Add rule.”
Enter the branch name pattern. Using main protects only the main branch. Using release/ covers all release branches matching that prefix.
The 4 most commonly used protection settings:
- Require pull request reviews: at least 1 approving review before merge
- Require status checks: CI must pass before the branch can merge
- Restrict force pushes: prevents rewriting branch history
- Block deletions: the branch cannot be deleted while the rule is active
Rulesets vs. branch protection rules
GitHub introduced rulesets as a more scalable alternative to per-branch protection rules. Multiple rulesets can apply to the same branch at once, and they layer together rather than overriding each other.
Branch protection rules: one rule per branch, first-created takes priority when rules conflict.
Rulesets: multiple rulesets stack, most restrictive version of any rule wins.
Rulesets are the better choice for organizations managing dozens or hundreds of repositories. Stripe and other large engineering organizations use organization-level rulesets to enforce code review requirements across all repositories without configuring each one manually.
How protection rules affect newly created branches
A newly created branch is unprotected by default. Protection only applies if the branch matches a rule’s name pattern.
A branch named release/v3.1.0 is immediately covered by any rule with the pattern release/. A branch named feature/new-ui is not, unless a rule explicitly targets feature/ or all branches with .
This matters for teams using continuous integration pipelines. If your CI requires status checks before merge, and a newly created branch matches the protection pattern, contributors cannot merge it until the checks pass. Build that expectation into your onboarding docs so new team members do not spend an hour debugging why their PR is blocked.
How to Delete a Branch in GitHub After Merging

Branch deletion is the last step in the branch lifecycle. Skipping it is one of the most common reasons repositories get cluttered. GitHub marks branches as stale after 3 months of inactivity, but teams should not wait that long.
58% of developers have accidentally deleted a branch or commits, according to Hutte’s data. GitHub keeps deleted branches recoverable for a period, which makes cleanup less risky than most people assume.
Deleting a branch from the GitHub UI after a PR merges
After a pull request merges, GitHub shows a “Delete branch” button directly on the PR page.
One click. The remote branch is gone. The PR remains accessible in the repository’s closed PRs list with the full commit history intact.
To automate this for every PR, go to Settings in your repository and enable “Automatically delete head branches.” Every merged PR branch gets deleted immediately without any manual action.
Deleting branches from the command line
There are 2 separate delete commands because local and remote branches are independent.
Delete local branch:
git branch -d <branch-name>
Delete remote branch:
git push origin --delete <branch-name>
The -d flag is safe. It refuses to delete a branch that has not been fully merged. Use -D only when you are certain you want to force-delete an unmerged branch.
Also worth running periodically: git remote prune origin. This removes local references to remote branches that no longer exist on GitHub. It does not delete anything on the remote, but it keeps your local branch list clean.
How to restore a deleted branch
Deleted branches are recoverable in GitHub for a limited time after deletion.
- Go to the closed pull request that the branch was associated with
- Click “Restore branch” at the bottom of the PR page
- The branch is recreated at the same commit it was at when deleted
If there is no associated pull request, use git log and git reflog locally to find the commit hash, then recreate the branch from that hash. 65% of developers have successfully recovered lost commits using git reflog, according to Hutte’s data.
Why stale branches create problems
A repository with hundreds of undeleted branches is not just messy. It slows down git fetch and git pull because Git has to reconcile more remote references on every network operation.
It also creates real confusion. A branch named fix/payment-bug sitting undeleted for 6 months gives no signal about whether that fix was shipped, abandoned, or superseded. The codebase history becomes harder to read.
The rule most teams land on: delete the remote branch when the PR merges, and delete the local branch the next time you switch away from it. Keep the cleanup cost near zero by doing it immediately, not in quarterly cleanup sprints.
FAQ on How To Create A Branch In GitHub
How do I create a new branch in GitHub without using the terminal?
Go to your repository on GitHub.com. Click the branch switcher dropdown, type a new branch name, and select “Create branch.” The branch is created on the remote instantly. No Git installation or terminal access required.
What is the git command to create and switch to a new branch at the same time?
Run git checkout -b or the newer git switch -c . Both create the branch and switch to it in one step. git switch -c is the preferred syntax in Git 2.23 and later.
How do I push a local branch to GitHub for the first time?
Run git push -u origin . The -u flag sets the upstream tracking relationship, so future git push and git pull commands work without specifying the remote and branch name every time.
How do I create a branch from a specific commit in Git?
Run git branch to create the branch without switching. Add -b to switch immediately. Use git log –oneline first to find the correct commit hash before branching.
Can I create a branch directly from a GitHub Issue?
Yes. Open the issue, find the Development section in the right sidebar, and click “Create a branch.” GitHub names it automatically using the issue number and title, and links the branch to the issue for project tracking.
What is the difference between a local branch and a remote branch?
A local branch exists only on your machine until you push it. A remote branch lives on GitHub. They stay independent until you run git push or git pull to sync changes between them.
How do I create a branch using the GitHub CLI?
Use gh issue develop –checkout to create a branch tied to a GitHub Issue directly from the terminal. For a plain branch, use standard git switch -c. GitHub CLI handles the remote linking automatically.
How do I rename a branch in GitHub after creating it?
Locally, run git branch -m . Then push the renamed branch and delete the old remote branch. You can also rename a branch in GitHub directly from the repository’s branch settings page.
How do I delete a branch in GitHub after merging a pull request?
Click “Delete branch” on the merged pull request page. To automate this, enable “Automatically delete head branches” in repository settings. Locally, run git branch -d to remove it from your machine.
How do I see all branches in a GitHub repository?
On GitHub.com, click the branch switcher dropdown and select “View all branches.” In the terminal, run git branch for local branches or git branch -r to list all remote branches tracked from origin.
Conclusion
This conclusion is for an article presenting every practical method to create a branch in GitHub, from the web interface to the command line, GitHub Desktop, and the GitHub CLI.
Each approach fits a different context. The git switch -c command suits daily terminal workflows. Issue-linked branches keep your commit history traceable. Branch protection rules and consistent naming conventions* keep the entire team aligned.
Branching is the foundation of every clean pull request, every safe hotfix, and every parallel feature built without breaking the default branch.
Pick the method that fits your workflow, document your naming rules, and enable automatic branch deletion after merging. Those three habits alone will keep your git flow clean for the long run.

- Google Play Account Suspended: What to Do - October 5, 2026
- How to Plan a Successful Data Migration Without Disrupting Business Operations - October 5, 2026
- How to Turn On Dark Mode in Notepad++ (Built-In, No Plugin) - October 3, 2026