Google rejected 1.75 million apps from the Play Store in 2025 alone. Knowing how to publish an app on Google Play the right way is the difference between going live and getting stuck in a rejection loop.
The process has changed a lot over the past two years. Stricter developer verification, mandatory closed testing for personal accounts, and the Android App Bundle requirement have all raised the bar. A quick upload and “submit” doesn’t cut it anymore.
This guide walks through every step, from creating your Google Play Console developer account to monitoring Android Vitals after launch. Account setup, app signing, content ratings, store listing optimization, testing tracks, the review process, staged rollouts, and post-launch monitoring are all covered.
What Is Google Play App Publishing?

Google Play app publishing is the process of submitting, reviewing, and distributing an Android application through Google Play Console. It covers everything from setting up a developer account to getting your app live in front of billions of users.
The distinction between publishing a new app and updating an existing one matters more than most people think. New apps go through stricter review. Updates usually clear faster, sometimes within hours.
Since August 2021, Google Play requires all new apps to use the Android App Bundle (AAB) format instead of the older APK. AAB lets Google generate device-specific APKs through a system called Dynamic Delivery, which cuts download sizes by an average of 15% compared to universal APKs (Google).
Android holds roughly 71.4% of the global mobile OS market share (Statista, 2025). That reach is why Google Play remains the default distribution channel for Android development projects.
Google Play Store fees start at a one-time $25 registration. Compare that to Apple’s $99 annual fee. The barrier to entry is low, but the review process has gotten tighter.
Google blocked 1.75 million apps from publishing in 2025 for policy violations (Google Security Blog, 2026). They banned over 80,000 developer accounts in the same period. The platform runs more than 10,000 safety checks on every submitted app.
Typical timeline from account creation to a live listing? Plan for 3 to 5 weeks if you’re using a new personal developer account, because of the mandatory closed testing period. Organization accounts can move faster since they skip certain testing gates.
How to Create a Google Play Developer Account

You need a Google account first. Any Gmail address works. From there, head to Google Play Console and register as a developer.
The registration fee is $25, paid once. You won’t be charged again.
Identity verification is where things slow down. Google introduced stricter developer verification requirements in 2023, then expanded them through 2024 and 2025. All developers, both personal and organization accounts, must verify their legal name, address, and contact details. If Google can’t verify your information, your apps risk removal.
Phone number and email verification happen during signup. Google sends a code, you confirm it. Straightforward.
But the real verification headache comes later, especially for organization accounts that require a D-U-N-S number. Getting one from Dun & Bradstreet can take up to 30 business days if your organization doesn’t already have one listed.
According to Google’s 2025 ecosystem safety report, these verification steps have “significantly reduced” pathways for bad actors. The tradeoff is more friction for legitimate developers during setup.
Personal Developer Account vs. Organization Account
This choice affects your publishing workflow more than you’d expect.
| Feature | Personal Account | Organization Account |
|---|---|---|
| Registration fee | $25 | $25 |
| D-U-N-S number | Not required | Required |
| Closed testing gate | 12 testers, 14 days | Not required |
| Verification docs | Government ID | Business documents |
| Store listing display | Individual name | Organization name |
Personal accounts are for solo developers and freelancers. The catch: new personal accounts created after November 2023 must complete a closed test with at least 12 testers opted-in for 14 consecutive days before they can apply for production access. Google reduced this from 20 testers in December 2024, but the 14-day requirement stayed.
Organization accounts skip the closed testing gate entirely. They need a D-U-N-S number and business verification documents instead. If you’re publishing for a company, studio, or agency, this is the route. Your store listing shows your organization name, which builds more trust with users.
One thing Google doesn’t let you do: migrate a personal account to an organization account. If you pick wrong, you’ll need to create a new Google Play developer account from scratch.
Google Play Console Setup and App Creation

Once your developer account is live, you create a new app inside Google Play Console. This is where you define the fundamentals that shape your entire listing.
Four decisions you make upfront:
- App name (can be changed later)
- Default language
- Whether it’s an app or a game
- Free or paid
The free vs. paid decision is permanent. You can switch a paid app to free, but you cannot switch a free app to paid. Ever. Took me a while to realize how many developers get burned by this, especially those who launch free with plans to monetize later through a paywall. Consider your app pricing models carefully before you click.
Content declarations come next. Google asks whether your app contains ads, what category it belongs to, and who the target audience is. Apps directed at children trigger additional compliance requirements under the Families Policy.
Store Listing Setup
Your store listing is the public face of your app. Google requires a privacy policy URL before you can publish. Skip it and your submission gets rejected automatically. Missing privacy policies are the number one rejection cause, according to multiple developer reports from 2025.
Here’s what you need for the listing:
- Short description: 80 characters max
- Full description: 4,000 characters max
- App icon: 512 x 512 px, PNG format
- Feature graphic: 1024 x 500 px
- Screenshots: minimum 2 per device type, following Google Play Store screenshot size requirements
The quality of your screenshots and feature graphic directly affects conversion rates. According to the Google Play Store ranking algorithm, install velocity influences search positioning. Better visuals lead to more installs, which improve your ranking. It compounds.
How to Prepare an Android App Bundle for Upload

Google Play requires Android App Bundle (AAB) format for all new apps. APK uploads are still accepted for updates to existing apps, but AAB is the standard going forward.
An AAB isn’t an installable file. It’s a publishing format. You upload the bundle, Google generates optimized APKs for each user’s device through Dynamic Delivery. Users get smaller downloads because they only receive assets that match their screen density, CPU architecture, and language.
Over 1 million apps and games on Google Play currently publish as AABs (Google).
Generating a Signed AAB
In Android Studio, go to Build > Generate Signed Bundle / APK and select Android App Bundle. You’ll need your keystore file to sign the bundle.
If you’re building from the command line, run ./gradlew bundleRelease and find the output at app/build/outputs/bundle/release.
The version code and version name matter here. Version code is an integer that must increment with every upload. Version name is the user-facing string like “1.0.3” that shows on your store listing. Following semantic versioning conventions keeps things clean as your codebase grows.
Play App Signing
Play App Signing is mandatory for all new apps. When you enroll, Google manages your app signing key in their secure infrastructure. You keep an upload key to sign bundles before uploading them to Play Console.
Two keys are involved:
- Upload key: You create and control this. It proves the upload came from you.
- App signing key: Google generates and manages this. It signs the final APKs delivered to users.
This setup protects against key loss, which used to be a real problem. Lose your signing key before Play App Signing, and you couldn’t push updates to your app. Period. You’d have to publish a brand new listing and lose all your reviews, ratings, and install history.
R8 (the successor to ProGuard) handles code shrinking and obfuscation during the build process. Misconfigured R8 rules are a common reason uploads fail or apps crash after release. Check your mapping files and test the release build on a real device before uploading. A solid build pipeline catches these issues early.
Content Rating Questionnaire

Every app on Google Play needs a content rating. No exceptions. Google doesn’t allow unrated apps on the store.
Ratings come through the International Age Rating Coalition (IARC), which has been handling Google Play ratings since 2015. You fill out a questionnaire in Play Console, and the system generates ratings from multiple regional authorities based on your answers.
How the IARC Questionnaire Works
The questionnaire asks about your app’s treatment of violence, language, sexual content, gambling, drug references, and user interactions. Your answers determine content ratings across regional systems like ESRB (North America), PEGI (Europe), USK (Germany), ClassInd (Brazil), and GRAC (South Korea).
One app can receive different ratings in different territories. A game rated “Everyone 10+” by ESRB might get a “PEGI 7” rating in Europe. That’s normal. Each rating authority applies its own logic.
The process is free and ratings are issued instantly after you submit. But accuracy counts. If a rating authority reviews your app and finds that the content doesn’t match your questionnaire responses, they can override your rating. Misrepresenting content can trigger a rejection or app removal.
When to Re-rate Your App
You must retake the questionnaire if an app update introduces content that changes how the questionnaire should be answered. Added a chat feature? Included user-generated content? Added in-app purchases? Those are all triggers.
The Google Play age ratings page covers the full breakdown of how each regional system maps to specific content types.
App Pricing, Distribution, and Country Targeting
As of January 2025, about 97% of Android apps on Google Play are free (Statista). Only 3% are paid.
That stat tells you where the money actually comes from: ads, in-app purchases, and subscriptions. Google Play generated $49.2 billion in consumer spending in 2025, a 13% increase over the previous year (Business of Apps). And $31 billion of that came from games alone.
Free vs. Paid Apps
You can change a paid app to free. You cannot change a free app to paid. This is a one-way door.
Most developers go free and monetize through Google Play Billing, which handles in-app purchases and subscription management. The average monthly subscription price for mobile apps sits around $10.20, with yearly plans averaging $49.60 (Business of Apps).
Fitness apps charge the highest subscription prices at roughly $15/month. Education apps come in second.
Country and Region Selection
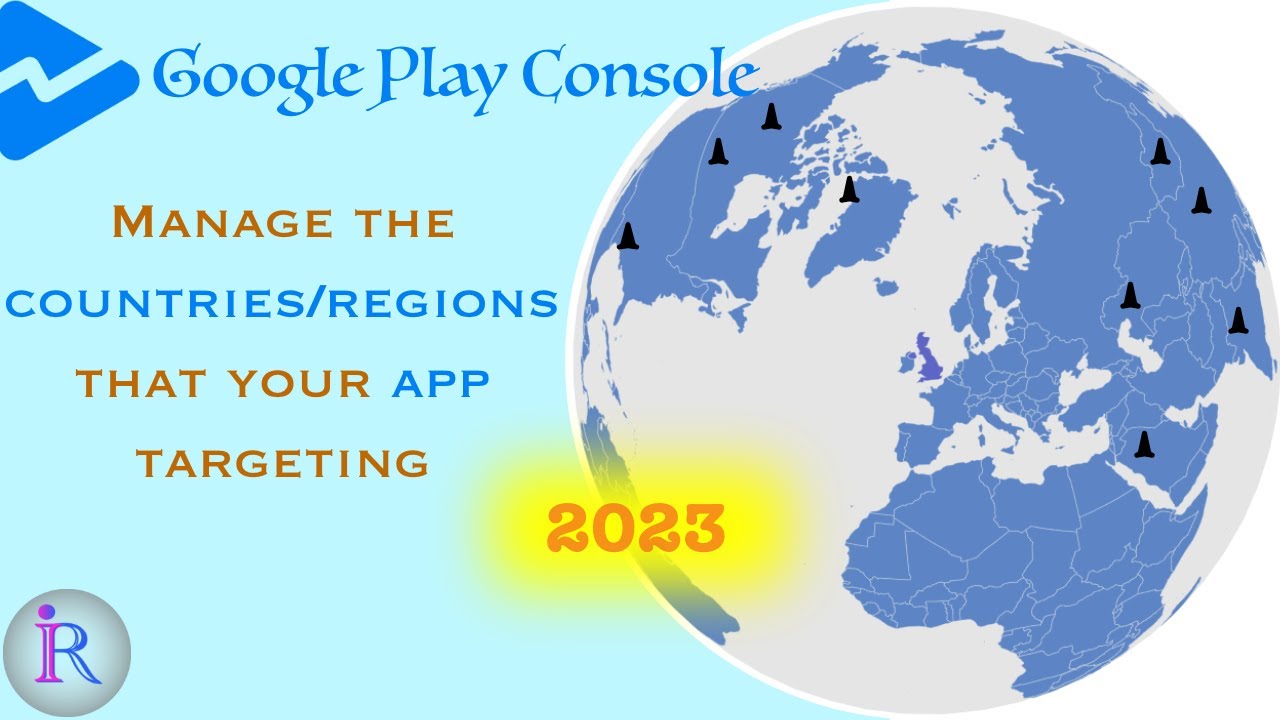
Google Play lets you pick exactly which countries and regions your app is available in. You can target all 180+ supported countries or select specific markets.
In countries like India, Indonesia, Brazil, and Mexico, over 90% of app downloads come from Google Play (Statista). If your app targets emerging markets, Android distribution is where your users are.
Device targeting is separate from country targeting. You can choose to distribute on phones, tablets, Wear OS devices, Android TV, and ChromeOS. Each device type has its own requirements for screenshots and sometimes additional technical constraints. Think about your mobile application development goals and where your users actually are before selecting every available option.
The overall app lifecycle doesn’t end at launch. Your distribution and pricing decisions set the foundation for how you’ll grow, monetize, and update the app over time.
Google Play Store Listing Optimization
Your store listing is a sales page. Treat it like one.
The average conversion rate on US Google Play in 2024 was 27.3% (App Radar). That means roughly 7 out of 10 people who view your listing leave without installing. The difference between a mediocre listing and a well-optimized one can shift that number dramatically.
ASOMobile research from 2025 shows that about 90% of users don’t scroll past the third screenshot. Your first three images decide whether your app gets downloaded or skipped.
Title, Short Description, and Full Description
Title: 30-character limit. Put your most relevant keyword here because the title carries the most weight for search indexing on Google Play.
Short description: 80 characters. This appears below screenshots on your listing page and affects both keyword indexing and conversion rate.
Full description: 4,000 characters. Most users won’t read it, but Google indexes every word. Write it for both humans who scroll and the ranking algorithm that scans it.
Spotify does a solid job with this. Their title is just “Spotify: Music and Podcasts,” which immediately communicates what the app does while using high-value search terms.
Visual Assets That Convert
Well-designed screenshots can lift page conversion by 20 to 35% (ASOMobile, 2025). One developer documented a jump from 14% to 30% conversion rate after redesigning screenshots alone.
Here’s what Google requires:
- Minimum 2 screenshots per supported device type
- Feature graphic at 1024 x 500 px
- Optional video trailer (YouTube link)
Google Play Console includes A/B testing through Store Listing Experiments. Use it. Test one element at a time (icon, first screenshot, short description) and let data guide decisions instead of gut instinct.
Localized Listings
Google Play supports localized store listings for multiple languages and regions. You can create entirely different descriptions, screenshots, and even feature graphics per market.
Localization goes deeper than translation. Color preferences, information density, and even screenshot layout expectations vary by region. A listing that converts well in the US might underperform in Japan or Brazil without cultural adaptation.
Think of your listing as part of the broader app deployment strategy, not an afterthought you fill in at the end.
Testing Tracks Before Production Release

Google Play Console offers three testing tracks. Using them isn’t optional if you want a stable launch (and if you have a new personal account, the closed track is literally required).
| Track | Max Testers | Review Required | Production Gate |
|---|---|---|---|
| Internal | 100 | No | No |
| Closed | Unlimited | Yes | Yes (personal accounts) |
| Open | Unlimited | Yes | No |
Internal testing gets builds to your own team fast. No Google review, no waiting. Great for QA during active development.
Closed testing is where most of the pre-launch work happens. You control who gets access through email lists or Google Groups. Google reviews the build before testers can access it.
Open testing is a public beta. Anyone can opt in through Google Play. Your test listing becomes visible on the store. Only available after you have production access.
Running a proper software testing lifecycle before going live catches the crashes and policy violations that would otherwise trigger a rejection. 28% of apps on Google Play are updated weekly, while 72% update monthly (TekRevol, 2026). The developers who test properly ship with more confidence.
How to Set Up a Closed Test
For new personal accounts, this is the mandatory gate. You need 12 testers opted in for 14 consecutive days before you can even apply for production access (Google Play Console Help).
Step by step:
- Go to Testing > Closed testing in Play Console
- Create an email list with at least 12 Gmail addresses
- Upload your AAB to the closed testing track
- Wait for Google to review (typically 3 to 5 days)
- Share the opt-in link with testers after approval
Testers must remain opted in for the full 14 days. If someone drops out midway, you may fall below the threshold and need to restart. Recruit a few extra (15 to 20) to build a buffer.
If you can’t find enough reliable testers, a closed testing service such as PrimeTestLab can supply 12 to 25 real testers who stay opted in for the full 14 days.
Google Play App Review Process

Google reviews every app before it goes live. Every update too. The process combines automated safety checks with human evaluation.
Google Play runs more than 10,000 safety checks on each app before and after publication (Google Security Blog, 2026). In 2025, the platform rejected 1.75 million apps for policy violations and banned over 80,000 developer accounts.
Review Timelines
Average review time in 2025 sits between 1 and 3 days for most apps (BE-DEV). Standard apps with clean submissions sometimes clear in under 24 hours.
What takes longer:
- Fintech and health apps (3 to 5 days, deeper compliance checks)
- Apps targeting children (Families Policy review)
- First submissions from new accounts
Google’s documentation states reviews can take up to 7 days or longer in some cases. Making changes to your listing while your app is under review can restart the process. Don’t touch anything once you submit.
Common Rejection Reasons
Missing privacy policy: The single most common cause of rejection. Every app needs a working privacy policy URL linked in Play Console and inside the app itself.
Excessive permissions: Google blocked 255,000 apps from gaining access to sensitive user data in 2025. If your flashlight app asks for contact list access, expect a rejection.
Data safety section errors: Since 2022, Google requires all apps to declare what data they collect and how they use it. Inaccurate declarations trigger rejections.
Metadata policy violations: Misleading titles, keyword stuffing in descriptions, or screenshots that don’t reflect actual app functionality.
Google uses a strike system. Repeated violations stack up, and enough strikes will get your developer account permanently suspended. Maintaining software compliance isn’t a one-time task.
How to Roll Out a Production Release
You’ve tested. You’ve passed review. Now it’s time to go live.
Google Play gives you two options: staged rollout or full rollout. Almost every experienced developer picks staged. Google itself recommends it.
Staged Rollout vs. Full Rollout
A staged rollout sends your app to a percentage of users first. You manually increase the percentage over time as you confirm stability.
Typical progression: Start at 1%, then 5%, 10%, 20%, 50%, and finally 100%. Monitor crash rates and ANR rates at each stage before bumping up.
Full rollout pushes to everyone immediately. Fine for critical hotfixes. Risky for feature releases.
The advantage of staged rollouts? If something breaks at 1%, you can halt the release. Only 1% of your users are affected. Discovering a crash at 100% is a different kind of problem entirely. This mirrors the logic behind canary deployment strategies used in broader software development.
Promoting from Testing to Production
If your app is already on a testing track, you can promote it directly to production without uploading again. Go to the testing track in Play Console, click “Promote release,” and select Production.
The build still goes through a review before it reaches users. Plan for 1 to 3 days of additional review time after promoting.
Release Notes
Release notes appear on your listing and in users’ update notifications. Keep them short, specific, and honest about what changed.
Skip vague lines like “bug fixes and performance improvements.” Users appreciate knowing what actually changed, and detailed release notes correlate with better update adoption. Good software documentation habits extend to user-facing notes too.
Post-Launch Monitoring in Google Play Console
Publishing is step one. What happens in the first 48 hours after launch determines whether you keep climbing or start sliding.
Play Console gives you a real-time dashboard with crash reports, ANR data, install metrics, and user feedback. Ignore it at your own risk.
Android Vitals
Android Vitals is Google’s built-in performance monitoring system. Your core vitals directly affect your app’s visibility on Google Play.
Bad behavior thresholds that trigger reduced visibility:
| Metric | Overall Threshold | Per-Device Threshold |
|---|---|---|
| User-perceived crash rate | 1.09% | 8% |
| User-perceived ANR rate | 0.47% | 8% |
Exceed the overall threshold, and Google may reduce your app’s discoverability across all devices. Exceed the per-device threshold on a specific phone model, and users on that device may see a warning on your store listing.
Play evaluates these metrics on a rolling 28-day average. Fix crashes fast, and the numbers recover. Let them linger, and your rankings drop. App Radar documented a case where a spike in ANR rates caused immediate keyword ranking losses that only recovered after the underlying bugs were fixed.
Ratings, Reviews, and Acquisition Reports
By June 2025, only about 234,000 apps on Google Play had achieved a 4.0-star rating or higher (Appinventiv). That’s a small fraction of the 1.58 million apps on the platform. High ratings are rare and worth protecting.
Respond to negative reviews quickly. Google surfaces developer responses alongside reviews, and a thoughtful reply can sometimes lead a user to update their rating.
To make this manageable at scale, centralize Play Store feedback in a single inbox, auto-tag by topic/sentiment, and generate reply drafts with AI-powered review management. Set alerts for critical keywords, route tasks to the right teammate, and summarize recurring issues for sprint planning. Track response SLAs and see how replies affect star ratings over time, so your team can manage app reviews with ease while keeping vitals and rankings healthy.
Acquisition reports show where your installs are coming from: organic search, browse, referral, or paid campaigns. Use this data to figure out what’s actually working and what’s wasting budget.
Managing App Updates

Updates follow the same upload, review, and rollout process as your initial release. Use staged rollouts for updates too, especially when shipping new features.
Version management matters. Increment your version code with every upload. Keep your software release cycle predictable so users know when to expect improvements.
Firebase Test Lab runs pre-launch reports automatically when you upload a build to any track. It tests your app across a range of physical and virtual devices, catching compatibility issues before real users hit them. Pair this with defect tracking in your development workflow and you’ll catch most issues before they reach production.
The post-deployment maintenance phase is where most apps either grow or die. The developers who monitor, iterate, and respond to data are the ones whose apps stick around.
FAQ on How To Publish An App On Google Play
How much does it cost to publish an app on Google Play?
The registration fee is a one-time $25 payment. No annual renewal. Google takes a 15% commission on the first $1 million in annual revenue from in-app purchases and subscriptions, then 30% after that.
How long does it take to get an app approved on Google Play?
Most apps clear review in 1 to 3 days. New accounts or apps in sensitive categories like finance or health may take up to 7 days. Avoid editing your listing during review, as changes can restart the process.
Can I publish an app on Google Play for free?
The app itself can be free to download. You still need to pay the $25 developer account fee. About 97% of Android apps on the Play Store are free, monetizing through ads, in-app purchases, or subscriptions instead.
What format does Google Play require for app uploads?
Google Play requires the Android App Bundle (AAB) format for all new apps since August 2021. APK uploads are no longer accepted for new submissions. AAB lets Google generate optimized, device-specific APKs through Dynamic Delivery.
Do I need a business account to publish on Google Play?
No. Personal accounts work fine. But new personal accounts must complete a closed test with 12 testers for 14 days before publishing. Organization accounts skip this requirement, though they need a D-U-N-S number for verification.
What is the closed testing requirement for new developers?
New personal developer accounts created after November 2023 must run a closed test with at least 12 opted-in testers for 14 consecutive days. This gate must be cleared before you can apply for production access in Play Console.
Can I publish an app built with cross-platform frameworks?
Yes. Apps built with Flutter, React Native, or other cross-platform app development frameworks can be published on Google Play. The framework doesn’t matter as long as the output is a signed Android App Bundle.
What happens if my app gets rejected by Google Play?
Google sends a notification explaining the policy violation. You fix the issue and resubmit. Repeated violations accumulate strikes on your developer account. Too many strikes can lead to a permanent account suspension.
Do I need a privacy policy to publish on Google Play?
Yes. Every app requires a privacy policy URL linked in Play Console and accessible within the app. You also need to complete the Data Safety section, declaring what user data your app collects and how it’s handled.
How do I update my app after publishing on Google Play?
Upload a new AAB with an incremented version code through Play Console. Updates go through the same review process. Use staged rollouts to release to a small percentage of users first, then increase gradually after confirming stability.
Conclusion
Learning how to publish an app on Google Play is straightforward once you understand the sequence. Developer account registration, Play App Signing, the IARC content rating questionnaire, store listing setup, closed testing, and production rollout all follow a clear path.
The process has gotten stricter. Google’s identity verification requirements, the 12-tester closed testing gate, and the mandatory Data Safety section all exist to filter out low-quality submissions. Meeting these standards takes more upfront effort, but it means less competition from junk apps once you’re live.
Focus on your Android Vitals after launch. Keep crash and ANR rates below the bad behavior thresholds. Respond to user reviews. Ship updates through staged rollouts instead of pushing to 100% on day one.
The developers who treat publishing as part of their mobile app development process, not a checkbox at the end, are the ones who build apps that last.

- MongoDB Cheat Sheet - October 20, 2026
- Adding AI Video Generation to a Software Product: Architecture, Cost Guardrails and QA - October 20, 2026
- Show Hidden Characters, Spaces, and Line Endings in Notepad++ - October 19, 2026