Git is the backbone of modern software development, used by 93.87% of developers worldwide as of 2025. But the command line stops a lot of people cold.
GitHub Desktop changes that. It gives you a clean, visual interface for the full Git workflow: cloning repositories, committing changes, managing branches, resolving merge conflicts, and opening pull requests.
This guide covers how to use GitHub Desktop from installation through to your first pull request. You will learn:
- How to install, authenticate, and configure GitHub Desktop
- How to clone, create, and manage repositories
- How to commit, push, pull, and handle merge conflicts
- How to work with branches, history, and keyboard shortcuts
No prior CLI experience needed.
What Is GitHub Desktop?
GitHub Desktop is a free, open-source GUI client for Git, built and maintained by GitHub, available on macOS 10.15+ and Windows 10+.
It removes the need for terminal commands during most common Git operations. Instead of typing git add, git commit, or git push, you click buttons in a visual interface that mirrors the same underlying Git workflow.
As of early 2025, over 150 million developers use GitHub worldwide, with more than 5 billion contributions recorded across repositories in 2024 (GitHub Octoverse 2025). GitHub Desktop targets the portion of that base that prefers a visual approach to source control over the command line.
How GitHub Desktop differs from Git CLI and GitHub.com
Three tools, three distinct roles. They overlap but are not interchangeable.
| Tool | What It Is | Primary Use |
|---|---|---|
| Git CLI | Command-line version control system | Full Git control, scripting, and CI/CD workflows |
| GitHub.com | Web-based repository hosting platform | Remote repository management, pull requests, and code review |
| GitHub Desktop | Local graphical Git client | Commit, branch, push, and pull operations without terminal commands |
Git adoption reached 93.87% of developers globally as of 2025 (Stack Overflow Developer Survey). GitHub Desktop gives non-CLI users a path into that ecosystem without learning terminal syntax first.
What GitHub Desktop does NOT do
GitHub Desktop covers roughly 80% of daily Git tasks. It does not expose every Git feature.
- No interactive rebase (
git rebase -i) - No built-in merge conflict editor (you open conflicts in your configured code editor)
- No Linux support
- No support for custom Git hooks from within the UI
For advanced operations, pairing GitHub Desktop with a code editor like VS Code or dropping into the terminal handles the gap.
How Do You Install and Set Up GitHub Desktop?

Download GitHub Desktop from desktop.github.com. The installer is available for macOS 10.15 (Catalina) and above, and Windows 10 64-bit and above. No Git installation is required beforehand since GitHub Desktop bundles its own Git binary.
GitHub Desktop is rated the best free Git GUI option across independent 2024-2025 reviews, with consistent mentions for zero-cost entry and GitHub integration (The Software Scout, 2025).
How to sign in and authenticate
Sign-in options:
- GitHub.com account via OAuth (browser-based flow)
- GitHub Enterprise Server via OAuth or personal access token
- GitHub Desktop 3.x supports both accounts simultaneously
After signing in, GitHub Desktop syncs your remote repositories automatically. No SSH key setup is required for HTTPS-based authentication through the OAuth flow.
How to configure Git identity in GitHub Desktop
Go to Preferences (Mac: Cmd+, / Windows: Ctrl+,) > Git. Set your name and email address there.
This writes directly to your global .gitconfig file. Every commit made from GitHub Desktop will carry this identity in the commit metadata. Getting this right before the first commit saves a lot of history-rewriting headaches later.
How to set your default editor and shell
Preferences > Integrations lets you set a default external editor and default shell.
Supported editors include: Visual Studio Code, Sublime Text, Atom, JetBrains IDEs, Notepad++, and others. The selected editor is what GitHub Desktop opens when you click “Open in editor” on a repository or a conflicted file.
For the shell, options include Command Prompt, PowerShell, Git Bash, and Windows Subsystem for Linux on Windows. On macOS, Terminal and iTerm2 are both available.
How to connect GitHub Desktop to GitHub Enterprise
Go to File > Options (Windows) or GitHub Desktop > Preferences (Mac) > Accounts > Sign in to GitHub Enterprise Server. Enter your instance URL and authenticate.
Enterprise authentication supports both browser-based OAuth and personal access tokens with the repo scope. Once connected, Enterprise repositories appear alongside your GitHub.com repositories in the repository list.
How Do You Clone a Repository in GitHub Desktop?

GitHub Desktop provides 3 methods to clone a repository: via GitHub.com directly, via a URL from any Git host, or by opening an existing local folder. Each covers a different starting point in the workflow.
Cloning creates a full local copy of the remote Git repository, including the complete commit history, all branches, and all tags. It is not just a file download.
Clone from GitHub.com
File > Clone Repository > GitHub.com tab lists every repository your account can access. Select one, choose a local path, click Clone.
This method pulls the repository over HTTPS using your stored OAuth credentials. No manual authentication step required. For large repositories with deep histories, the initial clone can take a few minutes depending on connection speed.
Clone from a URL
File > Clone Repository > URL tab accepts any valid Git remote URL. This works for GitLab, Bitbucket, Azure Repos, or any self-hosted Git server, not just GitHub.com.
Paste the HTTPS or SSH URL, set the destination folder, click Clone. For SSH URLs, your SSH key must already be configured in your system’s SSH agent since GitHub Desktop does not manage SSH keys directly.
Add an existing local repository
Use case: You already have a Git repository on disk that GitHub Desktop does not know about.
File > Add Local Repository > select the folder. GitHub Desktop checks for a .git directory and registers the repository in its sidebar. From that point, all push, pull, commit, and branch operations are available through the GUI.
If the folder contains no .git directory, GitHub Desktop offers to initialize a new repository there instead.
How Do You Create a New Repository in GitHub Desktop?

File > New Repository opens a dialog with 5 fields: name, description, local path, Initialize with README toggle, .gitignore template selector, and license selector. Fill these in and click “Create Repository.”
The repository exists locally only until you publish it. Nothing is sent to GitHub.com at creation time.
Choosing a .gitignore template and license
GitHub Desktop bundles the same .gitignore templates available on GitHub.com at repository creation time.
Common templates by tech stack:
- Node, Python, Ruby, Java, Swift, Kotlin, Go, C++
- “None” option for manual setup
The license dropdown includes MIT, Apache 2.0, GPL v3, and others. Both settings write the relevant files directly into the repository at init. Skipping these and adding them manually later is fine but takes extra steps.
How to publish a new repository to GitHub.com
After creating the repository locally, the top toolbar shows a “Publish repository” button. Click it to push the local repository to GitHub.com.
The publish dialog asks for the repository name (pre-filled), description, and visibility: public or private. For personal accounts, all options are free. Once published, the remote origin is set automatically and the Publish button becomes the standard Push/Pull/Fetch control.
How Do You Commit Changes in GitHub Desktop?

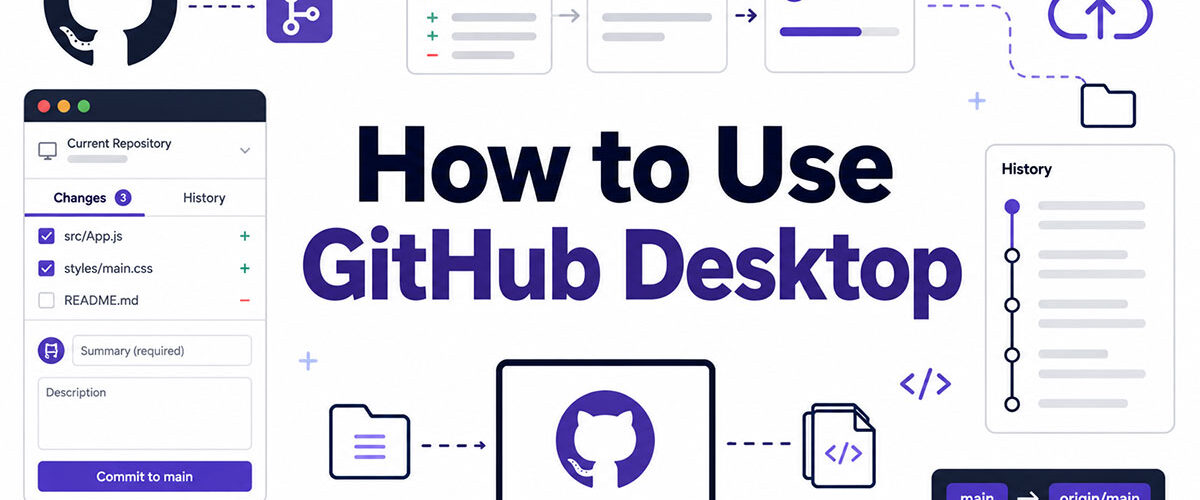
The Changes tab shows every modified, added, renamed, or deleted file in the working directory since the last commit. Each file has a checkbox. Checked files go into the next commit. Unchecked files stay unstaged.
According to Hutte.io Git-Based Development Statistics 2024, developers commit an average of 5 times per day. GitHub Desktop’s staging model is designed to keep that loop fast.
How to stage specific files or lines
File-level staging: check or uncheck the filename checkbox in the Changes tab.
Line-level staging: click on any file to open the diff view. Right-click on specific lines or hunks and select “Include in commit.” This lets you commit part of a file’s changes while leaving the rest unstaged. It is the GUI equivalent of <code>git add -p</code>.
Writing a commit message
The commit summary field accepts up to 72 characters (the standard Git convention). The description field below it is optional and accepts multi-line text for longer explanations.
Both fields are at the bottom of the Changes panel. Fill in the summary, optionally add a description, then click “Commit to [branch-name]”. The commit is written to the local repository only. Nothing is pushed to the remote yet.
How to amend a commit in GitHub Desktop
Right-click the most recent commit in the History tab and select “Amend commit.” This reopens the commit with its current message and staged changes for editing.
Amend works only on the most recent local commit. If the commit has already been pushed to a remote branch, amending rewrites history and will require a force push. GitHub Desktop warns about this before proceeding.
How Do You Create and Switch Branches in GitHub Desktop?
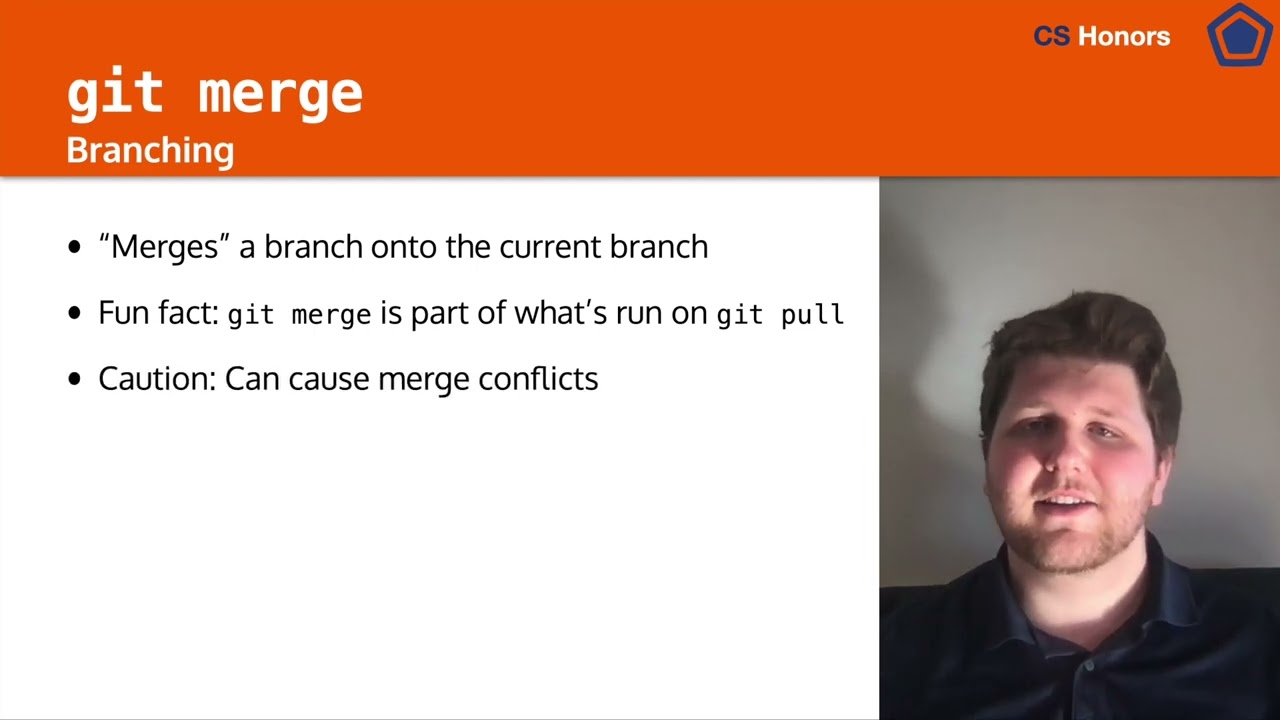
The Current Branch dropdown in the top toolbar lists all local and remote branches for the active repository. Clicking it opens the branch selector. From there you can create a new branch, switch to an existing one, or check out a pull request branch.
Understanding the branch and Git workflow model here matters. Switching branches rewrites the working directory to reflect that branch’s state. Uncommitted changes either travel with you or need to be stashed first.
How to create a new branch
In the Current Branch dropdown, click “New Branch.” Name the branch and choose whether to base it on the current branch or on a specific remote branch.
| Base Option | What It Does | When to Use It |
|---|---|---|
| Current branch | Creates a new branch from the current HEAD | Feature work based on the active development state |
Default branch (main/master) | Creates a branch from the repository’s default branch | Hotfixes or fresh feature branches from a clean baseline |
The new branch is local until you click “Publish branch” to push it to the remote.
Switching between branches
Select any branch name from the Current Branch dropdown. GitHub Desktop updates the working directory immediately.
If there are uncommitted changes in the working directory, GitHub Desktop offers 2 choices: bring the changes to the new branch, or leave them on the current branch (which requires stashing, handled automatically). I’ve seen developers lose work by not paying attention to this dialog. Read it before clicking.
How Do You Push, Pull, and Fetch in GitHub Desktop?

The top toolbar button handles all 3 remote sync operations. Its label and behavior change based on the current repository state: Fetch origin when the local and remote are in sync, Pull origin when the remote has commits the local branch does not, and Push origin when local commits exist that have not been sent to the remote yet.
What fetch, pull, and push each do
Fetch origin checks the remote for new commits, branches, and tags without modifying any local files. It updates GitHub Desktop’s awareness of what exists on the remote. No merge happens. This is always safe to run.
Pull origin downloads remote commits and merges them into the current local branch. If the remote branch has diverged from the local branch, Git performs a merge. If conflicts exist, GitHub Desktop surfaces them in the Changes tab with a warning icon.
Push origin uploads all local commits on the current branch to the remote. The button only appears after at least 1 local commit exists that the remote does not have. After pushing, the local and remote histories align.
Automatic fetch and how to control it
GitHub Desktop fetches the remote automatically every 5 minutes by default. This keeps the branch indicator in the toolbar current without manual action.
There is no toggle in the UI to disable automatic fetch entirely. The only way to stop it is to close GitHub Desktop or disconnect from the network. For teams working on shared branches, this behavior is useful. For offline or low-bandwidth work, it can cause repeated timeout dialogs. Worth knowing before you end up debugging unexpected network calls.
Pushing a branch for the first time
New local branches do not have a remote counterpart until you explicitly publish them. After creating a branch and making commits, the toolbar button reads “Publish branch” instead of “Push origin.”
Clicking “Publish branch” creates the branch on GitHub.com and sets the upstream tracking reference. After that first push, the button switches to the standard Push/Pull/Fetch behavior. This distinction trips up people who expect local branches to sync automatically. They do not.
How Do You Handle Merge Conflicts in GitHub Desktop?
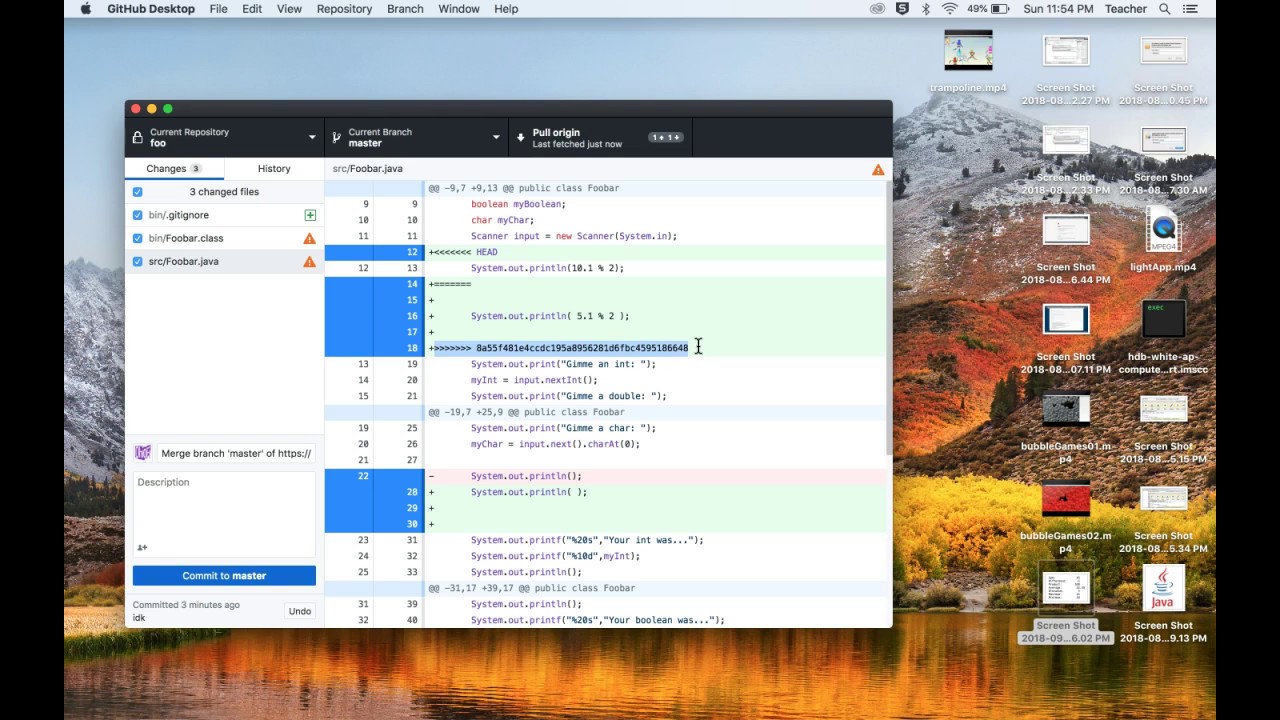
Merge conflicts happen when 2 branches change the same lines of the same file, and Git cannot decide which version to keep. GitHub Desktop surfaces these in the Changes tab with a yellow warning icon after a failed merge or pull.
Knowing how to resolve conflicts in GitHub is a core skill for any collaborative workflow. GitHub Desktop gives you 3 resolution paths depending on the conflict type.
How conflict markers work
When GitHub Desktop cannot auto-merge a file, it writes conflict markers directly into the file content.
<<<<<<< HEADmarks the start of your local version=======separates the 2 competing versions>>>>>>> branch-namemarks the end of the incoming version
Every marker must be removed from the file before the conflict is resolved. Leaving even one <<< marker in place breaks compilation in most languages.
The 3 resolution methods in GitHub Desktop
Method 1 – Open in editor: Sends the conflicted file to your configured default editor (VS Code, for example). Resolve the markers manually, save, return to GitHub Desktop.
Method 2 – Use one version: Right-click the conflicted file in the Changes tab. Select “Use the modified file” to keep the incoming version, or “Use the original file” to discard it entirely. No editor needed.
Method 3 – Abort the merge: Click “Abort merge” in the Changes tab to cancel the operation. The branch resets to its pre-merge state. Use this when you need to coordinate with a teammate before resolving.
After all conflicts show a resolved status, the “Continue merge” button becomes active. Click it to create the merge commit.
What GitHub Desktop cannot resolve
GitHub Desktop’s built-in tools handle line-change conflicts. They do not handle 3 specific conflict types.
- Binary file conflicts (images, compiled files)
- File deletion conflicts (one branch deleted, one modified)
- Conflicts too complex for the simple accept/reject UI
These require the terminal or a dedicated merge tool. GitHub Desktop flags them clearly and opens the path to the configured editor automatically.
How Do You Open a Pull Request from GitHub Desktop?

After pushing a branch that contains commits ahead of the base branch, the “Create Pull Request” button appears in the top toolbar. Clicking it opens GitHub.com in the browser with the PR form pre-filled.
The pull request title, description, reviewers, and labels are all written on GitHub.com, not inside GitHub Desktop. GitHub Desktop handles the branch prep. GitHub.com handles the PR management.
What the Pull Requests tab does
GitHub Desktop 3.x shows open pull requests for the current repository directly in the branch selector.
- Pull Requests tab lists all open PRs on the current repository
- Clicking a PR checks out its branch locally with one click
- CI status indicators (pass/fail) are visible next to each PR
Over 90% of Fortune 100 companies use GitHub for development workflows (GitHub, 2024), and pull requests are the primary code review process mechanism across most of those teams.
Checking out a pull request branch locally
Teams using GitHub Desktop regularly pull PR branches locally to test changes before approving.
In the Current Branch dropdown, switch to the Pull Requests tab, find the PR, and click it. GitHub Desktop fetches the branch and checks it out. You can run the code, test it, then return to your own branch without any terminal commands. Took me a while to realize this was even in the app. It looks like just a filter on the branch list, not a full feature.
How to create a pull request in GitHub
Full flow from GitHub Desktop:
- Commit your changes on a feature branch
- Push the branch (Publish branch or Push origin)
- Click “Create Pull Request” in the toolbar
- Complete the PR form on GitHub.com
- Assign reviewers and submit
The full guide on how to create a pull request in GitHub covers reviewer assignment, draft PRs, and auto-merge settings on the GitHub.com side.
How Do You View Repository History in GitHub Desktop?
The History tab lists every commit on the current branch in reverse chronological order. Clicking any commit shows the full file diff for that commit: green lines for additions, red lines for removals.
Developers commit an average of 5 times per day (Hutte.io, 2024). Over weeks and months, the History tab becomes the primary tool for understanding why a codebase changed the way it did.
Right-click actions on commits
Right-clicking any commit in the History tab opens a context menu with 4 key operations.
| Action | What It Does | When to Use It |
|---|---|---|
| Revert commit | Creates a new commit that reverses the selected commit | Undo a pushed commit without rewriting Git history |
| Cherry-pick commit | Applies the selected commit onto another branch | Reuse a bug fix or change across multiple branches |
| Create tag | Adds a Git tag pointing to the commit | Mark releases, versions, or important milestones |
| Compare on GitHub | Opens the commit comparison view on GitHub.com | Share or review a specific commit with teammates |
Cherry-picking in GitHub Desktop works by drag-and-drop: drag the commit from the History tab directly onto the target branch in the Current Branch dropdown (GitHub Docs, 2024).
Searching commit history
A search field sits at the top of the History tab. It filters commits by message text in real time.
Useful search patterns:
- Author name to find commits by a specific team member
- Ticket number (e.g., “JIRA-1042”) if your team includes them in commit messages
- Filename to find commits that touched a specific file
This is a lightweight alternative to <code>git log –grep</code> for everyday history lookups.
How Do You Use GitHub Desktop with Multiple Accounts or Repositories?
GitHub Desktop 3.x supports simultaneous sign-in for both a GitHub.com account and a GitHub Enterprise Server account. Switching between them does not require signing out. Both appear in the same repository list.
GitHub has over 150 million developers as of 2025, a significant portion of whom work across both personal GitHub.com accounts and employer-managed GitHub Enterprise instances (GitHub Octoverse, 2025).
Managing multiple repositories
All repositories you add appear in the left sidebar list.
Add menu gives 3 options: clone a new repository, create a new repository, or add an existing local folder. Switching between repositories is instant. The Changes, History, and Branch views all update to reflect whichever repository is selected.
Removing a repository from GitHub Desktop removes it from the sidebar list only. The local folder and its entire Git history stay on disk untouched.
Using GitHub Desktop with GitHub Enterprise
Enterprise repositories behave identically to GitHub.com repositories inside GitHub Desktop. Same commit, push, pull, and branch workflow. Same UI.
The practical difference is authentication: Enterprise uses a personal access token or browser-based OAuth tied to your organization’s identity provider. After the initial sign-in, GitHub Desktop stores the credential and handles token refresh silently. Your organization’s SSO policy applies here, so if your token expires or your SSO session lapses, GitHub Desktop will prompt you to re-authenticate before pushing.
What Are the Keyboard Shortcuts in GitHub Desktop?
GitHub Desktop has 72 documented keyboard shortcuts across 3 categories: Branches, Repositories, and Site-wide (HotkeyCheatSheet, 2025). Learning the 6 most-used ones covers the majority of daily tasks.
Research from DEV Community shows developers who move keyboard-to-mouse per action lose roughly 1.5 seconds per switch, with 200+ switches per day adding up to 5 minutes of friction daily. Shortcuts eliminate that entirely.
Most-used GitHub Desktop shortcuts
| Action | Windows | macOS |
|---|---|---|
| Commit changes | Ctrl + Enter | Cmd + Enter |
| New branch | Ctrl + Shift + N | Cmd + Shift + N |
| Push / Pull / Fetch | Ctrl + P | Cmd + P |
| Open in terminal | `Ctrl + “ | `Cmd + “ |
| Open in editor | Ctrl + Shift + A | Cmd + Shift + A |
The full reference list is available inside the app at Help > Keyboard Shortcuts. Worth a quick read once. You will find 2 or 3 shortcuts in there that become permanent muscle memory within a week.
The git cheat sheet connection
Every GitHub Desktop action maps to an underlying Git command. If you want to understand what the GUI is doing, the git cheat sheet is the fastest reference for matching button clicks to terminal equivalents.
This is particularly useful when you outgrow GitHub Desktop for a specific operation and need to drop into the terminal. You already know the concept. You just need the syntax.
GitHub Desktop’s “Open in terminal” shortcut (Ctrl+ / Cmd+) opens a shell session at the repository root. From there, any Git command runs in the context of the current repository without navigating to the folder manually.
FAQ on How To Use GitHub Desktop
Is GitHub Desktop free to use?
Yes. GitHub Desktop is completely free and open source. It works with free GitHub.com accounts and paid GitHub Enterprise plans. There are no hidden tiers or feature paywalls inside the app itself.
Does GitHub Desktop work without the command line?
For most daily tasks, yes. Committing, pushing, pulling, branching, and opening pull requests all work without touching a terminal. Advanced operations like interactive rebase still require the Git CLI.
What is the difference between Git and GitHub Desktop?
Git is the version control system. GitHub Desktop is a GUI client that runs Git operations on your behalf. Same underlying commands, no terminal required.
Can GitHub Desktop connect to GitLab or Bitbucket?
Yes, via URL-based cloning. Paste any valid HTTPS or SSH remote URL into the Clone dialog. GitHub Desktop is not limited to GitHub.com repositories, though its pull request features only work with GitHub.com and GitHub Enterprise.
How do I undo a commit in GitHub Desktop?
Open the History tab, right-click the most recent commit, and select “Revert commit.” This creates a new commit that undoes the changes. For unpushed commits only, use “Amend commit” instead to rewrite it cleanly.
What happens to uncommitted changes when I switch branches?
GitHub Desktop prompts you to either bring the changes to the new branch or leave them behind. Leaving them triggers an automatic stash. Read the dialog carefully before clicking. Ignoring it is how work gets lost.
How do I sync my local repository with GitHub.com?
Use the Fetch origin button to check for remote changes, then Pull to download them. Push sends your local commits up. The toolbar button label changes based on what action is needed at that moment.
Can I use GitHub Desktop with multiple GitHub accounts?
Yes. GitHub Desktop 3.x supports simultaneous sign-in for a GitHub.com account and a GitHub Enterprise Server account. Both appear in the same repository list without needing to sign out and back in.
How do I resolve a merge conflict in GitHub Desktop?
Conflicted files appear in the Changes tab with a warning icon. Right-click to accept one version outright, or open the file in your editor to resolve manually. Once all conflicts are cleared, click “Continue merge.”
Does GitHub Desktop support GitHub Actions or CI status?
Partially. GitHub Desktop shows CI pass/fail indicators next to pull requests in the branch selector. It does not let you configure or trigger GitHub Actions workflows directly. That still happens on GitHub.com.
Conclusion
This conclusion is for an article presenting how to use GitHub Desktop across the full version control workflow, from cloning your first repository to resolving merge conflicts and opening pull requests.
The commit history, branch creation, and remote sync features cover what most developers need daily. No terminal required.
GitHub Desktop sits at the practical middle ground between source control management tools built for power users and the raw Git command line.
Pair it with a solid understanding of Git flow and your team’s branching strategy, and the collaborative development workflow becomes significantly less friction-heavy.
The tool is free. The repository sync, staging area, and pull request integration work out of the box. Start with one repository and build from there.

- How to Run a React App in VS Code Step by Step - October 23, 2026
- Transactional or marketing email: which messages your app should send itself - October 23, 2026
- How Software Teams Write SOPs for Releases and Deployments - October 22, 2026