A messy development environment kills productivity. Learning how to setup PyCharm correctly from the start saves hours of debugging configuration issues later.
PyCharm is JetBrains’ Python IDE trusted by millions of developers worldwide. It handles everything from simple scripts to complex Django and Flask projects.
This guide walks you through the complete installation and configuration process.
You’ll learn how to:
- Download and install PyCharm on Windows, macOS, or Linux
- Configure your Python interpreter and virtual environment
- Customize editor settings for your workflow
- Verify your setup works correctly
Total time required: 15-25 minutes. No prior IDE experience needed.
How to Setup PyCharm

Setting up PyCharm is the process of downloading, installing, and configuring JetBrains’ Python IDE for your development environment.
Developers need this when starting Python projects, switching from another code editor, or building a proper software development workflow.
This guide covers 7 steps requiring 15-25 minutes and basic computer skills.
Prerequisites
Before you begin, confirm these requirements:
- PyCharm 2024.3 (Community or Professional Edition)
- Windows 11, macOS Sonoma 14+, or Ubuntu 22.04+
- 8 GB RAM minimum; 16 GB recommended
- 3.5 GB free disk space
- Python 3.8 or newer installed
- Administrator or root access
Time estimate: 15-25 minutes.
Skill level: Beginner.
Step One: How Do You Download PyCharm from JetBrains?
Visit jetbrains.com/pycharm/download, select your operating system tab, choose Community Edition (free) or Professional Edition (paid), then click the download button to get the installer file.
Action
Navigate to the official JetBrains website.
Click the tab matching your OS: Windows, macOS, or Linux.
Community Edition works for most Python projects. Professional adds Django support, database tools, and scientific mode.
The download starts automatically. File size ranges from 400 MB to 600 MB depending on your platform.
Purpose
Downloading from the official source guarantees you get the latest stable version without bundled malware or outdated builds.
Unlike generic web development IDEs, PyCharm is built specifically for Python workflows.
Step Two: How Do You Install PyCharm on Your Operating System?
Double-click the downloaded installer, follow the installation wizard prompts, select your destination folder, enable desktop shortcut and PATH variable options, then restart your system for changes to take effect.
Windows Installation
Run the .exe file as administrator.
Choose installation location (default: C:Program FilesJetBrainsPyCharm).
Check these boxes:
- Create Desktop Shortcut (64-bit)
- Add “Open Folder as Project”
- Add launchers dir to PATH
- Associate .py files with PyCharm
For detailed Windows instructions, see how to install PyCharm on Windows.
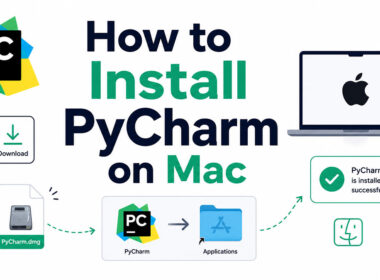
macOS Installation
Open the .dmg file.
Drag PyCharm to Applications folder.
First launch triggers Gatekeeper; click “Open” to confirm.
Linux Installation
Extract the .tar.gz to /opt/ directory.
Run bin/pycharm.sh from terminal.
Create desktop entry through Tools > Create Desktop Entry.
Check the guide on installing PyCharm on Linux for distribution-specific steps.
Purpose
Proper installation ensures terminal integration, file associations, and system-wide accessibility.
PATH configuration lets you launch PyCharm from command line with “pycharm” command.
Step Three: Where Do You Configure Initial PyCharm Settings?
On first launch, select “Do not import settings” for fresh install, choose your UI theme (Darcula or IntelliJ Light), review default plugins, then activate your license or start the free evaluation period.
Import Settings Dialog
Select “Do not import settings” unless migrating from previous PyCharm version.
Importing old settings can carry over outdated configurations.
Theme Selection
Customize > Color Theme offers two main options:
- Darcula: Dark theme; reduces eye strain during long sessions
- IntelliJ Light: Classic light theme; better for bright environments
You can change this anytime through Settings > Appearance.
Plugin Review
PyCharm bundles plugins for Git integration, markdown support, and terminal access.
Disable plugins you won’t use. Fewer active plugins means faster IDE startup and lower memory usage.
The plugin marketplace offers thousands of extensions for frameworks, languages, and tools.
License Activation
Professional Edition requires JetBrains account login or license key.
Community Edition is completely free. No activation needed.
“Evaluate for free” gives 30-day Professional trial.
Purpose
Initial configuration shapes your entire development workflow.
Getting familiar with PyCharm’s settings early prevents frustration later when you need to change defaults mid-project.
Step Four: How Do You Create Your First Python Project?
Click “New Project” on the welcome screen, enter your project path, select “Pure Python” as project type, then click Create to generate the folder structure.
Action
Welcome screen > New Project button.
Set location field to your preferred path (e.g., C:UsersYourNamePycharmProjectsMyProject).
Left panel options:
- Pure Python: Standard Python projects
- Django: Web framework projects
- Flask: Lightweight web apps
- Scientific: NumPy, pandas, Jupyter integration
For step-by-step walkthrough, see how to create a new project in PyCharm.
Purpose
Project structure keeps code organized. PyCharm tracks dependencies, run configurations, and version control per project.
Step Five: How Do You Configure the Python Interpreter?
Open File > Settings > Project > Python Interpreter (Ctrl+Alt+S), click Add Interpreter dropdown, select Add Local Interpreter, choose System Interpreter tab, browse to your Python executable, then click Apply and OK.
Action
Navigate to Settings (Ctrl+Alt+S) > Project: [YourProject] > Python Interpreter.
Click gear icon > Add.
Interpreter options:
- System Interpreter: Uses globally installed Python (e.g., C:Python312python.exe)
- Virtualenv: Creates isolated environment per project
- Conda: Uses Anaconda distribution
- Pipenv/Poetry: Modern dependency management
Detailed guide: how to add Python interpreter in PyCharm.
Need project isolation? Check how to create virtual environment in PyCharm.
Purpose
The Python interpreter determines which Python version runs your code and which packages are available.
Wrong interpreter = import errors, version mismatches, missing modules.
Step Six: How Do You Verify Your PyCharm Setup Works?
Create a new Python file in your project, type a simple print statement, run the file using Shift+F10, and confirm output appears in the Run tool window.
Action
Project panel (Alt+1) > Right-click project folder > New > Python File.
Name it testsetup.py.
Type this code:
“ print("PyCharm setup complete") `
Run: Shift+F10 or Run menu > Run ‘testsetup’.
Expected output in Run window: PyCharm setup complete
More details: how to run code in PyCharm.
Purpose
Verification confirms interpreter configuration, project structure, and run configuration work correctly.
Step Seven: Where Do You Customize Editor Preferences?
Access Settings > Editor to adjust font size, code style, auto-import behavior, and syntax highlighting; apply changes to match your workflow.
Font and Appearance
Settings > Editor > Font:
- Size: 14 (default 13 too small for most)
- Line spacing: 1.2
- Font family: JetBrains Mono (included)
Code Style
Settings > Editor > Code Style > Python:
- Tab size: 4 spaces
- Continuation indent: 8
- Hard wrap at: 120 columns
Auto Import
Settings > Editor > General > Auto Import:
- Enable “Add unambiguous imports on the fly”
- Enable “Optimize imports on the fly”
Learn the full interface: how to use PyCharm effectively.
Purpose
Editor preferences affect every line of code you write. Proper code style configuration enforces consistency across your projects.
Verification
Confirm your setup works correctly:
- Run Configuration dropdown (top-right) shows your Python file
- Tools > Python Console opens interactive REPL
- External Libraries visible in Project panel under interpreter
- Code completion triggers when typing import statements
- Linting highlights errors as you type
Test keyboard shortcuts: Ctrl+Space (completion), Ctrl+Q (documentation), Ctrl+B (go to definition).
Troubleshooting
Python Interpreter Not Detected
File > Settings > Project > Python Interpreter > Add Interpreter > System Interpreter.
Browse manually to python.exe location. Common paths: C:Python312python.exe or /usr/bin/python3.
If switching versions, see how to change Python version in PyCharm.
PyCharm Runs Slowly
Help > Change Memory Settings > Set heap size to 2048 MB minimum.
Disable unused plugins. Exclude large folders from indexing (Settings > Project Structure > Excluded).
Project Files Not Appearing
File > Invalidate Caches > Invalidate and Restart.
Check if folder is marked as Excluded in Project Structure settings.
No Python Interpreter Configured Warning
Click the warning link in editor. Select Add Interpreter > choose existing Python installation.
Package Installation Fails
Check pip is installed: how to install pip in PyCharm.
For adding libraries: how to install packages in PyCharm.
Next Steps
Your PyCharm setup is complete. Continue with these guides:
- How to debug in PyCharm for breakpoints and step-through execution
- How to connect PyCharm to GitHub for source control integration
- How to install NumPy in PyCharm for scientific computing
- How to install pandas in PyCharm for data analysis
- How to comment in PyCharm for code documentation shortcuts
For comparing alternatives: PyCharm vs Jupyter for notebooks, PyCharm vs Anaconda for data science workflows.
Keep your IDE current with how to update PyCharm.
FAQ on How To Setup Pycharm
What Are the System Requirements for PyCharm?
PyCharm requires 8 GB RAM minimum (16 GB recommended), 3.5 GB disk space, and a 64-bit operating system.
Supported platforms include Windows 10/11, macOS 10.15+, and Linux distributions with GLIBC 2.17+.
Is PyCharm Free to Use?
PyCharm Community Edition is completely free and open-source. Professional Edition requires a paid license but offers a 30-day trial.
Students and open-source contributors can apply for free Professional licenses through JetBrains.
How Long Does It Take to Setup PyCharm?
Complete setup takes 15-25 minutes. Download requires 5-10 minutes depending on connection speed.
Installation runs 3-5 minutes. Initial configuration and interpreter setup add another 5-10 minutes.
What Is the Difference Between PyCharm Community and Professional?
Community Edition handles pure Python projects. Professional adds Django, Flask, database tools, remote interpreters, and scientific mode with Jupyter support.
For web development or data science, Professional delivers more value. Compare PyCharm vs IntelliJ IDEA for polyglot development.
Can I Use PyCharm Without Installing Python First?
Yes, but limited functionality. PyCharm can download Python during project creation.
Installing Python separately gives more control over versions and global packages. Multiple Python versions can coexist on one system.
How Do I Configure PyCharm for Django Projects?
Create new project > select Django template > specify project location and interpreter. PyCharm Professional auto-configures settings.py, templates folder, and run configurations.
Community Edition requires manual Django setup through terminal commands.
Why Is PyCharm Running Slowly After Installation?
Initial indexing causes temporary slowdown. Large projects take longer to index.
Increase heap memory via Help > Change Memory Settings to 2048 MB. Disable unused plugins and exclude nodemodules or virtual environment folders from indexing.
How Do I Add Libraries in PyCharm?
Settings > Project > Python Interpreter > click + button > search package name > Install.
Alternatively, use terminal (Alt+F12) with pip commands. Check how to install libraries in PyCharm for detailed steps.
Can I Import Settings From Another IDE?
PyCharm supports importing settings from previous PyCharm installations via File > Manage IDE Settings > Import Settings.
VS Code or Sublime Text settings require manual recreation. Keymaps can be switched to match familiar shortcuts.
How Do I Setup PyCharm for Remote Development?
Professional Edition supports SSH interpreters and Docker containers. Configure via Settings > Project > Python Interpreter > Add > SSH Interpreter.
Enter host credentials and remote Python path. Community Edition lacks remote interpreter support.
Conclusion
You now know how to setup PyCharm from download to first working project. The entire process takes under 30 minutes.
Your development environment is ready. Code completion works. The debugger is configured. Run configurations execute your scripts.
Next steps matter. Learn keyboard shortcuts to speed up your workflow. Explore plugin installation for Git integration, database tools, and framework support.
Configure unit testing frameworks like pytest early. Set up proper project structure before your codebase grows.
PyCharm handles everything from simple automation scripts to full applications built with Python.
Start coding. Build something. The best way to master any IDE is through actual projects.
Many of his resources are available on various design marketplaces and for free on Codepen.
Over the years, he's worked with a range of clients and contributed to design publications like Design Your Way, Designmodo, WebDesignerDepot, WPDean, Speckyboy, and Slider Revolution among others.
- How to Set Up Subscriptions on Google Play (Developer Guide) - July 12, 2026
- Why Work With a CMS Development Company for a Secure and Scalable Website? - July 12, 2026
- ADB Commands Cheat Sheet - July 11, 2026