PyCharm runs better on Linux than most developers expect. Fewer background processes, faster indexing, and native terminal integration make it the preferred setup for serious Python work.
Learning how to install PyCharm on Linux takes about 10 minutes using terminal commands, Snap, or Flatpak.
This guide walks you through system requirements, downloading the JetBrains IDE, extracting archives, and creating desktop entries for Ubuntu, Fedora, and Debian.
You’ll also find troubleshooting fixes for common installation errors.
By the end, your web development IDE will be ready for Python scripting, Django projects, or building apps with Python.
How to Install PyCharm on Linux

Installing PyCharm on Linux is the process of setting up JetBrains’ Python IDE on Ubuntu, Fedora, Debian, or other Linux distributions using terminal commands, package managers, or manual extraction.
Developers need this when building Python applications, working with Django web frameworks, or setting up a complete software development environment.
This guide covers 6 steps requiring 10-15 minutes and basic familiarity with the Linux terminal.
If you’re new to this IDE, start by understanding what PyCharm is before proceeding.
Prerequisites
Before running any terminal commands, verify you have:
- Linux distribution: Ubuntu 22.04/24.04, Fedora 39/40, Debian 12, or Arch Linux
- RAM: Minimum 4GB (8GB recommended for larger projects)
- Disk space: 3.5GB for installation files
- Access: sudo or root privileges
- Connection: Active internet for downloading packages
Time estimate: 10-15 minutes.
Skill level: Beginner to intermediate.
Step One: How Do You Verify System Requirements?
Check your system’s RAM and available disk space using the Linux terminal before downloading PyCharm. Run free -h for memory and df -h for storage. You should see at least 4GB RAM and 3.5GB free space.
Action
- Open Terminal: Press
Ctrl+Alt+T - Check RAM:
free -h - Check disk space:
df -h /home
Expected Result
The terminal displays your system resources in human-readable format.
Look for “available” memory exceeding 4GB and free space above 3.5GB in your home partition.
Purpose
PyCharm requires sufficient memory for code completion, syntax highlighting, and debugging tools. Insufficient resources cause crashes during Python script execution.
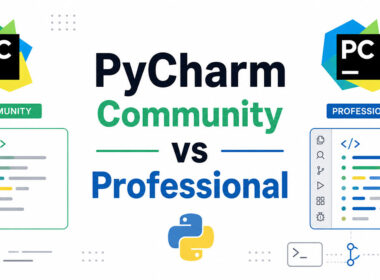
Step Two: How Do You Choose the Right PyCharm Edition?
Select between Community Edition (free, open-source) and Professional Edition (paid, full-featured) based on your project requirements. Community handles pure Python development. Professional adds web framework support, database tools, and scientific libraries.
Edition Comparison
- Community Edition: Python development, Git integration, code refactoring, virtual environment support
- Professional Edition: Django, Flask, database connections, Jupyter notebook integration, remote development
Most developers start with Community. It covers 90% of Python programming needs.
If you’re comparing options, see how PyCharm compares to Jupyter for data science workflows or check the differences between PyCharm and Anaconda for scientific computing.
Purpose
Choosing the wrong edition means either missing features you need or paying for tools you won’t use.
Step Three: How Do You Download PyCharm Using the Terminal?
Download the PyCharm tar.gz archive from JetBrains’ official website using wget or curl commands. The file saves to your Downloads directory. Always verify you’re downloading from jetbrains.com to avoid compromised packages.
Action
- Navigate to Downloads:
cd ~/Downloads - Download Community Edition:
wget https://download.jetbrains.com/python/pycharm-community-2024.1.tar.gz
- Or download using curl:
curl -O https://download.jetbrains.com/python/pycharm-community-2024.1.tar.gz
Expected Result
A file named pycharm-community-2024.1.tar.gz appears in your Downloads folder.
File size should be approximately 500-700MB depending on the version.
Alternative: Snap Package Manager
Skip manual download entirely with Snap:
sudo snap install pycharm-community --classic
This method handles installation, desktop entry creation, and automatic updates in one command. Perfect for Ubuntu users who prefer the Snapcraft ecosystem.
Alternative: Flatpak Installation
Fedora and other distributions support Flatpak from Flathub:
- Add Flathub:
flatpak remote-add --if-not-exists flathub https://flathub.org/repo/flathub.flatpakrepo - Install:
flatpak install flathub com.jetbrains.PyCharm-Community
Flatpak provides sandboxed applications with dependency isolation.
Purpose
Downloading from official sources prevents security risks. The JetBrains website always hosts the latest stable release with verified checksums.
Once installed, learn how to use PyCharm effectively or jump straight into setting up PyCharm for your first project.
Step Four: How Do You Extract the PyCharm Archive?
Extract the downloaded tar.gz file using the tar command and move it to the /opt directory, the standard location for third-party Linux applications. This keeps your system organized and separates PyCharm from OS-managed packages.
Action
- Extract archive:
tar -xzf pycharm-community-.tar.gz - Move to /opt:
sudo mv pycharm-community- /opt/pycharm - Verify extraction:
ls /opt/pycharm
Expected Result
The /opt/pycharm directory contains bin, lib, plugins, and license folders.
The bin folder holds the pycharm.sh shell script you’ll use to launch the IDE.
Purpose
Installing to /opt keeps PyCharm separate from apt or dnf managed software, preventing conflicts during system updates.
Step Five: How Do You Run PyCharm for the First Time?
Execute the pycharm.sh script from the bin directory to launch the setup wizard. First launch takes 30-60 seconds while PyCharm indexes system libraries and configures the Python interpreter.
Action
- Navigate to bin:
cd /opt/pycharm/bin - Set execute permission:
chmod +x pycharm.sh - Launch PyCharm:
./pycharm.sh
Expected Result
The JetBrains privacy policy dialog appears first.
Accept the terms, choose your UI theme (Darcula or Light), and the Welcome screen loads.
Initial Configuration
The setup wizard prompts you to:
- Import settings from previous installations (skip if fresh install)
- Select keymap scheme (VS Code, Eclipse, or default)
- Install featured plugins (Python Scientific, Docker, Markdown)
After setup, learn how to add a Python interpreter in PyCharm to start coding immediately.
Purpose
First launch creates ~/.config/JetBrains configuration files storing your preferences, recent projects, and plugin data.
Step Six: How Do You Create a Desktop Entry for PyCharm?
Create a desktop entry so PyCharm appears in your GNOME or KDE Plasma application menu. No more navigating to /opt/pycharm/bin every time you want to code.
Action
- Open PyCharm using terminal method from Step Five
- Navigate: Tools > Create Desktop Entry
- Check “Create entry for all users” (requires sudo password)
- Click OK
Expected Result
PyCharm icon appears in your application launcher.
Search “PyCharm” in GNOME Activities or KDE Application Menu to confirm.
Manual Desktop Entry
If the built-in tool fails, create the entry manually:
“ sudo nano /usr/share/applications/pycharm.desktop `
Add this content:
` [Desktop Entry] Type=Application Name=PyCharm Community Icon=/opt/pycharm/bin/pycharm.svg Exec=/opt/pycharm/bin/pycharm.sh Terminal=false Categories=Development;IDE; `
Save with Ctrl+O, exit with Ctrl+X.
Purpose
Desktop integration enables launching PyCharm like any native Linux application, improving your development workflow.
Verification: How Do You Confirm PyCharm Installed Correctly?
Test the installation by creating a simple Python project and running a script. A working installation shows code completion, syntax highlighting, and successful script execution in the integrated terminal.
Action
- Launch PyCharm from application menu
- Click “New Project”
- Set location: ~/PycharmProjects/test_project
- Select Python interpreter (system or virtualenv)
- Create file: main.py
- Write: print(“PyCharm installed successfully”)
- Run: Right-click > Run ‘main’
Expected Result
The Run tool window displays your output message without errors.
Code completion works when typing print (suggestions appear automatically).
For detailed guidance on running scripts, see how to run code in PyCharm.
Additional Checks
- Help > About: Displays version number (2024.1 or later)
- File > Settings > Python Interpreter: Shows detected Python 3.x
- VCS > Enable Version Control: Git integration works
Ready to expand your environment? Learn how to install packages in PyCharm or set up virtual environments in PyCharm for project isolation.
Troubleshooting
Issue: PyCharm Fails to Start with Java Error
Cause: Missing or incompatible Java Runtime Environment.
Solution: Install OpenJDK 17:
- Ubuntu/Debian: sudo apt install openjdk-17-jdk
- Fedora: sudo dnf install java-17-openjdk
- Arch Linux: sudo pacman -S jdk17-openjdk
Issue: Desktop Entry Not Appearing
Cause: Desktop database not refreshed after entry creation.
Solution: Run update-desktop-database ~/.local/share/applications or log out and back in.
Issue: Permission Denied When Running pycharm.sh
Cause: Execute permission not set on shell script.
Solution: chmod +x /opt/pycharm/bin/pycharm.sh
Issue: Snap Installation Fails
Cause: Snapd service not running or network connectivity problems.
Solution: Check service status with sudo systemctl status snapd and restart if needed: sudo systemctl restart snapd
Issue: Flatpak Installation Hangs
Cause: Flathub repository not properly configured.
Solution: Re-add the repository:
flatpak remote-add –if-not-exists flathub https://flathub.org/repo/flathub.flatpakrepo
Issue: Python Interpreter Not Detected
Cause: Python not installed or not in system PATH.
Solution: Install Python 3: sudo apt install python3 python3-pip python3-venv
Then configure the interpreter path manually in File > Settings > Project > Python Interpreter. For step-by-step guidance, check how to change Python version in PyCharm.
Next Steps
Your PyCharm installation is ready. Here’s what to do next:
- Install NumPy in PyCharm for numerical computing
- Install Pandas in PyCharm for data analysis
- Connect PyCharm to GitHub for source control
- Learn debugging in PyCharm for troubleshooting code
- Create a new project in PyCharm to start building
Need to install additional tools? See how to install libraries in PyCharm or install Pygame in PyCharm for game development.
Keep your IDE current by learning how to update PyCharm when new versions release.
FAQ on How To Install PyCharm On Linux
What is the easiest way to install PyCharm on Linux?
Use Snap with a single command: sudo snap install pycharm-community –classic. This method handles downloading, extraction, desktop entry creation, and automatic updates. Works on Ubuntu, Linux Mint, and any distribution with Snapd installed.
Is PyCharm free for Linux users?
Yes. PyCharm Community Edition is completely free and open-source under the Apache 2.0 license. It includes Python development tools, Git integration, and virtual environment support. Professional Edition requires a paid subscription for web framework and database features.
Which Linux distributions support PyCharm?
PyCharm runs on Ubuntu, Fedora, Debian, Arch Linux, Linux Mint, openSUSE, and most distributions with glibc 2.17 or later. JetBrains officially tests on Ubuntu LTS releases. Both GNOME and KDE Plasma desktop environments work without issues.
Do I need to install Java before PyCharm?
No. PyCharm bundles its own JetBrains Runtime (a modified OpenJDK). Manual Java installation is unnecessary unless you encounter startup errors. If problems occur, install OpenJDK 17 using your distribution’s package manager as a fallback.
What is the difference between Snap and Flatpak installation?
Snap integrates tighter with Ubuntu and provides automatic updates from Snapcraft. Flatpak from Flathub offers better sandboxing and works across more distributions. Both methods install PyCharm in isolated environments. Performance difference is negligible for most developers.
How much disk space does PyCharm need on Linux?
PyCharm requires 3.5GB for installation files. Plan for 5-8GB total including project indexes, caches, and plugins. The IDE creates configuration files in ~/.config/JetBrains and stores project data in ~/PycharmProjects by default.
Can I install PyCharm without sudo or root access?
Yes. Download the tar.gz archive and extract to your home directory: tar -xzf pycharm-.tar.gz -C ~/apps/. Run directly from ~/apps/pycharm/bin/pycharm.sh. You won't have system-wide desktop integration, but the IDE functions normally.
How do I update PyCharm installed manually on Linux?
PyCharm checks for updates automatically. Navigate to Help > Check for Updates. For manual installations, download the new version, extract to /opt/pycharm, and replace existing files. Snap and Flatpak handle updates through their package managers automatically.
Why does PyCharm fail to start after installation?
Common causes include missing execute permissions, Java runtime errors, or insufficient RAM. Run chmod +x pycharm.sh to fix permissions. Check free -h for available memory. Review ~/.cache/JetBrains/PyCharm/log/idea.log for specific error messages.
Should I choose PyCharm or another IDE for Linux Python development?
PyCharm offers the most complete Python experience with intelligent code completion, debugging tools, and refactoring. Compare PyCharm vs Spyder for scientific computing or check Sublime vs PyCharm for lightweight alternatives.
Conclusion
You now know how to install PyCharm on Linux using manual extraction, Snap, or Flatpak methods.
Each approach gets you the same result: a fully functional Python IDE with code completion, debugging tools, and Git integration.
The manual tar.gz method gives you control over installation location. Snap and Flatpak trade that control for automatic updates and simpler package management.
Your next steps depend on your workflow. Configure a virtualenv or Conda environment for project isolation. Install pip packages directly from the IDE’s built-in terminal.
Set up continuous integration if you’re working with a team.
Explore AI tools for developers to speed up coding.
PyCharm on Linux Mint, Arch Linux, or any distribution runs lighter than Windows installations. Less overhead means faster indexing and smoother performance during intensive debugging sessions.
Many of his resources are available on various design marketplaces and for free on Codepen.
Over the years, he's worked with a range of clients and contributed to design publications like Design Your Way, Designmodo, WebDesignerDepot, WPDean, Speckyboy, and Slider Revolution among others.
- How to Set Up Subscriptions on Google Play (Developer Guide) - July 12, 2026
- Why Work With a CMS Development Company for a Secure and Scalable Website? - July 12, 2026
- ADB Commands Cheat Sheet - July 11, 2026