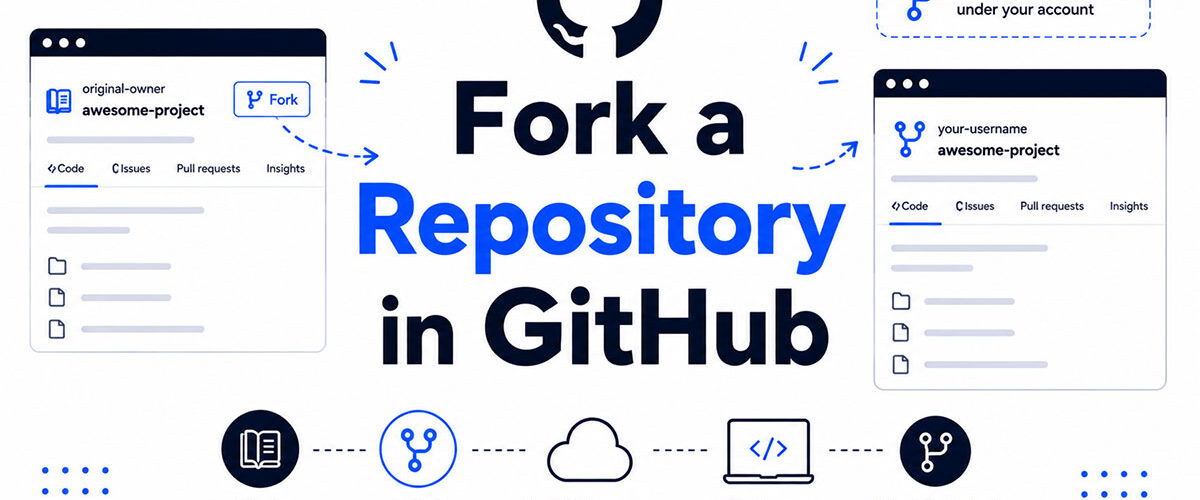
Every major open source contribution starts the same way: someone forks a repository.
Knowing how to fork a repository in GitHub is one of the most practical skills in any developer’s version control workflow. It gives you a personal copy of any public codebase, lets you experiment freely, and feeds directly into the pull request process that powers open source collaboration at scale.
This guide covers the full fork lifecycle, from the initial click to syncing with the upstream repository, cloning locally, contributing back, and cleaning up when you’re done.
No write access required. No prior contribution experience needed.
What Is a Fork in GitHub?

A GitHub fork is a personal copy of another user’s repository stored under your own GitHub account, independent from the original but maintaining a traceable connection to it. Forks are the backbone of open source contribution on the platform.
GitHub hosts over 180 million developers across more than 630 million repositories as of 2025 (GitHub Octoverse 2025). A significant portion of that activity runs through fork-based workflows. The platform recorded over 1 billion public contributions in 2025 alone.
When you fork a repository, GitHub creates a server-side copy that lives at your-username/repo-name. You own it. You control it. The original project continues untouched.
Forks are used for 3 main purposes:
- Contributing to open source projects you don’t have write access to
- Experimenting with a codebase without affecting the upstream repository
- Building an independent project on top of existing code
The fork relationship is visible on the GitHub repository page. It shows the upstream source and how many forks exist. GitHub’s first-contributions repo, for example, has over 101,000 forks, making it the most forked learning repository on the platform (GitHub Ranking, 2025).
How Does a Fork Differ From a Branch?
A branch lives inside the original repository. A fork lives in your account. That single distinction drives every other difference.
Branches are for contributors who already have write access. Forks are for everyone else.
| Feature | GitHub Fork | GitHub Branch |
|---|---|---|
| Location | Your GitHub account (separate copy of the repository) | Inside the original repository |
| Requires write access | No | Yes (typically) |
| Merges back via | Pull request from your fork | Pull request within the same repository |
| Best for | Open-source contributions, external collaborators | Internal team development workflows |
Open source projects like Linux, VS Code, and Flutter receive most external contributions through fork-based pull requests. This keeps the main branch protected while still accepting community input.
What Is the Difference Between a Fork and a Clone?

Fork and clone both create copies of a repository. They serve completely different purposes, and mixing them up is one of the most common mistakes new GitHub users make.
A fork is a server-side copy on GitHub. A clone is a local copy on your machine. One lives in the cloud; the other lives on your hard drive.
Fork vs Clone: Core Mechanics
Fork mechanics:
- Created via the GitHub web interface or GitHub CLI
- Lives under your GitHub account at
your-username/repo-name - Maintains a tracked relationship to the upstream (original) repository
- No
gitcommand performs a fork natively. It requires the GitHub platform or GitHub CLI
Clone mechanics:
- Created with
git clone <URL>in your terminal - Downloads the entire commit history to your local machine
- Sets the cloned URL as
originremote automatically - Works on any public repo or any repo you have read access to
When to Use Each One
The decision is simple: fork first if you don’t have write access to the original repository (most open source scenarios). Clone directly if you’re a collaborator with write access on a team project.
| Scenario | What to Do |
|---|---|
| Contributing to a public open source project | GitHub Fork, then clone your fork |
| Working on your own team’s private repo | Clone directly (you already have write access) |
| Experimenting with someone else’s code locally | Clone directly (no pull request needed) |
| Building a new product from an existing open source base | Fork (keeps upstream link for future updates) |
Most real-world open source workflows follow this order: fork on GitHub, clone your fork locally, make changes, push to your fork, open a pull request.
What Are the Requirements to Fork a Repository?
Forking a public repository on GitHub has almost no barrier to entry. A free GitHub account is all you need in most cases.
Here are the 5 prerequisites to check before forking:

- GitHub account – Free tier works. No paid plan required.
- Repository visibility – The source repo must be public, or you need explicit access to a private one.
- Browser or GitHub CLI – The web interface works for most users. GitHub CLI is available for terminal-based workflows.
- Organization permissions – Some GitHub organizations disable forking for private repositories. Check the org settings if the Fork button is missing.
- No write access needed – You never need permission from the repository owner to fork a public repo.
Private Repository Forking Rules

Private repos behave differently. You need at least read access (collaborator or org member) before GitHub allows a fork.
Organization admins can restrict forking entirely under Settings > Member privileges > Repository forking. If an org has disabled forking for private repositories, the Fork button simply does not appear, and the GitHub CLI command will return an error.
GitHub Enterprise adds another layer: enterprise-level policies can restrict whether members can fork repositories outside the organization. This is separate from the org-level setting.
How to Fork a Repository on GitHub Using the Web Interface
The web interface is the most common way to fork. The entire process takes under 30 seconds.
Forking Into a Personal Account
According to GitHub Octoverse 2025, developers created over 230 new repositories per minute throughout 2025, with fork-based workflows driving a large share of open source activity. Here is the exact process:
- Go to the repository page on
github.com - Click the Fork button in the top-right corner, next to Star and Watch
- GitHub opens a “Create a new fork” form
- The owner defaults to your account. Optionally rename the fork or add a description
- Click Create fork
GitHub redirects you to your fork immediately after creation. The page shows a notice: “forked from original-owner/repo-name” directly under the repository name.
One thing worth noting: forks copy the default branch only by default. If you need all branches, check the “Copy the DEFAULT branch only” checkbox option before confirming.
Forking Into a GitHub Organization
The flow is identical, with one extra step. On the “Create a new fork” form, the Owner dropdown lets you select between your personal account and any GitHub organization you belong to.
Key difference: Forking into an organization requires the organization’s fork policy to allow it. If the dropdown only shows your personal account, the org has restricted forking for that repository type.
Microsoft’s VS Code repository is forked into thousands of GitHub organizations. Teams use org-level forks to maintain internal customizations while still tracking upstream changes from the official VS Code project.
How to Fork a Repository Using GitHub CLI
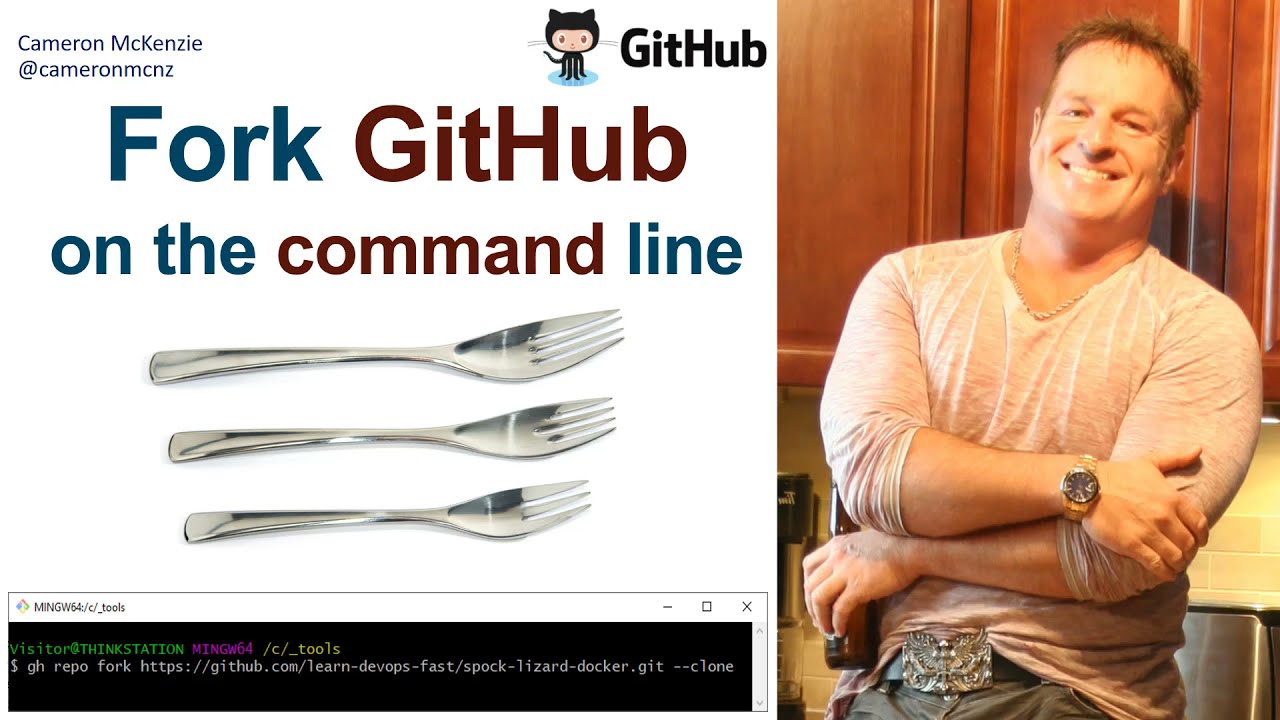
GitHub CLI reduces the fork-and-clone process to a single command. No browser switching, no copy-pasting URLs.
Monthly pull request merges on GitHub averaged 43.2 million in 2025, up 23% year-over-year (GitHub Octoverse 2025). Developers who work heavily in the terminal use GitHub CLI to keep that entire contribution cycle inside one environment.
Basic Fork Command
First, authenticate with gh auth login if you haven’t already. Then run:
gh repo fork OWNER/REPOGitHub CLI creates the fork under your account and asks if you want to clone it and add a remote. Answer Yes to both for the fastest setup.
Useful flags:
--clone– Clones the fork locally immediately after creation--remote– Adds the original repo as the upstream remote automatically--clone=false– Skips the clone prompt for a remote-only fork--remote-name– Sets a custom name for the new remote (defaults toorigin)
One-Command Fork and Clone
This is the command most experienced contributors use:
gh repo fork OWNER/REPO --clone=true --remote=trueIt does 3 things at once: creates the fork on GitHub, clones it to your current directory, and sets the original repository as the upstream remote. Running git remote -v afterward shows both origin (your fork) and upstream (the original repo) already configured.
The Rocky Linux documentation project, for example, recommends exactly this command in their official contribution guide for new contributors joining the project.
How to Clone Your Fork Locally

Forking creates the copy on GitHub. Cloning brings it to your machine where you can actually edit files. These are 2 separate steps.
Cloning via HTTPS
HTTPS is the simplest method for most users. No SSH key setup required.
Go to your forked repository page on GitHub, click the green Code button, and copy the HTTPS URL. Then run:
git clone https://github.com/YOUR-USERNAME/REPO-NAME.gitThis creates a local directory with the full commit history. The origin remote points to your fork by default. Confirm with git remote -v.
Cloning via SSH
SSH authentication is faster once set up and avoids entering credentials on every push.
Prerequisites: you need an SSH key generated locally and added to your GitHub account. Once that’s done:
git clone git@github.com:YOUR-USERNAME/REPO-NAME.gitThe cloned directory structure is identical to HTTPS. The difference is only in authentication method.
| Method | Best For | Setup Required |
|---|---|---|
| HTTPS | Quick start, occasional contributors | None (uses GitHub credentials or personal access token) |
| SSH | Regular contributors, CI/CD automation | SSH key generation + adding public key to GitHub account |
| GitHub CLI | Terminal-first developers | gh auth login |
After cloning, always verify remotes before making any changes. Run git remote -v and confirm origin points to your fork, not the original repo. Getting this wrong is a common source of failed pushes later.
How to Keep Your Fork in Sync With the Upstream Repository
Forks don’t update automatically. The upstream repository keeps moving while your fork stays frozen at the point you created it. Syncing before you start work prevents merge conflicts later.
GitHub introduced the “Sync fork” button in the web UI in 2021, making one-click syncing possible without the command line.
Syncing via the GitHub Web Interface
This is the fastest method for occasional contributors.
- Go to your forked repository on GitHub
- Look for the “Sync fork” dropdown near the top of the file list
- Click it and select Update branch
GitHub merges upstream changes into your fork’s default branch. If the upstream has commits your fork doesn’t, the button shows how many commits behind you are. If your fork has diverging commits, GitHub warns you before updating.
Syncing via Command Line
The command-line method gives more control, especially when rebasing is preferred over merging.
First, add the upstream remote (only needed once per local clone):
git remote add upstream https://github.com/ORIGINAL-OWNER/REPO-NAME.gitThen fetch and merge upstream changes:
git fetch upstream
git checkout main
git merge upstream/main
If you prefer a linear commit history, replace git merge upstream/main with git rebase upstream/main. Push the updated main branch back to your fork:
git push origin mainRebase vs merge: Rebase gives a cleaner history. Merge preserves the exact sequence of upstream changes. Most open source project maintainers prefer rebased contributions because they apply cleanly to the tip of the base branch.
The git rebase command is worth understanding in depth if you contribute to projects regularly. It becomes a daily tool once you’re managing multiple feature branches across an active fork.
How to Contribute Back to the Original Repository From a Fork
Most forks exist for one reason: to send changes back upstream. GitHub recorded 43.2 million pull request merges per month in 2025, a 23% increase year-over-year (GitHub Octoverse 2025). Fork-based pull requests drive the majority of that activity on public open source projects.
The contribution workflow has 4 stages: branch, commit, push, pull request.
Creating a Branch Before You Change Anything
Never work directly on main in your fork. Always create a dedicated branch.
git checkout -b fix/your-branch-nameWhy this matters: if your pull request is rejected or takes weeks to review, you can keep pulling upstream changes into your fork’s main without conflicts. A clean main makes everything else easier to manage.
Branch naming conventions vary by project. Common patterns: fix/issue-123, feat/add-login, docs/update-readme. Check the project’s contributing guidelines before picking a format.
Pushing Changes and Opening a Pull Request
After committing your changes locally, push the branch to your fork:
git push origin fix/your-branch-nameGitHub detects the new branch and shows a “Compare and pull request” banner at the top of your fork’s page. Click it. The pull request form targets the upstream repository’s default branch automatically.
Write a clear title and description. Reference the issue number if one exists (e.g., “Closes #42”). Maintainers use this context to triage and prioritize incoming contributions.
What Maintainers See From a Fork-Based Pull Request
Maintainer view: the PR shows your fork’s branch as the head ref and the upstream repo’s branch as the base. Reviewers can comment inline, request changes, and even push commits directly to your branch if you have checked “Allow edits by maintainers” during PR creation.
Projects like git flow-style workflows and the git workflow used by Linux kernel contributors both depend on this fork-and-PR model for external contributions.
Keep pull requests small and focused. PRs that change 1 file merge faster than PRs that touch 20. That’s not an opinion, it’s how maintainers triage queues in practice.
How to Fork a Private Repository
Forking a private repository has 3 layers of permission control: repository-level, organization-level, and enterprise-level. Each layer can independently block forking.
| Permission Layer | Who Controls It | Default Setting |
|---|---|---|
| GitHub Repository | Repo admin | Inherits organization setting |
| GitHub Organization | Org owner | Forking disabled by default |
| GitHub Enterprise | Enterprise owner | Policies cascade down to organizations |
New GitHub organizations have forking of private repositories disabled by default (GitHub Docs). Organization owners must explicitly enable it under Settings > Member privileges > Repository forking.
Access Rules for Private Repo Forks
Personal account repos: if you fork a private repo owned by a personal account, external collaborators on the original also get access to the fork automatically (GitHub Docs).
Organization repos: if you fork a private repo owned by an organization, teams within the org get access but external collaborators do not. You cannot fork a private org repo using GitHub Free. GitHub Team or higher is required.
What Happens If You Lose Access
Access removal has a direct effect on your fork.
- If someone is removed from a private repo, their private fork is deleted immediately
- Local clones remain intact on the removed person’s machine
- If a team loses repo access, all team members’ private forks are deleted unless those members have access through another team
GitHub Enterprise with managed users adds a further restriction: managed user accounts cannot fork repositories from outside the enterprise entirely (GitHub Enterprise Docs). This is commonly used by regulated industries and financial institutions that need strict code containment.
What Happens to a Fork When the Original Repository Is Deleted?
Fork lifecycle after upstream deletion depends entirely on whether the original repository was public or private. The 2 cases behave completely differently.
Public Repository Deleted
Your fork survives. GitHub does not delete public forks when a public upstream is removed.
When a public repository is deleted, the oldest active public fork is promoted to the new upstream repository (GitHub Docs). All other forks in the network are re-pointed to this new root. Subsequent pull requests go to the new upstream.
The commit history, branches, and files in every fork remain fully accessible. The repository network restructures automatically without any action from fork owners.
A well-known real case: the Spoon-Knife repository used by GitHub for fork demonstrations has over 156,000 forks. If GitHub ever removed it, the fork network would continue under the oldest surviving fork rather than disappearing.
Private Repository Deleted
This is the opposite situation. When a private repository is deleted, all its private forks are also deleted (GitHub Docs).
There is no promotion, no network restructuring. All private forks disappear along with the source.
Local clones are not affected. Anything already cloned to a developer’s machine remains on disk. This is why teams working with sensitive private repositories should maintain local copies or independent backups of critical branches.
| Upstream Action | Public Forks | Private Forks |
|---|---|---|
| Public repo deleted | Survive; oldest fork becomes new upstream | N/A |
| Private repo deleted | N/A | Deleted along with source |
| Public repo made private | Fork network splits into independent repositories; existing forks remain public | N/A |
| Access revoked on private repo | N/A | Fork access removed; fork is typically deleted or becomes inaccessible |
How to Delete a Fork
Deleting a fork is permanent. GitHub provides no recovery option once the deletion is confirmed.
The process takes under a minute, but there are 3 things worth checking before you click confirm.
Pre-Deletion Checklist
Open pull requests: any open PRs from your fork to the upstream are invalidated when the fork is deleted. Close or merge them first, or accept that they will disappear.
Downstream dependencies: if other projects or pipelines reference your fork’s URL directly, those references break on deletion. Check for any continuous integration configs, package managers, or webhooks pointing to the fork.
Unmerged local changes: if you have commits in your fork that don’t exist anywhere else, back them up locally before deleting. Once the remote fork is gone, those commits exist only in your local clone.
Deletion Steps
Deleting a fork follows the same process as deleting any repository in GitHub.
- Go to your fork’s main page on GitHub
- Click the Settings tab
- Scroll to the bottom of the General settings page
- Find the Danger Zone section
- Click Delete this repository
- Type the full repository name to confirm
- Click the red I understand the consequences, delete this repository button
GitHub completes the deletion within seconds. The original upstream repository is not affected in any way. Your fork is a copy. Removing the copy leaves the source unchanged.
When Deletion Makes Sense
Most developers accumulate forks they no longer need. Cleaning them up is good practice.
- Pull request merged and contribution complete
- Fork was for experimentation only
- Repo is outdated and no longer relevant
If you’re not ready to delete but want to stop active use, GitHub’s archive option (Settings > Danger Zone > Archive) makes the fork read-only without removing it. That keeps the URL alive and the commit history accessible without cluttering your active repositories.
Teams doing regular source control management cleanups should audit forks quarterly. Stale forks with open pull requests that have been abandoned for 6+ months are a common source of confusion during onboarding.
FAQ on How To Fork A Repository In GitHub
Does forking a repository copy all branches?
By default, GitHub copies only the default branch when you fork. To include all branches, uncheck “Copy the DEFAULT branch only” on the fork creation form before confirming.
Can you fork a repository without a GitHub account?
No. Forking requires a GitHub account because the fork is stored under your username. A free account is sufficient. No paid plan is needed to fork any public repository.
Does the original repository owner know when you fork it?
Yes. The fork count on the upstream repository increases and the owner can see it. However, they receive no direct notification. GitHub does not alert repository owners when a new fork is created.
Is there a limit to how many times you can fork a repository?
GitHub does not impose a hard limit on forking. You can only hold one fork of a given repository per account at a time. To get a fresh copy, delete the existing fork first.
Can you fork your own repository?
Not into the same account. You can fork your own repository into a different GitHub account or organization. Within the same account, use the repository creation flow with import instead.
What is the difference between git clone and fork?
A fork creates a server-side copy on GitHub under your account. A clone copies a repository to your local machine. Most open source workflows require both: fork first, then clone your fork locally.
Can you fork a private repository?
Yes, if you have access and the organization allows it. Private repo forking is disabled by default in new GitHub organizations. Enterprise accounts add a third permission layer that can restrict forking further.
How do you keep a forked repository up to date?
Use the “Sync fork” button in the GitHub web UI, or run git fetch upstream followed by git merge upstream/main in your terminal. Add the original repo as an upstream remote first with git remote add upstream.
Does deleting a fork affect the original repository?
No. The original repository is completely unaffected. Deleting your fork only removes your copy. Any open pull requests from your fork to the upstream will be invalidated on deletion.
Do you need to fork a repository to submit a pull request?
Only if you lack write access to the original repo. Team members with direct access can branch and PR without forking. For most open source contributions, fork first, then create a pull request from your fork.
Conclusion
This conclusion is for an article presenting how to fork a repository in GitHub, covering everything from the fork button to branch management, upstream sync, and pull request submission.
Forking is not complicated. But getting the details right, setting up the upstream remote, working from a dedicated branch, keeping your fork in sync, matters more than most beginners expect.
The fork-based development model powers billions of open source contributions each year. Understanding the full repository network, including what happens to private forks, how git remote configuration works, and when to use the git clone command, puts you in control of the entire workflow.
Start with a small contribution. The process becomes second nature quickly.

- Show Hidden Characters, Spaces, and Line Endings in Notepad++ - October 19, 2026
- Military and Defense UI/UX Design Services Firms to Know in 2026 - October 19, 2026
- How to Manage Your Google Play Subscriptions - October 17, 2026