You can’t actually transfer apps from iPhone to iPad via Bluetooth, but you’re not alone in thinking it should work that way.
iOS doesn’t support app installation through Bluetooth connectivity. Apple restricts app distribution to the App Store only, which means your apps sync through your Apple ID account instead.
This guide explains the actual methods for getting your purchased apps onto your iPad. You’ll learn how automatic downloads work, how to manually download apps from your purchase history, and why the iOS ecosystem blocks direct app transfers between devices.
The process takes just a few taps once you know where to look.
How to Transfer Apps from iPhone to iPad: Quick Workflow
Sign into the same Apple ID on both devices first. Then pick whichever method fits your situation.
Method A: iCloud Automatic Sync (Easiest)
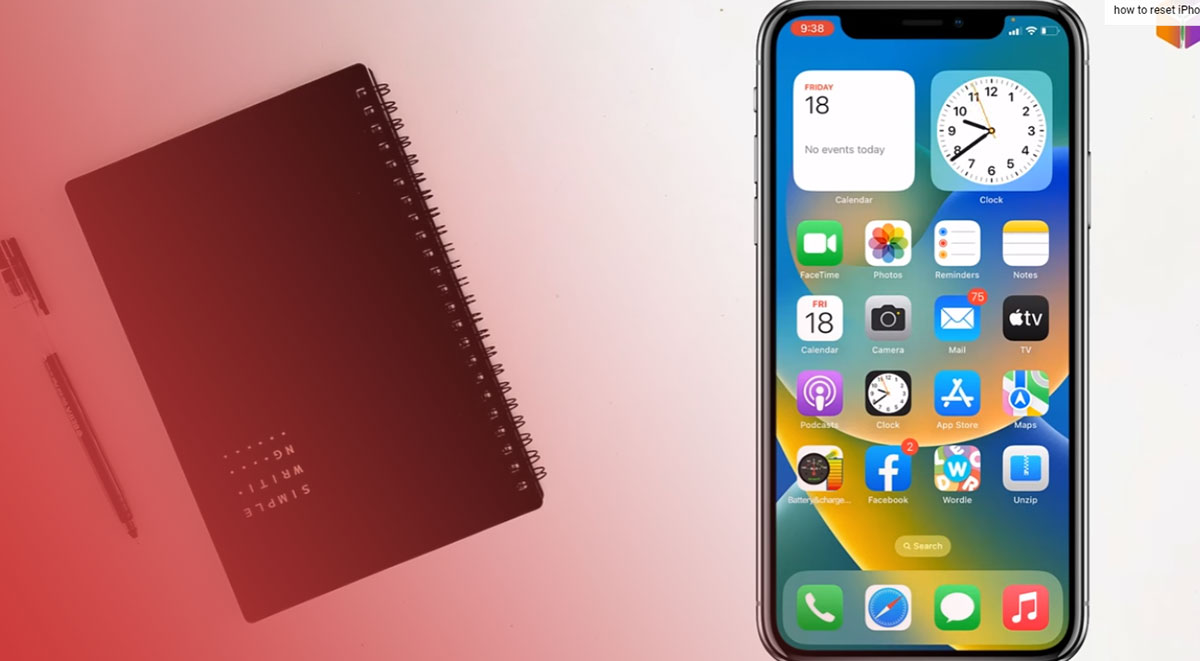
- On your iPad, go to Settings > App Store
- Toggle on “Apps” under Automatic Downloads
- Done. New iPhone app installs now appear on your iPad automatically
Method B: Manual Download from Purchase History
- Open the App Store on your iPad
- Tap your profile icon (top right)
- Tap “Purchased”
- Filter by “Not on This iPad”
- Tap the cloud icon next to each app you want
Method C: Quick Start (New iPad Setup)
- Hold your iPhone near your new iPad during initial setup
- Scan the animation with your iPhone camera
- Select “Transfer Directly from iPhone”
- Keep both devices close and plugged in for 30-90 minutes
Method D: Computer Backup and Restore
- Connect iPhone to Mac/PC via cable
- Open Finder (Mac) or iTunes (Windows)
- Click “Back Up Now” with “This computer” selected
- Connect your iPad, select “Restore Backup”, pick the iPhone backup
If Apps Won’t Transfer, Check These
- Storage: Settings > General > iPad Storage (free up space if needed)
- iOS version: Settings > General > Software Update
- Apple ID: Sign out and back in under Settings > [Your Name]
- Compatibility: Some apps are iPhone-only or pulled from the App Store
Keep in mind: Apps and app data transfer separately. Apps download fresh from the App Store, but your saved data only moves via iCloud sync, backup restore, or the app’s own cloud service.
Understanding iOS App Transfer Methods

Apple’s iOS ecosystem controls how applications move between devices through centralized distribution.
The App Store acts as the only official source for app installations on iPhone and iPad. Every app download requires authentication through your Apple ID, which connects all your devices to the same purchase history.
iCloud handles automatic synchronization of app availability across your devices. When you download an app on your iPhone, that same app becomes available for download on your iPad without purchasing it again.
The system doesn’t actually transfer the app files themselves. Instead, it recognizes your purchase record and allows fresh downloads on each device through the App Store servers.
Bluetooth on iOS devices only handles specific file types and data transfer functions. Apple restricts Bluetooth functionality to prevent unauthorized software development distribution outside their controlled ecosystem.
AirDrop uses both Wi-Fi and Bluetooth for the initial handshake, but it only transfers documents, photos, and app-specific data files. The actual application installation still requires App Store access.
This architecture stems from Apple’s iOS development security model. Apps include digital rights management and licensing restrictions that tie each installation to authenticated user accounts.
The iOS file system prevents direct access to app bundles. Even if you could transfer the files via Bluetooth, the operating system would reject any installation attempt that didn’t originate from the App Store.
Using App Store to Get Apps on iPad
Open the App Store on your iPad.
Tap your profile icon in the top right corner. Select “Purchased” from the menu to view your complete app download history.
You’ll see two tabs at the top. “All” shows every app you’ve downloaded, while “Not on This iPad” filters to apps currently missing from your device.
Find the app you want and tap the download icon next to it. The app installs directly from Apple’s servers using your existing purchase record.
For automatic downloads across devices, go to Settings on your iPad. Tap your name at the top, then select “App Store” from the list.
Toggle on “App Downloads” under Automatic Downloads. Now any app you download on your iPhone will automatically appear on your iPad without manual intervention.
This works for all apps tied to your Apple ID, whether free or paid. Family Sharing extends this to purchased apps from other family members’ accounts.
Using iCloud for App Sync
Navigate to Settings and tap your name at the top of the screen.
Select “iCloud” from the menu. Scroll down and verify that your iCloud account shows as active with available storage.
iCloud backup doesn’t transfer apps directly, but it preserves your app layout and data. When you restore from an iCloud backup, the system automatically downloads all previously installed apps.
For automatic app installation, ensure you’re signed in with the same Apple ID on both devices. The synchronization happens through your purchase history, not through iCloud storage itself.
Network requirements matter here. Your iPad needs a stable Wi-Fi connection to download apps from the App Store servers. Cellular data works too if you’ve enabled it for App Store downloads in Settings.
The process takes longer for large apps. Games and mobile application development tools with substantial file sizes can take several minutes depending on your connection speed.
Using AirDrop for App Data Transfer
AirDrop transfers documents, photos, and files between Apple devices, not the apps themselves.
Turn on both Wi-Fi and Bluetooth on your iPhone and iPad. Open Control Center by swiping down from the top right corner (or up from the bottom on older devices).
Press and hold the network settings card in the top left. Tap AirDrop and select “Everyone for 10 Minutes” to receive files from any nearby device.
On your iPhone, open the app containing the data you want to transfer. Look for the Share button (a square with an arrow pointing up).
Tap the Share button and select your iPad from the AirDrop section at the top. The file transfers wirelessly within seconds for small documents.
This works for app-specific content like Pages documents, Numbers spreadsheets, or photo editing project files. Each app must support the file format you’re trying to share.
App data includes things like saved game progress, document drafts, or custom settings. Some apps sync this data through iCloud automatically, eliminating the need for manual AirDrop transfers.
The actual application binary files never move through AirDrop. Those stay locked within the App Store distribution system due to digital rights management and security restrictions built into iPadOS.
Why Bluetooth Doesn’t Transfer Apps Between iOS Devices
Apple’s iOS security architecture blocks app installation from any source except the App Store.
Bluetooth protocol limitations prevent large file transfers like application bundles. Most apps range from 50MB to several gigabytes, far beyond Bluetooth’s practical transfer capabilities.
The App Store ecosystem enforces digital rights management on every app. Each installation verifies your purchase license through Apple’s servers before allowing the app to run.
Apps contain code signatures that iOS validates during installation. Bluetooth transfers would bypass this verification process, creating security vulnerabilities that Apple won’t allow.
DRM licensing ties each app to your Apple ID account. The system checks your credentials every time you download or update an app, preventing unauthorized distribution.
Android allows APK file transfers between devices because Android development uses a different security model. iOS restricts direct file system access to prevent malware and piracy.
Even enterprise apps distributed outside the App Store require special provisioning profiles. Companies using custom app development must register with Apple’s Developer Program to deploy internal apps.
Apps Not Appearing on iPad
Open Settings and tap your name at the top.
Check that the Apple ID displayed matches the one you used to purchase the apps on your iPhone. Sign out and sign back in if needed.
Navigate to Settings, tap your name, then select “Media & Purchases.” Tap “View Account” and verify your account shows active with no payment issues.
iCloud settings affect app visibility across devices. Go to Settings, tap your name, select iCloud, and ensure iCloud Drive is enabled.
Your network connection matters for app synchronization. Connect to stable Wi-Fi before attempting to download purchased apps from the App Store.
Some apps have device compatibility restrictions. iPad-specific apps won’t appear on iPhone, and some iPhone-only apps may not support iPad displays.
Check your purchase history by opening the App Store, tapping your profile icon, and selecting “Purchased.” Apps you’ve bought or downloaded should appear in this list.
Family Sharing affects app availability. If someone else in your family bought the app, verify that Family Sharing is enabled and the purchaser has sharing turned on for that app.
Hidden purchases won’t show up in your app list. Go to App Store settings, tap your profile, select “Hidden Purchases,” and unhide any apps you want back.
Manual App Download Process
Launch the App Store app on your iPad.
Tap the search icon at the bottom of the screen. Type the app name in the search bar and tap Search on the keyboard.
Find the correct app in the results list. Apps you’ve previously purchased show a download cloud icon instead of a price or “Get” button.
Tap the download icon to start the installation. The app downloads directly to your home screen or App Library.
Device compatibility appears below the app name. If your iPad doesn’t meet the minimum iOS version requirements, the app won’t install.
Large apps require significant storage space. Check available storage by going to Settings, tapping General, then iPad Storage. Delete unnecessary files if needed.
App Store downloads pause when your device loses internet connectivity. The download resumes automatically when you reconnect to Wi-Fi or cellular data.
Some apps require specific hardware features. Apps needing Face ID won’t work on older iPads with only Touch ID, and AR apps need compatible camera systems.
Update your iPadOS version if apps won’t download. Go to Settings, tap General, select Software Update, and install any available updates.
App Data Transfer vs App Installation
App data includes your saved preferences, login credentials, game progress, and created content. The app itself is just the program code that runs on your device.
iCloud backup captures app data for supported apps. When you restore from backup, your apps redownload from the App Store while your data comes from iCloud.
Each app decides what data it syncs. Some apps store everything in iCloud Drive, others use their own cloud services, and some keep data only on your device.
Documents and files within apps can move between devices through several methods. iCloud sync handles this automatically for apps that support it, requiring no manual intervention.
AirDrop transfers work for individual files that apps can open. Send a PDF from your iPhone to your iPad, and any compatible app can access it.
Third-party cloud services like Dropbox or Google Drive provide another path for app data movement. Many cross-platform app development tools integrate these services directly.
Settings and preferences typically sync through your Apple ID. Apps built with Apple’s standard frameworks automatically sync certain data types across your devices.
Game progress syncs through Game Center for supported titles. Your achievements, leaderboard positions, and saved games follow you across devices without manual transfers.
Custom app settings may require manual reconfiguration on each device. Not all developers implement data sync features, particularly in older or simpler apps.
The app installation process always requires App Store authentication. Your iPad validates your purchase or download rights before allowing any app to install, regardless of how you move the data.
FAQ on How To Transfer Apps From iPhone To iPad Via Bluetooth
Can I use Bluetooth to transfer apps from iPhone to iPad?
No. iOS blocks app transfers through Bluetooth completely. Apps only install through the App Store using your Apple ID. The system syncs your purchase history across devices automatically, letting you redownload apps on any device.
Why won’t my iPad let me transfer apps via Bluetooth?
Apple’s security architecture prevents app installation outside the App Store. Bluetooth lacks the authentication and digital rights management verification that iOS requires. Apps must download directly from Apple’s servers to validate your purchase license.
What’s the fastest way to get apps on my new iPad?
Enable automatic downloads in Settings under your Apple ID. Tap “Media & Purchases,” then toggle on “App Downloads.” Any app you download on your iPhone will instantly appear on your iPad without manual intervention or device pairing.
Do I need to pay again for apps on my iPad?
No. Your Apple ID tracks all purchases across devices. Free and paid apps remain available for download on any device using the same account. Check your purchase history in the App Store to redownload previously bought apps.
Can AirDrop transfer apps between iOS devices?
AirDrop only transfers documents, photos, and app data files. The actual application installation requires App Store access. AirDrop uses Wi-Fi and Bluetooth for the handshake, but can’t move app bundles due to iOS security restrictions.
How do I sync apps from iPhone to iPad without iCloud?
You can’t sync the apps themselves without internet connectivity. Apps download from the App Store servers, not from your iPhone. Your devices share the same purchase history through your Apple ID, which requires network access to verify and download.
What if my purchased apps don’t show on iPad?
Verify you’re signed in with the correct Apple ID on both devices. Open App Store, tap your profile, and select “Purchased.” Check for hidden purchases and ensure your payment method remains valid and active.
Can I transfer app data without reinstalling the app?
Yes, but only if the app supports iCloud sync. Many apps automatically sync data across devices. Some require manual backup through their own cloud services. Game progress syncs through Game Center for supported titles without additional configuration.
Why are some iPhone apps missing from my iPad?
Apps have device compatibility requirements. Developers specify supported devices and iOS versions. Some iPhone-only apps don’t scale properly for iPad screens. Check the App Store listing for compatibility information before attempting to download.
How long does it take to download apps on iPad?
Download speed depends on app size and your network connection. Small apps take seconds over Wi-Fi. Large games or mobile application development tools exceeding 1GB can take several minutes. Downloads pause automatically if connectivity drops.
Conclusion
Understanding how to transfer apps from iPhone to iPad via Bluetooth starts with recognizing that Bluetooth isn’t the solution.
App Store downloads through your Apple ID handle all application synchronization between devices. The process works automatically once you enable the right settings.
Your purchased apps remain accessible across all devices without additional payments. Device pairing through Bluetooth only handles file sharing, not application installation.
The iOS ecosystem’s security model prevents app transfers outside Apple’s controlled distribution system. This protects your device from malware while ensuring proper licensing verification.
Set up automatic downloads and your apps will appear on your iPad moments after downloading them on your iPhone. No wireless transfer needed.
If you liked this article about how to transfer contacts from iPhone to iPhone, you should check out this article about how to transfer apps from iPhone to iPad via Bluetooth.
There are also similar articles discussing how to screen record restricted apps on iPhone, how to play music in the background on iPhone, how to check apps running in the background on iPhone, and how to turn off the microphone on iPhone.
And let’s not forget about articles on how to turn off restrictions on iPhone, how to check screen time on iPhone, how to transfer apps from iPhone to MacBook Air, and how to hide recently added apps on iPhone.
Many of his resources are available on various design marketplaces and for free on Codepen.
Over the years, he's worked with a range of clients and contributed to design publications like Design Your Way, Designmodo, WebDesignerDepot, WPDean, Speckyboy, and Slider Revolution among others.
- How to Set Up Subscriptions on Google Play (Developer Guide) - July 12, 2026
- Why Work With a CMS Development Company for a Secure and Scalable Website? - July 12, 2026
- ADB Commands Cheat Sheet - July 11, 2026