TypeScript doesn’t run on its own. That’s the first thing most tutorials skip.
Learning how to run TypeScript in VSCode means understanding the compile-and-execute cycle, not just writing .ts files and hoping for the best. The TypeScript compiler (tsc), Node.js, and VSCode each play a distinct role.
This guide covers everything you need: project setup with tsconfig.json, compiling with tsc, running files directly via ts-node, automating builds with VSCode tasks, and debugging with source maps and breakpoints.
By the end, you’ll have a working TypeScript setup in VSCode, whether you’re building a Node.js backend or a browser project.
What is Running TypeScript in VSCode
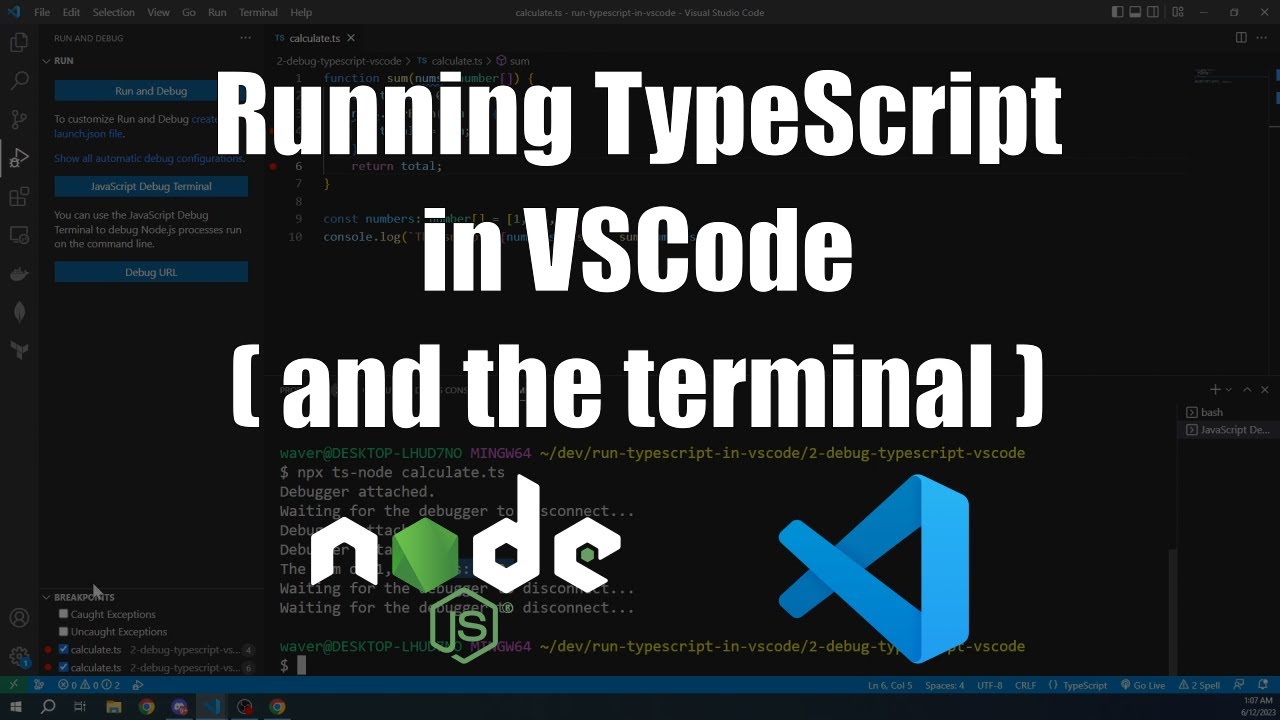
Running TypeScript in VSCode means compiling .ts files into JavaScript and executing the output. TypeScript itself cannot run directly. The browser doesn’t understand it. Node.js doesn’t understand it – at least not without extra steps.
VSCode has built-in TypeScript language support. That means IntelliSense, type checking, and error highlighting all work out of the box. But language support is not the same as execution. To actually run TypeScript, you need the TypeScript compiler (tsc) and Node.js installed separately.
Here’s what happens under the hood when you “run” TypeScript:
- You write a
.tsfile - The TypeScript compiler reads it and checks for type errors
- tsc transpiles the code into a
.jsfile - Node.js executes that JavaScript output
Some tools (like ts-node) collapse steps 2-4 into one command. But they’re still doing the same thing – just silently.
Key distinction: VSCode showing zero red squiggles doesn’t mean your code runs. Compilation and type checking are separate from execution. You can have valid TypeScript that crashes at runtime, and you can have type errors that don’t stop compilation depending on your tsconfig settings.
TypeScript adoption has grown fast. According to the 2025 State of JavaScript survey, 40% of developers now write exclusively in TypeScript, up from 28% in 2022 (InfoQ/Devographics, 2026). Understanding the compile-and-run cycle is the foundation everything else builds on.
Prerequisites Before You Start

Before anything works, two things need to be installed: Node.js and the TypeScript compiler. Everything else depends on these.
Node.js is the runtime that executes compiled JavaScript. TypeScript gets installed as an npm package. VSCode’s built-in language features don’t include either of these – that’s a common point of confusion for developers new to TypeScript.
Install Node.js
Go to nodejs.org and download the LTS version. The current LTS as of early 2026 is Node.js 22.x, which also includes experimental native TypeScript type stripping – useful to know later.
After installing, confirm it works:
node -v
 npm -v
Both commands should return version numbers. If they don’t, Node.js isn’t in your PATH. Fix that before moving on – nothing else will work until you do.
Install TypeScript Globally
Global installation means you can run tsc from any directory in the terminal:
npm install -g typescript
Verify it worked:
tsc -v
You should see something like Version 5.x.x. If the terminal says “command not found,” check that npm’s global bin folder is in your system PATH. This trips up a lot of developers on fresh machines.
Optional: Install ts-node
ts-node lets you run TypeScript files directly without a separate compile step. It’s great for development and quick scripting.
npm install -g ts-node
Whether you need it depends on your workflow – covered in detail in the ts-node section below.
VSCode Setup
VSCode doesn’t need a special TypeScript extension for basic support. Language features are built in through the TypeScript Language Server, which ships with VSCode itself.
That said, a few things are worth checking:
- Make sure you’re using the latest stable VSCode release
- The VSCode terminal should recognize tsc and node after installation – if not, restart VSCode to reload PATH variables
- You can check which TypeScript version VSCode is using by opening a .ts file and clicking the version number in the bottom status bar
VSCode is the dominant choice here, used by 75.9% of professional developers as of 2025 (Stack Overflow Developer Survey). Its TypeScript tooling is mature and well-documented – one of the main reasons TypeScript and VSCode have become almost synonymous in web development.
How to Set Up a TypeScript Project in VSCode
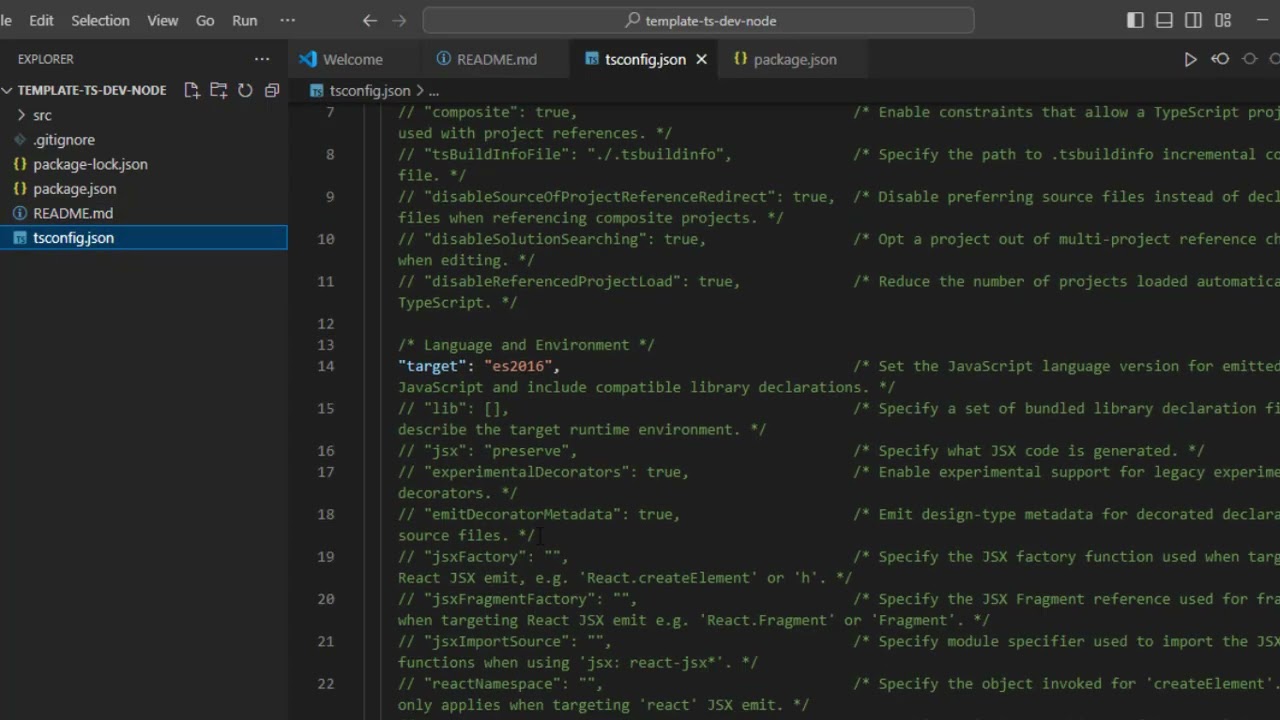
A proper TypeScript project starts with a tsconfig.json file. Without it, tsc makes a lot of assumptions – some of which will cause problems later. Setting this up correctly takes five minutes and saves hours of debugging.
Initialize tsconfig.json
Open the VSCode terminal (Ctrl+`) and navigate to your project folder. Then run:
tsc --init
This generates a tsconfig.json with every compiler option commented out. Most of it you won’t touch. But a few settings are worth configuring immediately.
Recommended starting configuration:
{
 "compilerOptions": {
 "target": "ES2020",
 "module": "commonjs",
 "rootDir": "./src",
 "outDir": "./dist",
 "strict": true,
 "esModuleInterop": true,
 "skipLibCheck": true
 }
 }
The rootDir and outDir settings are the most important. They tell the compiler where to find your TypeScript source and where to put the compiled JavaScript. Without them, .js files end up scattered next to your .ts files.
Folder Structure
Keep it simple:
my-project/
 ├── src/
 │   └── index.ts
 ├── dist/         ← compiled output goes here
 ├── tsconfig.json
 └── package.json
The dist/ folder doesn’t need to exist yet – tsc creates it on first compile. Add it to .gitignore so compiled output doesn’t end up in version control.
Key tsconfig Settings Explained
| Option | What it does | Recommended value |
|---|---|---|
| target | JavaScript version for output | ES2020 for modern Node.js |
| strict | Enables all strict type checks | true (always) |
| outDir | Where compiled .js files go | ./dist |
| rootDir | Where your .ts source files live | ./src |
| sourceMap | Generates .map files for debugging | true if you plan to debug |
Enabling strict: true from the start is strongly recommended. Turning it on in an existing project is painful. Starting with it on is not. Airbnb’s TypeScript migration (completed 2024-2025) emphasized this exact point when they moved their entire frontend codebase to TypeScript.
How to Compile and Run TypeScript Using tsc

This is the standard workflow – the one that actually mirrors how TypeScript runs in production. Compile first, execute the output. It’s a two-step process, but it gives you full type checking and the cleanest output.
Compile a Single File
For quick tests or single-file scripts, you can compile without a tsconfig:
tsc src/index.ts
This creates src/index.js next to the source file. Not ideal for projects, but fine for one-off scripts.
Then run the output:
node src/index.js
Compile the Full Project
With tsconfig.json in place, just run tsc from the project root:
tsc
TypeScript reads the config file, compiles everything in rootDir, and outputs to outDir. Then execute:
node dist/index.js
That’s the full compile-and-run cycle. Two commands, clean separation between source and output.
Watch Mode
Recompiling manually after every change is tedious. Watch mode handles it automatically:
tsc --watch
tsc now monitors your source files and recompiles on every save. You still need to re-run node dist/index.js manually – watch mode compiles but doesn’t execute. For automatic re-execution, combine tsc with nodemon (covered separately).
When tsc Is the Right Choice
Use tsc (not ts-node) when:
- You’re building for production
- You need full type checking before deployment
- You’re working on a large project where compilation errors should block execution
- You need the compiled .js files as a deliverable (for a library, for example)
According to Stack Overflow’s 2025 Developer Survey, TypeScript is used by 43.6% of developers globally – and the vast majority of those production deployments involve tsc, not ts-node. The compile step is worth it.
How to Run TypeScript Directly with ts-node
ts-node skips the manual compile step entirely. You point it at a .ts file, it handles compilation internally, and executes the result. One command instead of two.
It’s the go-to tool for development workflows, quick scripts, and situations where you want fast feedback without managing output files.
Installing and Configuring ts-node
Install it as a dev dependency (preferred over global install for project-level control):
npm install -D ts-node typescript
Or globally if you want it available everywhere:
npm install -g ts-node
Run any TypeScript file directly:
npx ts-node src/index.ts
No dist/ folder. No separate compile step. The file just runs.
For faster startup, use –transpile-only mode – this skips type checking and focuses purely on execution speed:
npx ts-node --transpile-only src/index.ts
Useful when you’re iterating fast and your editor is already showing type errors.
Running Files and Handling Common Errors
The two most common errors with ts-node:
ESM module conflict: If your package.json has "type": "module", ts-node needs extra flags:
node --loader ts-node/esm src/index.ts
“Cannot find module” on type packages: Install the missing types:
npm install -D @types/node
ts-node hasn’t had a major release in a couple of years, which has pushed some teams toward alternatives like tsx (built on esbuild). tsx starts significantly faster, especially on large projects, because esbuild is written in Go rather than JavaScript. Worth knowing if ts-node startup times start to bother you.
| Tool | Type Checking | Speed | Best For |
|---|---|---|---|
| tsc | Full | Slower | Production builds |
| ts-node | Full (or skip with flag) | Medium | Dev scripts, debugging |
| tsx | None (strips types only) | Fast | Rapid dev iteration |
| Node.js native (v22+) | None | Fastest | Simple scripts, no enums |
How to Run TypeScript in VSCode Using Tasks
Typing tsc in the terminal every time gets old quickly. VSCode’s task runner automates it. You define the task once, then trigger it with a keyboard shortcut.
This is how most developers actually work with TypeScript in VSCode day-to-day – not by typing compile commands manually.
Creating tasks.json
Create a .vscode/ folder in your project root if it doesn’t exist. Inside it, create tasks.json:
{
 "version": "2.0.0",
 "tasks": [
 {
 "label": "Build TypeScript",
 "type": "shell",
 "command": "tsc",
 "group": {
 "kind": "build",
 "isDefault": true
 },
 "problemMatcher": ["$tsc"]
 }
 ]
 }
Setting “isDefault”: true in the build group means Ctrl+Shift+B now runs tsc directly. No terminal needed.
The “problemMatcher”: [“$tsc”] line is worth paying attention to. It tells VSCode to parse TypeScript compiler errors and display them in the Problems panel. Type errors show up as warnings and errors directly in the editor – the same way a build pipeline surfaces errors in a CI environment.
Watch Mode as a Task
Running tsc in watch mode as a background task is even more practical:
{
 "label": "Watch TypeScript",
 "type": "shell",
 "command": "tsc --watch",
 "isBackground": true,
 "problemMatcher": {
 "owner": "typescript",
 "fileLocation": "relative",
 "pattern": "$tsc",
 "background": {
 "activeOnStart": true,
 "beginsPattern": "Starting compilation",
 "endsPattern": "Watching for file changes"
 }
 }
 }
isBackground: true tells VSCode the task runs continuously without blocking the terminal. It starts compiling, finishes, then waits for changes – all silently in the background while you code.
Trigger it via Terminal > Run Task, then forget about it. Every save triggers a recompile automatically. This matches how continuous integration workflows handle incremental builds – detect change, compile, surface errors, repeat.
How to Debug TypeScript Directly in VSCode

Setting breakpoints in .ts files and having the debugger stop there, not in the compiled .js output, requires two things working together: source maps enabled in tsconfig and a properly configured launch.json.
Without source maps, VSCode’s debugger loses the link between your TypeScript source and the running JavaScript. Breakpoints show up as gray hollow circles instead of red dots. That’s the sign something is misconfigured.
Configuring launch.json for TypeScript
Open the Run and Debug panel (Ctrl+Shift+D). Click “create a launch.json file” and select Node.js.
Replace the generated content with this:
{
 "version": "0.2.0",
 "configurations": [
 {
 "type": "node",
 "request": "launch",
 "name": "Debug TypeScript",
 "program": "${workspaceFolder}/src/index.ts",
 "preLaunchTask": "tsc: build - tsconfig.json",
 "outFiles": ["${workspaceFolder}/dist/**/*.js"],
 "sourceMaps": true,
 "smartStep": true
 }
 ]
 }
Three fields that actually matter here:
- outFiles: tells VSCode where compiled JavaScript lives, so it can match your breakpoints
- preLaunchTask: compiles TypeScript before the debug session starts automatically
- smartStep: skips over compiler-injected helper code (like async/await downcompilation) when stepping through
Press F5 to start the session. VSCode compiles, launches Node.js, and hits breakpoints inside your .ts files directly.
Using Source Maps for Accurate Debugging
Source maps are the bridge. Without them, the debugger only sees the compiled JavaScript, which looks nothing like your TypeScript source.
Enable them in tsconfig.json:
{
 "compilerOptions": {
 "sourceMap": true,
 "outDir": "./dist"
 }
 }
After compiling, each .js file in dist/ gets a matching .js.map file. That map file is what allows VSCode to show you the TypeScript line when execution pauses, not the JavaScript equivalent.
Debugging with ts-node works differently. If you want to skip compilation entirely and debug via ts-node, use this launch config instead:
{
 "type": "node",
 "request": "launch",
 "name": "Debug with ts-node",
 "runtimeExecutable": "node",
 "runtimeArgs": ["--loader", "ts-node/esm"],
 "program": "${file}",
 "skipFiles": ["/**"]
 }
This approach is quicker for one-off debugging sessions. The compiled-output approach (with tsc + source maps) is more reliable for larger projects where you want the debugger to stay in sync with production behavior.
How to Run TypeScript in VSCode for Node.js vs Browser Projects
The setup differs significantly depending on where your TypeScript runs. Node.js projects and browser projects use different module systems, different tsconfig settings, and completely different execution tools.
Getting this wrong is one of the most common sources of module resolution errors. The module setting in tsconfig that works perfectly for Node.js will break a browser build, and vice versa.
Node.js TypeScript Projects

Standard workflow: tsc or ts-node, CommonJS or Node16 module system, no bundler needed.
The relevant tsconfig settings for Node.js:
{
 "compilerOptions": {
 "module": "commonjs",
 "moduleResolution": "node",
 "target": "ES2020"
 }
 }
If you’re on Node.js 22+ and want to use native TypeScript support (experimental), you can run .ts files directly with:
node --experimental-strip-types src/index.ts
No tsc, no ts-node. Node strips the type annotations and executes. The catch: it doesn’t support enums, namespaces with runtime values, or custom tsconfig.json settings. Useful for simple scripts, not for complex projects.
Browser TypeScript Projects
Browsers can’t run TypeScript or CommonJS modules. A bundler is required.
Vite is the practical default here. It has a 98% satisfaction rate among developers (State of JavaScript 2025), which is unusually high for a build tool. One command sets up a complete TypeScript project:
npm create vite@latest my-app -- --template vanilla-ts
Vite handles TypeScript transpilation using its own Oxc transformer (faster than tsc), serves the project on localhost:5173, and supports Hot Module Replacement out of the box. Note that Vite does transpilation, not type checking. Run tsc --noEmit separately for type validation before shipping.
The tsconfig for a Vite browser project looks different:
{
 "compilerOptions": {
 "module": "ESNext",
 "moduleResolution": "bundler",
 "target": "ES2020",
 "lib": ["ES2020", "DOM", "DOM.Iterable"],
 "isolatedModules": true
 }
 }
Key difference: "lib": ["DOM"] gives you access to browser APIs. Without it, TypeScript doesn’t know what document or window are.
Side-by-Side Comparison
| Setting | Node.js Project | Browser Project (Vite) |
|---|---|---|
| module | commonjs / NodeNext | ESNext |
| moduleResolution | node / node16 | bundler |
| lib | ES2020 (no DOM) | ES2020, DOM |
| Execution tool | node, ts-node, tsx | Vite dev server |
| Bundler needed? | No | Yes (Vite, Webpack, Parcel) |
Shopify’s Hydrogen framework, which is TypeScript-first and browser-targeted, uses Vite as its default bundler for exactly these reasons. The module system alignment between Vite and the browser means no extra configuration to get TypeScript running in a realistic front-end development environment.
Common Errors When Running TypeScript in VSCode
Most TypeScript setup problems fall into a small number of categories. The errors look intimidating the first time. Once you’ve seen them a few times, they’re fast to fix.
tsc Not Recognized in Terminal
Running tsc -v returns “command not found.” The TypeScript compiler installed correctly but npm’s global bin folder isn’t in your system PATH.
Fix on Windows: Find the npm global folder with npm config get prefix, then add that path to your system environment variables.
Fix on macOS/Linux:
export PATH="$PATH:$(npm config get prefix)/bin"
Add that line to your .bashrc or .zshrc. After that, restart the VSCode terminal or open a new one. The terminal inherits the old PATH until refreshed.
ESM vs CommonJS Conflicts
This is the most common error by a significant margin. It shows up as:
Error [ERR_REQUIRE_ESM]: require() of ES Module not supported
or the reverse:
ReferenceError: exports is not defined in ES module scope
Root cause: package.json has "type": "module" but tsconfig outputs CommonJS (or vice versa). The module system in tsconfig and package.json must match.
For CommonJS projects: remove “type”: “module” from package.json (or set “type”: “commonjs”) and keep “module”: “commonjs” in tsconfig.
For ESM projects: set “type”: “module” in package.json and use “module”: “NodeNext” with “moduleResolution”: “NodeNext” in tsconfig.
Cannot Find Module or Type Declarations
Two separate problems share this error message.
Missing @types package: A package exists but TypeScript can’t find its types. Install the types package:
npm install -D @types/node
 npm install -D @types/express  # or whatever package you're using
Path alias not resolving: You defined a path like @/utils in tsconfig but it’s not resolving. The paths option in tsconfig affects the compiler only. At runtime, Node.js still needs a resolver. Use tsconfig-paths with ts-node, or configure your bundler to handle path aliases.
Breakpoints Not Hitting in Debugger
Gray hollow circles instead of red dots. Three likely causes:
- “sourceMap”: true is missing from tsconfig (most common)
- outFiles in launch.json doesn’t match where compiled files actually are
- The dist/ folder is stale – run tsc again before starting the debug session
A quick check: look in dist/ for .js.map files. If they’re missing, source maps aren’t being generated. If they exist but breakpoints still don’t hit, the outFiles glob in launch.json is wrong.
The VSCode debugging JavaScript documentation covers the smartStep option in detail, which helps skip compiler-injected helper code when stepping through async functions. Worth enabling by default for TypeScript projects.
Type Errors Blocking Compilation
Sometimes you want to run code even when type errors exist, during a refactor. Two options:
Compile anyway: Add “noEmitOnError”: false to tsconfig. tsc will report errors but still output JavaScript.
Skip type checking entirely:
tsc --noEmit false --skipLibCheck
Or with ts-node, use –transpile-only to skip all type checking and just execute. Both are valid for development. Neither should replace proper type checking before shipping.
A 2025 Microsoft Research study found TypeScript codebases had 15% fewer production bugs per 1,000 lines compared to equivalent JavaScript projects, with type errors caught at compile time costing roughly $25 to fix versus $750 to $1,500 in production. That’s the reason you want type checking passing before deployment, even when bypassing it during development feels faster in the moment.
FAQ on How To Run TypeScript In VSCode
Does VSCode run TypeScript natively?
No. VSCode provides TypeScript language support – IntelliSense, type checking, error highlighting – but it doesn’t execute .ts files. You need Node.js and the TypeScript compiler (tsc) installed separately to actually run TypeScript code.
What is the fastest way to run a TypeScript file in VSCode?
Install ts-node globally with npm install -g ts-node, then run ts-node src/index.ts in the VSCode terminal. It compiles and executes in one step, skipping the manual compile-then-run workflow entirely.
Do I need a tsconfig.json to run TypeScript in VSCode?
Not for single files. But for any real project, yes. Without tsconfig.json, tsc makes assumptions about your module resolution, output directory, and target that often cause problems. Run tsc –init to generate one.
Why is tsc not recognized in the VSCode terminal?
npm’s global bin folder isn’t in your PATH. Run npm config get prefix to find the folder, then add it to your system environment variables. Restart the VSCode terminal after making the change.
What is the difference between tsc and ts-node?
tsc compiles TypeScript to JavaScript files, which Node.js then executes. ts-node combines both steps, running TypeScript directly without producing output files. Use tsc for production builds, ts-node for development and quick scripts.
How do I debug TypeScript in VSCode with breakpoints?
Enable “sourceMap”: true in tsconfig.json, then create a .vscode/launch.json with sourceMaps: true and the correct outFiles path. Press F5 to start the debug session. Breakpoints in .ts files will hit correctly.
How do I run TypeScript automatically on save in VSCode?
Run tsc –watch as a background task via .vscode/tasks.json with “isBackground”: true. Set it as the default build task so it starts with Ctrl+Shift+B. Every file save triggers an automatic recompile.
Can I run TypeScript in VSCode without installing Node.js?
No. Node.js is the runtime that executes compiled JavaScript. Without it, there’s nothing to run the tsc output. Install the LTS version from nodejs.org. Both node -v and npm -v should return version numbers after installation.
How do I run a TypeScript browser project in VSCode?
Use Vite. Run npm create vite@latest my-app — –template vanilla-ts, then npm run dev. Vite handles TypeScript transpilation and serves the project at localhost:5173 with Hot Module Replacement enabled by default.
Why are my TypeScript breakpoints showing as gray circles in VSCode?
“sourceMap”: true is missing from tsconfig.json, or the outFiles glob in launch.json doesn’t match your dist/ folder. Check that .js.map files exist in your output directory after compiling. If they’re missing, source maps aren’t generating.
Conclusion
This conclusion is for an article presenting the full workflow for running TypeScript in VSCode, from installing Node.js and configuring tsconfig.json to compiling with tsc, automating builds with tasks, and debugging via source maps.
The method you choose depends on your project. ts-node and tsx work well for development speed. tsc stays the right call for production builds and strict type checking.
Browser projects need a bundler like Vite. Node.js projects don’t.
Get the launch.json and tasks.json set up once, and the day-to-day compile-and-run cycle becomes nearly invisible. That’s the setup worth investing time in.

- Notepad++ Android Options: Apps That Come Close - October 21, 2026
- Data Management Services: A Practical Guide for Growing Companies - October 21, 2026
- MongoDB Cheat Sheet - October 20, 2026