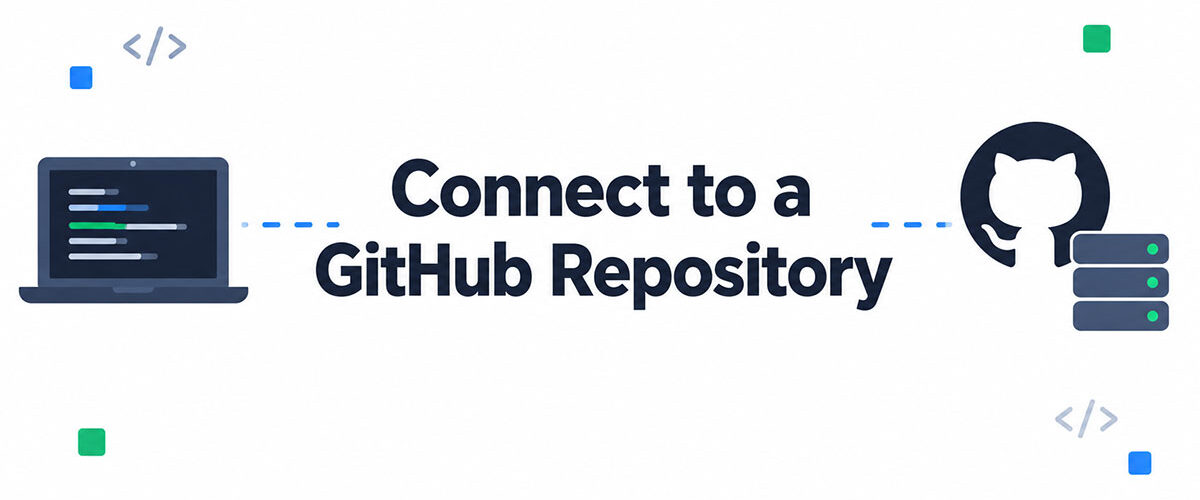
Most Git errors happen before you write a single line of code.
Knowing how to connect to a GitHub repository from VS Code is the one setup step that determines whether your version control workflow runs smoothly or breaks every time you push.
This guide covers 3 connection methods: HTTPS with a Personal Access Token, SSH key authentication, and the GitHub Pull Requests extension. Each method suits a different situation.
By the end, you will know exactly which method to use, how to set it up, and how to fix the most common Git authentication errors that block remote repository access in VS Code.
What Does Connecting to a GitHub Repository From VS Code Mean?
Connecting to a GitHub repository from VS Code means authenticating the editor to communicate with GitHub’s remote servers via Git protocols. VS Code itself does not ship with a native GitHub client. It acts as a Git client, sending push, pull, fetch, and clone operations through Git under the hood.
Without an active connection, none of those remote operations complete. The editor’s Source Control panel just sits there, showing local changes with nowhere to send them.
There are 3 distinct connection layers available: HTTPS (token-based), SSH (key-based), and the GitHub Pull Requests and Issues extension (OAuth-based API access). Each layer serves a different purpose and can run alongside the others.
As of 2025, GitHub hosts over 1 billion repositories and has more than 100 million registered developers. Setting up a working VS Code connection is not optional if you plan to do any serious collaborative software development on the platform.
| Connection Type | Protocol | Authentication | Best For |
|---|---|---|---|
| HTTPS | Port 443 | Personal Access Token (PAT) | Beginners and restricted networks |
| SSH | Port 22 | SSH key pair (Ed25519 recommended) | Frequent contributors and security-focused teams |
| GitHub Extension | GitHub API | OAuth through a web browser | Pull request reviews and issue tracking within VS Code |
What Are the Prerequisites Before Connecting VS Code to GitHub?

Before touching any settings, 4 things need to be in place: a local Git installation (version 2.x or later), a GitHub account, VS Code version 1.70 or later, and network access to github.com.
VS Code does not ship with Git. If Git is not installed, the Source Control panel shows “No source control providers registered” and every Git-related command fails silently or throws an error.
According to the Stack Overflow Developer Survey 2025, 93.87% of developers globally use Git as their primary version control system. Yet a surprising number of setup failures happen simply because Git was installed but never added to the system PATH.
Windows users run into this more than anyone else. The Git installer has a PATH option during setup that most people click through without reading. Understanding what Git is and how it integrates with your OS before starting saves a lot of troubleshooting later.
How to Confirm Git Is Installed and Recognized by VS Code
3-step check:
- Open the VS Code integrated terminal and run
git --version - If the command returns a version number, Git is installed and on the PATH
- If it returns “command not found,” Git is either missing or not registered
VS Code also checks for Git automatically on startup. Go to Settings and search for git.path to manually point VS Code to a specific Git binary if the auto-detection misses it.
On Windows, Git Bash ships with Git for Windows and adds Git to the system PATH during installation. That is the simplest fix if the terminal does not recognize the git command after a fresh install. For a full breakdown of all available Git commands and what each one does, that reference is worth bookmarking before diving into the connection setup.
How to Connect to a GitHub Repository From VS Code Using HTTPS
HTTPS is the default connection method GitHub recommends for most users. It runs over port 443, which passes through almost every corporate and home firewall without issues.
GitHub dropped password-based authentication for Git operations in August 2021. A Personal Access Token (PAT) now replaces the password in every HTTPS authentication flow. This applies to VS Code’s built-in credential prompts as much as it does to the command line.
The connection process runs through 3 stages: cloning or adding a remote, triggering the first push or pull, and completing the VS Code credential prompt with a valid PAT.
How to Generate a GitHub Personal Access Token for VS Code
Fine-grained tokens vs. classic tokens:
- Fine-grained tokens – scoped to specific repositories; better for production and team environments
- Classic tokens – cover all repositories your account can access; simpler but broader
To generate one: GitHub Settings > Developer Settings > Personal access tokens > Generate new token. Select the repo scope at minimum. Set an expiration date. Copy the token immediately. GitHub does not show it again after you leave the page.
GitHub limits each account to 50 fine-grained personal access tokens. For teams running multiple automation workflows, that limit fills up fast. In those cases, a GitHub App is the recommended alternative for scaling API integration beyond individual developer tokens.
How VS Code Stores GitHub Credentials After HTTPS Authentication
VS Code hands credential storage to the OS-level manager: Windows Credential Manager on Windows, macOS Keychain on Mac, and libsecret on Linux.
This means the PAT gets stored locally and reused for subsequent push and pull operations without re-prompting. The Git Credential Manager (GCM) handles this flow transparently after VS Code 1.65.
One thing to watch: if the token expires and VS Code keeps using the cached version, every remote operation fails with “Authentication failed.” The fix is to clear the stored credential from the OS manager and re-authenticate. On Windows, that is Credential Manager > Windows Credentials > look for the github.com entry and delete it.
How to Connect to a GitHub Repository From VS Code Using SSH
SSH authentication uses a key pair: a private key stored locally on your machine and a public key added to your GitHub account. Once set up, there are no tokens to rotate, no prompts for credentials, and no expiration dates to track.
That one-time setup is what makes SSH the preferred method for developers who push code daily. According to GitHub’s own CLI documentation, SSH is especially recommended for private repository contributors who need smooth, uninterrupted authentication.
How to Generate an SSH Key Pair for GitHub
Run this command in the VS Code terminal:
ssh-keygen -t ed25519 -C "youremail@example.com"
GitHub recommends ed25519 over the older RSA algorithm. It generates shorter keys with stronger cryptographic properties. The command prompts for a save location (default is ~/.ssh/ided25519) and an optional passphrase.
- Private key: ~/.ssh/ided25519 (never share this)
- Public key: ~/.ssh/ided25519.pub (this gets added to GitHub)
Once generated, copy the public key content and add it under GitHub Settings > SSH and GPG keys > New SSH key. A full walkthrough of exactly how to add an SSH key to GitHub covers the web interface steps in detail.
How to Test the SSH Connection to GitHub From VS Code
Open the VS Code terminal and run:
ssh -T git@github.com
Expected response: “Hi username! You’ve successfully authenticated, but GitHub does not provide shell access.”
If that comes back, the connection works. If it times out or returns “Permission denied (publickey),” either the public key was not added to GitHub, the wrong private key path is in the SSH config, or the SSH agent is not running.
On Windows, the OpenSSH Agent service needs to be running for key-based auth to work from VS Code’s integrated terminal. Git Bash includes its own SSH agent, which is why some developers run Git operations from Git Bash rather than the VS Code terminal on Windows. Understanding what Git Bash is helps clarify why the two terminals can behave differently for SSH.
How to Connect Using the GitHub Extension for VS Code
The GitHub Pull Requests and Issues extension (publisher ID: GitHub.vscode-pull-request-github) adds a third connection layer on top of HTTPS or SSH. It connects to the GitHub API via OAuth, enabling PR reviews, issue tracking, and GitHub Actions status directly inside the editor.
This extension does not replace Git remote operations. It runs alongside whichever protocol is configured for push and pull. Think of it as a GitHub web interface embedded in VS Code, not a replacement for the underlying Git connection.
How to Install and Sign Into the GitHub Extension
Install from the Extensions panel (Ctrl+Shift+X), search “GitHub Pull Requests and Issues,” click Install.
Sign-in flow:
- Click the Accounts icon in the VS Code activity bar (bottom-left)
- Select “Sign in with GitHub to use GitHub Pull Requests and Issues”
- VS Code opens the browser for GitHub OAuth approval
- Approve the permissions and return to VS Code
The OAuth flow handles authentication without a PAT or SSH key. But the extension does not give you push/pull access on its own. You still need HTTPS or SSH configured for those operations. This is a common point of confusion for developers setting up VS Code for the first time.
As of mid-2025, the extension supports 1 active GitHub account at a time. Developers working across personal and work accounts need to sign out and back in when switching contexts. VS Code 1.90 added native multi-account support in the Accounts menu, which partly addresses this, but the GitHub extension itself still operates one session at a time.
How to Clone a GitHub Repository Directly Inside VS Code

Cloning is the most common first step when connecting to an existing repository. VS Code offers 2 paths: the Command Palette and the GitHub extension shortcut.
Stack Overflow’s 2025 developer survey found that 75.9% of developers use VS Code regularly, with 36 million monthly active users globally (Skillademia 2024). Most of them interact with GitHub repositories through VS Code’s built-in clone workflow rather than switching to a separate Git GUI.
How to Clone Using the Command Palette
Open the Command Palette with Ctrl+Shift+P (or Cmd+Shift+P on Mac), type “Git: Clone,” and paste the repository URL.
VS Code accepts both URL formats:
- HTTPS: https://github.com/username/repository.git
- SSH: git@github.com:username/repository.git
After selecting a local destination folder, VS Code opens the cloned repository and asks whether to open it in the current window or a new one. Pick the new window option when working on multiple projects at the same time. Understanding what git clone does under the hood explains why the repository URL format matters here.
How to Clone Using the GitHub Extension Shortcut
Faster path when the GitHub extension is signed in:
- Open the Command Palette and type “Clone from GitHub”
- VS Code pulls your repository list directly from the GitHub API
- Search by name and select without copying any URL
This method skips the URL step entirely. It is especially useful when working across many repositories in the same organization. The extension queries the GitHub API and surfaces both personal and organization repositories based on your OAuth permissions.
One note: this shortcut only works if the GitHub Pull Requests and Issues extension is installed and authenticated. Without it, “Clone from GitHub” does not appear as a Command Palette option. The standard “Git: Clone” with a manual URL always works regardless of which extensions are installed.
How to Connect an Existing Local Project to a GitHub Repository From VS Code
This is a different workflow from cloning. The code already exists locally. The goal is connecting it to a remote GitHub repository so changes can be pushed and synced.
VS Code 1.73 introduced a “Publish to GitHub” button in the Source Control panel that automates most of this. Before that version, the process required 4 manual steps in the terminal. Many developers still do it manually out of habit, even when the button is available.
How to Initialize Git and Push to GitHub From VS Code
In the VS Code Source Control panel, click “Initialize Repository.” This runs git init in the project folder.
Then create a new repository on GitHub with no README and no .gitignore. Adding those during GitHub repository creation causes a merge conflict on the first push because the remote has commits the local history does not.
| Step | VS Code GUI | Terminal Equivalent |
|---|---|---|
| Initialize Git | Source Control → Initialize Repository | git init |
| Stage files | Click + next to files in Source Control | git add . |
| Commit | Enter a commit message and click the ✓ checkmark | git commit -m "message" |
| Add remote | Terminal only | git remote add origin <repository-url> |
| Push | Source Control → Publish Branch | git push -u origin main |
The “Publish Branch” button in VS Code’s Source Control panel handles the –set-upstream flag automatically. That is the flag that links the local branch to a remote tracking branch, which is what allows future git pull and git push commands to work without specifying the remote and branch name every time.
How to Push an Existing Repository to GitHub From VS Code
If the local repository already has a remote pointing somewhere else, update the remote URL rather than adding a new one.
Run in the VS Code terminal:
git remote set-url origin https://github.com/username/repo.git
Confirm the change with git remote -v. This shows the fetch and push URLs side by side. Both should point to the new GitHub repository before attempting the first push.
The first push to a new remote requires setting the upstream. VS Code’s “Publish Branch” action handles this automatically. If doing it manually in the terminal, the full command is git push -u origin main. The -u flag is what sets the upstream tracking. Getting familiar with what upstream means in Git makes this step less confusing the first time around. Understanding what a remote repository is also helps clarify why the remote URL needs to be set before any sync operations can run.
How to Switch Between GitHub Accounts in VS Code

Most developers run at least 2 GitHub accounts. A personal one, a work one, sometimes a third for a client or open-source organization. VS Code was not built with this in mind originally, and the friction of switching is still one of the most-complained-about issues in the Microsoft/vscode GitHub repository as of 2025.
VS Code 1.90 added native multi-account support via the Accounts menu. Before that version, there was no clean way to stay signed into 2 accounts simultaneously for the same extension category.
How to Switch GitHub Accounts Using the VS Code Accounts Menu
Sign-out and sign-in steps:
- Click the Accounts icon in the bottom-left activity bar
- Select the signed-in GitHub account and choose “Sign Out”
- Click “Sign in with GitHub” and authenticate the second account via the browser OAuth flow
- The GitHub Pull Requests and Issues extension picks up the new session automatically
This works but it is a full sign-out. There is no “switch” toggle. The GitHub extension supports 1 active account at a time as of mid-2025, which means developers with both a personal and a work GitHub account need to go through this cycle every time they change context.
Microsoft acknowledged this in VS Code issue #256635, noting that syncing a selected account across extensions like Copilot, PRs, and Codespaces is a priority feature request with significant developer demand.
How to Handle Multiple GitHub Accounts Using SSH Config
SSH is actually the cleaner solution here. No sign-out needed.
~/.ssh/config setup for 2 accounts:
Host github-personal HostName github.com User git IdentityFile ~/.ssh/ided25519personal
Host github-work HostName github.com User git IdentityFile ~/.ssh/ided25519work `
With this config, the remote URL in each repository determines which key gets used. Set the personal repo remote to git@github-personal:username/repo.git and the work repo to git@github-work:org/repo.git.
Git picks the right key based on the host alias. No switching, no sign-out.
Understanding what git config does at a per-repository level makes this pattern easier to manage across multiple projects.
Developers who work across personal and work contexts frequently also find source control management practices worth reviewing, since Git’s identity model (name, email, key) operates at 3 different scopes: system, global, and local.
How to Set Per-Repository Git Identity in VS Code
Commit identity (name and email in the commit log) is separate from authentication.
Set it per repository from the VS Code terminal:
git config user.name "Work Name" git config user.email "work@company.com"
This writes to the repository’s local .git/config, not the global config. It does not affect authentication.
Push and pull still use whichever credential method (HTTPS or SSH) is configured. The commit history just shows the right identity for that repository.
Teams using continuous integration pipelines often enforce commit email verification, so this detail matters more in professional environments than personal ones.
How to Fix Common GitHub Connection Errors in VS Code

Authentication errors in VS Code are almost always caused by 1 of 5 things: an expired or wrong PAT, a missing or misconfigured SSH key, a repository URL typo, a blocked port, or Git not being found on the system PATH.
The Git authentication failed error is among the most common issues developers encounter when interacting with remote repositories, according to GeeksforGeeks (2025).
GitHub, GitLab, and Bitbucket all now require PATs for HTTPS authentication when 2FA is enabled, which catches a lot of developers who set up credentials months ago and forgot about expiration dates.
| Error | Cause | Fix |
|---|---|---|
| “Authentication failed” | Expired Personal Access Token (PAT) or missing repository scope | Regenerate the token and clear the operating system’s credential cache |
| “Permission denied (publickey)” | Public SSH key not added to GitHub or incorrect key path | Add the public key to GitHub Settings and verify ~/.ssh/config |
| “Repository not found” | Incorrect repository URL or no access to a private repository | Verify the repository URL and confirm your account has the required permissions |
| Port 22 timeout | Firewall or network blocking the SSH port | Use SSH over port 443 via ssh.github.com |
| No Git operations in VS Code | Git is not installed or not available in the system PATH | Install Git if needed and configure git.path in VS Code settings |
How to Fix “Authentication Failed” on HTTPS in VS Code
2-step fix: regenerate the PAT and clear the cached credential.
On Windows, open Credential Manager, go to Windows Credentials, find the github.com entry, and delete it. On macOS, open Keychain Access and remove the github.com entry. On Linux with libsecret, run git credential reject followed by the protocol, host, and username.
After clearing the cache, the next push or pull in VS Code prompts for credentials again. Paste the new PAT when asked for a password. VS Code stores it back to the OS credential manager automatically.
How to Fix “Permission Denied (publickey)” on SSH
SSH key authentication fails for 3 reasons: the public key was not added to GitHub, the wrong private key is being used, or the SSH agent is not running.
Run this check in the VS Code terminal:
ssh -vT git@github.com
The -v flag shows verbose output. Look for the line that reads “Offering public key:” and confirm it matches the key in your GitHub Settings under SSH and GPG keys.
If the agent is not running, add the key manually:
ssh-add ~/.ssh/id_ed25519
Getting familiar with what git remote is also helps here, since SSH connection failures sometimes appear as remote repository errors rather than explicit key errors.
How to Use SSH Over Port 443 When Port 22 Is Blocked
Port 22 is the default SSH port and is blocked by many corporate firewalls. GitHub maintains a fallback SSH server at ssh.github.com that listens on port 443, which most firewall rules allow.
Add to ~/.ssh/config:
Host github.com Hostname ssh.github.com Port 443 User git
Test with ssh -T -p 443 git@ssh.github.com. A successful response reads: “Hi username! You’ve successfully authenticated, but GitHub does not provide shell access.”
According to GitHub’s official documentation, most firewall rules allow this port 443 SSH fallback, though proxy servers may still interfere. If both port 22 and port 443 time out, the issue is at the network level, not the Git or SSH configuration, and requires contacting the network administrator or switching to HTTPS entirely.
How to Manage GitHub Repository Settings From VS Code
Knowing what VS Code can and cannot handle directly saves time. A lot of developers open github.com for things that were actually available inside the editor the whole time.
GitLens has crossed 18 million installs and 120 million downloads (GitKraken, 2025), which signals how many developers want deeper repository management than VS Code’s built-in Source Control panel provides. The VS Code Marketplace lists GitLens alongside GitHub Copilot as one of only 4 extensions exceeding 40 million installs (Skillademia, 2024).
What VS Code Handles Natively for GitHub Repositories
Built into the Source Control panel:
- Staging, committing, and discarding changes
- Push, pull, and fetch from remote
- Branch creation, switching, and deletion
- Merge and rebase operations
- Stash management
- Conflict resolution via the inline merge editor
All of these run through Git under the hood. The panel is a GUI layer over standard Git commands. Anything the built-in panel does not show can be done through the VS Code terminal using full version control CLI commands.
What the GitHub Extension Adds to VS Code
The GitHub Pull Requests and Issues extension connects to the GitHub API on top of Git, adding capabilities the Source Control panel cannot reach.
Added by the extension:
- Pull request creation, review, and approval without leaving VS Code
- Issue creation and assignment from inside the editor
- GitHub Actions workflow run status visible in the sidebar
- Comment threads on specific lines in pull requests
Microsoft announced the official GitHub Actions VS Code extension public beta in May 2024, giving developers workflow run management and YAML authoring support directly inside the editor (GitHub Blog, 2024).
What Still Requires the GitHub Web Interface
Branch protection rules, repository visibility settings, collaborator access, webhooks, and secret management all require github.com.
VS Code has no interface for these. They are account-level or repository-level administration settings that the GitHub API does expose, but the VS Code GitHub extension does not surface them in the editor UI. For Git workflow steps that involve repository-wide configuration changes, the browser is still the right tool.
How GitLens Extends Repository Management Inside VS Code
GitLens (by GitKraken) sits a layer above both the Source Control panel and the GitHub extension.
Key additions over native VS Code Git:
- Inline blame annotations showing author, date, and commit message on every line
- Commit graph for visual branch and history navigation (free tier since 2024)
- File and line history tracking how specific code evolved over time
- Proactive conflict detection before merge or rebase (Pro feature)
GitLens integrates with GitHub, GitLab, Bitbucket, and Azure DevOps for remote provider features like linking commits to pull requests and surfacing issue context.
Understanding the full git repository structure helps when using GitLens’s history and blame features, since the extension surfaces data from every layer of the Git object model, not just the working tree.
Teams engaged in code review workflows tend to get the most out of GitLens, since the inline blame and PR integration cut context-switching between the editor and the browser significantly.
FAQ on Connecting To A GitHub Repository From VS Code
Does VS Code have built-in GitHub support?
Yes. VS Code includes built-in Git integration through the Source Control panel. For GitHub-specific features like pull request reviews and issue tracking, you need to install the GitHub Pull Requests and Issues extension separately.
Do I need to install Git separately before connecting VS Code to GitHub?
Yes. VS Code does not ship with Git. You need Git version 2.x or later installed locally. Run git –version in the VS Code terminal to confirm it is installed and recognized on your system PATH.
What is the difference between HTTPS and SSH connections in VS Code?
HTTPS authenticates using a Personal Access Token over port 443. SSH uses an ed25519 key pair over port 22. HTTPS is easier to set up. SSH removes the need to manage token expiration for frequent pushers.
Why did GitHub stop accepting my password in VS Code?
GitHub deprecated password-based Git authentication in August 2021. You now need a Personal Access Token instead. Generate one under GitHub Settings, Developer Settings, Personal Access Tokens, and use it as your password when prompted.
How do I clone a GitHub repository directly inside VS Code?
Open the Command Palette with Ctrl+Shift+P, type “Git: Clone,” and paste the repository URL. VS Code asks for a local folder, then opens the cloned repository automatically. Both HTTPS and SSH clone URLs work.
What scopes does my GitHub Personal Access Token need for VS Code?
Select the repo scope at minimum. This covers read and write access to private and public repositories. Add workflow if you plan to trigger GitHub Actions runs. Fine-grained tokens offer tighter per-repository permission control.
How do I fix “Permission denied (publickey)” when using SSH in VS Code?
Run ssh -vT git@github.com in the VS Code terminal to check which key is being offered. If the key does not match your GitHub SSH settings, add the correct key to GitHub under Settings, SSH and GPG keys.
Can I use multiple GitHub accounts in VS Code at the same time?
Not simultaneously through the GitHub extension, which supports one active account at a time. The cleanest workaround is SSH config with separate key pairs and host aliases, letting Git pick the right credentials per repository automatically.
What should I do if SSH port 22 is blocked by my firewall?
Add a ~/.ssh/config entry pointing github.com to ssh.github.com on port 443. GitHub officially supports SSH over HTTPS port as a firewall fallback. Test with ssh -T -p 443 git@ssh.github.com before pushing.
What is the GitHub Pull Requests and Issues extension and do I need it?
It is an official GitHub extension that adds OAuth-based GitHub API access inside VS Code. You do not need it for basic git push and pull operations. Install it only if you want pull request reviews or issue tracking without leaving the editor.
Conclusion
This conclusion is for an article presenting how to connect to a GitHub repository from VS Code using 3 distinct methods: HTTPS with a Personal Access Token, SSH key pairs, and the GitHub Pull Requests extension.
Each method serves a different workflow. HTTPS works for most beginners. SSH suits developers who push code daily and need token-free remote repository access.
Once the connection is established, the Source Control panel handles staging, committing, branching, and merging. The GitHub extension adds pull request reviews and issue tracking on top.
Get the SSH config right once, and git authentication runs silently in the background for every repository you clone afterward.

- MongoDB Cheat Sheet - October 20, 2026
- Adding AI Video Generation to a Software Product: Architecture, Cost Guardrails and QA - October 20, 2026
- Show Hidden Characters, Spaces, and Line Endings in Notepad++ - October 19, 2026