Upload the wrong file and Play Console rejects it instantly. Get the Google Play feature graphic size wrong by even a single pixel, and your store listing stalls before it reaches a single user.
This banner image is a mandatory asset for every Android app listing. It drives editorial placement, acts as the cover image for your promo video, and directly influences store listing conversion rates.
This article covers the exact pixel dimensions, file format requirements, safe zone guidelines, design rules, upload steps, common errors, and how localization works for this asset across multiple markets.
What Is the Google Play Feature Graphic?
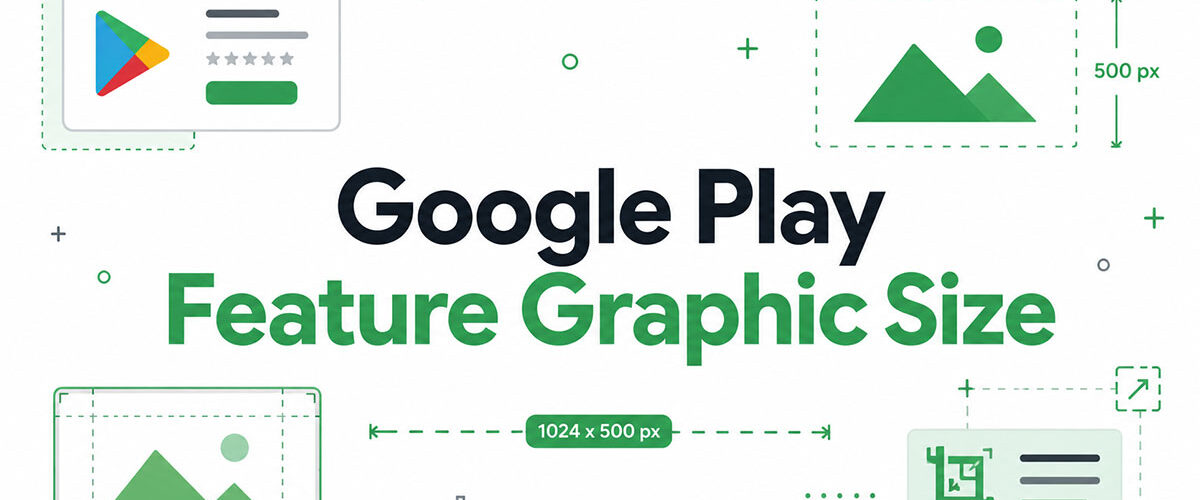
The Google Play feature graphic is a mandatory 1024 x 500 pixel banner image that every app listing on the Google Play Store must include before publishing.
It functions as the visual header for your store listing page, appearing above your screenshots and serving as the cover image for your promotional video if one is attached.
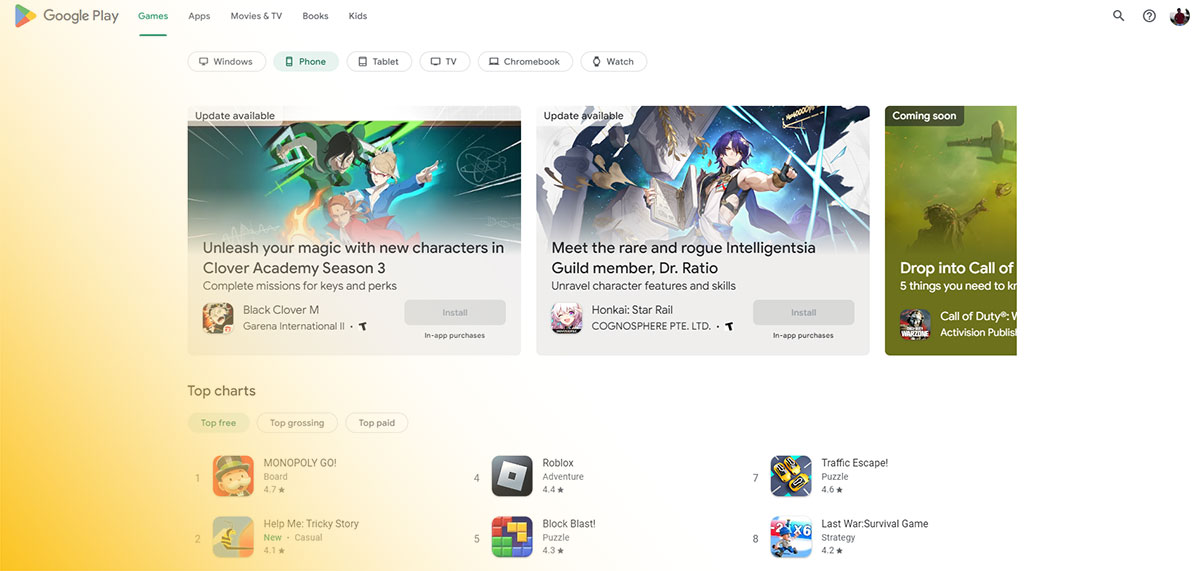
Google also pulls this asset into curated collections, editorial spots, app campaign placements, and search result cards, which means it shows up in far more places than just your listing page.
Before the Play Store redesign in 2018, the feature graphic sat at the very top of every listing as a full-width banner, visible to all visitors regardless of whether a promo video was present. After the redesign, its primary display role became the cover image for promotional videos, with a play button overlaid in the center.
One thing worth knowing: if you do not upload a promo video, the feature graphic will not display on your listing page. Google still requires you to upload one because the asset is used for promotional and editorial placements across the platform.
Where the Feature Graphic Appears on Google Play
This asset appears across more surfaces than most developers expect. Missing any one of them is a good reason not to treat this as a box-ticking exercise.
- Store listing page on mobile (displayed before screenshots when a promo video is present)
- Featured sections: “Editor’s Choice,” category carousels, “Top Charts”
- Google Play homepage promotional banners
- App Campaigns ads displayed inside the Play Store
- Expanded organic search results on some device configurations
- External sharing contexts, when an app link is shared on social or messaging platforms
Phiture’s analysis of 3,300 feature graphics across 33 Play Store categories found that store listing visitors make download decisions in around 7 seconds. The feature graphic, as the first visual element they encounter, carries most of that initial load.
Feature Graphic vs. App Icon vs. Screenshots
Key difference: the feature graphic operates at brand level, not UI level. Screenshots show what the app looks like inside. The feature graphic communicates what the app is about at a glance.
| Asset | Recommended Dimensions | Primary Role | Displays Without Video |
|---|---|---|---|
| Feature Graphic | 1024 × 500 px | Cover image for the promo video and use in certain editorial and promotional placements | ❌ No, it does not appear on the main store listing by itself |
| App Icon | 512 × 512 px | Represents the app in search results, recommendations, and on users’ devices | ✅ Yes |
| Screenshots | Up to 3840 px on the longest side | Showcase the app’s UI, features, and user experience | ✅ Yes |
The app icon shows up in search results and is a scaled-down brand mark. The feature graphic is a horizontal canvas that carries a value proposition and visual story. Designing one as a resized version of the other is a common mistake that weakens both.
What Is the Google Play Feature Graphic Size?
The Google Play feature graphic size is 1024 x 500 pixels. This is a hard requirement, not a guideline. Upload a file even 1 pixel off those dimensions and Play Console will reject it immediately with no auto-resizing.
The aspect ratio works out to approximately 2.048:1, which is wider than 16:9 and closer to a cinematic 2:1 banner format. That wide, shallow shape is what gives the feature graphic its distinctive look across the Play Store.
File Format and Size Requirements
Google enforces 3 technical constraints alongside the pixel dimensions.
Accepted formats: JPEG or 24-bit PNG. Both work. JPEG is generally the smarter choice for file size.
Alpha transparency: not allowed. Flatten all layers before export. A PNG with an alpha channel will fail the upload even if the dimensions are correct.
Maximum file size: 1 MB. Most well-compressed JPEGs at 1024 x 500 come in well under this. If a PNG is pushing the limit, re-export as JPEG at 80-90% quality or run it through TinyPNG first.
Safe Zone and Cropping Behavior
Google crops and scales the feature graphic differently depending on which surface it appears on. The full 1024 x 500 canvas is only guaranteed on the listing page itself.
In featured collections and editorial placements, the graphic is cropped to aspect ratios ranging from 16:9 down to 4:3, cutting off left and right edges unpredictably.
Recommended safe zone: keep all critical content (logo, headline, key visuals) inside a centered 924 x 400 px area, leaving a 50 px buffer on each edge. Anything outside that zone risks being cut off on at least one display surface.
If a promo video is attached, a circular play button roughly 96 x 96 px renders dead-center on the feature graphic. Do not place your logo or tagline at the horizontal center of the image, as the play button will obscure it.
| Spec | Requirement |
|---|---|
| Dimensions | 1024 × 500 px (exact) |
| Aspect Ratio | 2.048:1 |
| File Formats | JPEG or 24-bit PNG |
| Alpha Channel (Transparency) | Not supported |
| Maximum File Size | 1 MB |
| Recommended Safe Zone | Central 924 × 400 px |
What Are the Google Play Feature Graphic Design Requirements?
Google enforces both technical specs and content policy rules for the feature graphic. Failing either category can result in upload rejection or policy flags after publishing.
The content rules are where most developers run into trouble, not the pixel dimensions.
Content Policy Rules
These restrictions come directly from Google Play’s developer policy and apply to every version of the feature graphic, including localized variants.
- No pricing or promotional language: words like “Free,” “Discount,” “Sale,” “#1,” or “Top” are explicitly banned
- No call-to-action text: phrases like “Download now,” “Install now,” or “Try now” violate policy
- No third-party logos or trademarked characters without proper written permission
- No Google Play badges, Android robot imagery, or Apple App Store assets of any kind
- No simulated ratings, fake notifications, or misleading performance claims
- No imagery that suggests Google endorsement or Play Store awards
Time-sensitive content is also flagged. A feature graphic with a “Holiday Sale” banner that stays live in January will eventually draw a policy review. Google’s official guidance specifically calls out time-bound content as something to swap in and out in a timely manner.
Visual and Design Rules
Google does not define specific design rules beyond the technical specs and content policies, but Play Console’s own documentation and editorial team guidelines point to several practical constraints.
Text legibility: any text must remain readable when the graphic is displayed at 50% of its uploaded size. This rules out font sizes below roughly 24 px in practice.
No device frames: avoid adding phone or tablet mockup frames. Google renders its own framing where relevant, and outdated device imagery can make listings look neglected quickly.
No duplication of screenshot content: the feature graphic and first screenshot should not carry the same visual. They appear side by side on some display surfaces and serve different communication purposes.
Apps like Duolingo and Spotify consistently follow these constraints. Their feature graphics show only own-brand assets and a single short headline, which is exactly what Google’s editorial team expects when evaluating apps for featured placement.
How to Create a Google Play Feature Graphic at the Correct Size
Set your canvas to exactly 1024 x 500 px before doing anything else. This seems obvious, but a lot of designers start in a different size and rescale, which introduces compression artifacts and sub-pixel rendering issues.
Canvas Setup in Design Tools
Resolution: 72 DPI is standard for screen assets. Color mode: RGB, not CMYK.
Figma: create a new frame at 1024 x 500. Set constraints to scale for any child elements you want to stay proportional.
Adobe Photoshop: New Document, set width to 1024 px, height to 500 px, resolution 72 PPI, color mode RGB 8-bit.
Canva: use “Custom size” and enter 1024 x 500 px. Canva’s Google Play feature graphic templates already use this canvas, so those are a faster starting point for non-designers.
Safe Zone and Margin Guidelines
Draw a guide box at 924 x 400 px, centered on the canvas. That is your working area for all critical content.
Leave the outer 50 px on each edge empty or filled only with background color. Those edge zones will be cropped on promotional surfaces.
Play button zone: if your app includes a promo video, mark the center 96 x 96 px area as off-limits for logos and text. The play button will cover that area on your listing page.
Took me a while to figure out that “centered” safe zone advice actually means centered on the full 1024 x 500 frame, not centered within the visible crop. Worth double-checking before you finalize the layout.
Export Settings for JPEG and PNG
JPEG at 80-90% quality is the default choice. It keeps file sizes comfortably under 1 MB and handles photographic content better than PNG.
Use 24-bit PNG only if your design has large flat color areas where JPEG compression creates visible banding. Flatten all layers before export. An unflattened PNG with alpha channel fails the Play Console upload every time.
File size check: run the exported file through TinyPNG or Squoosh if it is approaching the 1 MB limit. Both tools compress without visible quality loss at this canvas size.
Final check before upload: view the exported file at 50% zoom. If any text becomes hard to read at that scale, increase font size or reduce the amount of copy in the design.
How Does the Feature Graphic Affect Google Play Store Conversion?
The average Google Play Store listing conversion rate in the US was 27.3% in H1 2024 (AppTweak). That means roughly 1 in 4 people who view a listing install the app. The feature graphic is the first visual that those visitors encounter.
Internal A/B tests run by larger ASO agencies consistently show that swapping the feature graphic alone moves install conversion rate by 7 to 18 percent, comparable in impact to changing the first screenshot (ScreenMagic, 2025). For a high-traffic app, that range represents a significant volume of installs.
Why the Feature Graphic Drives Conversion
It is the first image a store listing visitor sees when a promo video is present. Screenshots, which carry most of the UI storytelling work, sit below it. If the feature graphic does not hold attention, most visitors will not scroll far enough to read descriptions or view screenshots.
Phiture’s analysis of 3,300 Play Store feature graphics found that store listing visitors form a download intent within approximately 7 seconds. The feature graphic absorbs a large portion of that window.
Google itself recommends testing the feature graphic as a priority when running Google Play store listing experiments, noting that “it has such a presence on your store listing’s page.”
The Relationship Between Feature Graphic Quality and Editorial Placement
Apps that appear in Google Play’s “Editor’s Choice” and curated collections are reviewed by Google’s editorial team. A low-quality feature graphic, one that is blurry, policy-violating, or visually inconsistent with the app’s brand, disqualifies a listing from editorial consideration regardless of how strong the app itself is.
What editorial reviewers look for:
- Brand consistency across icon, feature graphic, and screenshots
- Clear value proposition communicated without promotional language
- High visual quality at both full size and thumbnail crop
- No policy violations (no pricing language, no fake ratings)
Headspace and Calm are good examples here. Both apps use minimal feature graphics with a single short headline, consistent color palettes, and no text that could be flagged as promotional. Their editorial placement history on Google Play reflects that approach.
A/B Testing the Feature Graphic
Google Play Console includes native Google Play A/B testing through the Store Listing Experiments tool. It tests icon, feature graphic, screenshots, and descriptions against real store traffic and reports changes in first-time installers per store listing visitor.
PressPlay’s 2026 analysis of experiment data puts typical feature graphic conversion swings at 5 to 15 percent per test, with higher variance in competitive categories like games and utilities. Tests should run for at least 7 days, covering both weekday and weekend traffic patterns, before drawing conclusions.
External platforms like SplitMetrics and StoreMaven also support feature graphic testing with more detailed segmentation than Play Console’s native tool provides.
How to Upload the Feature Graphic in Google Play Console
The upload path inside Google Play Console is: select app > Store presence > Main store listing > Graphics section.
The “Feature graphic” upload field sits in the Graphics section, below the screenshot upload area. The field accepts JPEG and 24-bit PNG files up to 1 MB at exactly 1024 x 500 px.
Upload Rules and Common Rejection Reasons
Play Console does not auto-resize or auto-compress files. The system validates dimensions and format before accepting the upload.
Dimension mismatch: even 1 pixel off (1023 x 500, 1024 x 499) triggers a rejection. Re-export from the original canvas at the correct size rather than scaling the exported file.
Alpha channel in PNG: flatten all layers in Photoshop or Figma before exporting. A transparent layer anywhere in the PNG file will cause the upload to fail.
File over 1 MB: re-export JPEG at 70-80% quality. For PNG files, run through TinyPNG before upload. Do not open and re-save a compressed file, as this adds additional compression artifacts on top of the existing ones.
Publishing and Live Status
Uploading a new feature graphic does not make it live immediately. The updated store listing goes through Google’s review process before the change is visible to users on the Play Store.
Review times vary. Most store listing updates process within a few hours to a few days. If a policy flag is triggered (prohibited language in the graphic, for example), the update is held until the issue is resolved.
The feature graphic change also applies to all locales that use the default graphic. Localized listings with a locale-specific feature graphic are unaffected by changes to the default. Check each locale separately after publishing to confirm the correct graphic is showing in each market.
What Are Common Feature Graphic Errors and How to Fix Them?
Most feature graphic upload failures fall into 4 categories. Each has a specific fix that does not require redesigning the entire asset.
Technical Upload Errors
Dimension mismatch (“Image dimensions don’t match”): the canvas was set incorrectly or the file was resized after export. Open the original design file, verify the canvas is exactly 1024 x 500 px, then re-export. Do not resize the exported image file.
File over 1 MB:
- For JPEG: re-export at 70-80% quality in Photoshop or Figma
- For PNG: run through TinyPNG or Squoosh before upload
- Avoid opening and re-saving compressed files repeatedly
Alpha channel rejection: in Photoshop, use Flatten Image before export. In Figma, export as JPEG or confirm the PNG export has no transparency. In Canva, download as JPEG rather than PNG to avoid this entirely.
Policy Violation Flags
These errors appear after upload or during the listing review phase, not at the file validation stage.
Promotional language: remove any instance of “Free,” “Sale,” “#1,” “Best,” “Top,” or “Million Downloads.” Rewrite the tagline to describe the app’s function or benefit without superlatives or pricing language.
Call-to-action text: phrases like “Download now” or “Play free” are policy violations. State what the app does rather than what the user should do.
Third-party brand misuse: remove any logo, character, or trademark you do not own. This includes the Android robot, the Google Play badge, and competitor brand assets. Even a faint watermark from a stock image library can trigger a review hold.
Design Errors That Hurt Conversion Without Triggering Rejection
These do not cause upload failures but they do reduce the asset’s effectiveness.
Text clipped at edges: move all text and logo elements inside the 924 x 400 px safe zone. Flush-to-edge placement looks fine in the design tool but gets cropped in promotional placements.
Logo behind the play button: if the app has a promo video, the play button renders in the center of the feature graphic. Shift the logo to the upper-left or upper-right quadrant of the safe zone.
Small text that becomes unreadable at thumbnail size: test the exported file at 50% zoom before upload. Any font below 24 px will be illegible in search result card contexts and smaller promotional surfaces.
How to Upload the Feature Graphic in Google Play Console
The upload path inside Google Play Console is: select app > Store presence > Main store listing > Graphics section.
The “Feature graphic” upload field sits in the Graphics section, below the screenshot upload area. The field accepts JPEG and 24-bit PNG files up to 1 MB at exactly 1024 x 500 px.
Upload Rules and Common Rejection Reasons
Play Console does not auto-resize or auto-compress files. The system validates dimensions and format before accepting the upload.
Dimension mismatch: even 1 pixel off (1023 x 500, 1024 x 499) triggers a rejection. Re-export from the original canvas at the correct size rather than scaling the exported file.
Alpha channel in PNG: flatten all layers in Photoshop or Figma before exporting. A transparent layer anywhere in the PNG file will cause the upload to fail.
File over 1 MB: re-export JPEG at 70-80% quality. For PNG files, run through TinyPNG before upload. Do not open and re-save a compressed file, as this adds additional compression artifacts on top of the existing ones.
Publishing and Live Status
Uploading a new feature graphic does not make it live immediately. The updated store listing goes through Google’s review process before the change is visible to users on the Play Store.
Most store listing updates process within a few hours to a few days. If a policy flag is triggered, say prohibited language in the graphic, the update is held until the issue is resolved.
The feature graphic change also applies to all locales that use the default graphic. Localized listings with a locale-specific feature graphic are unaffected by changes to the default.
Check each locale separately after publishing to confirm the correct graphic is showing in each market.
What Are Common Feature Graphic Errors and How to Fix Them?
Most feature graphic upload failures fall into 4 categories. Each has a specific fix that does not require redesigning the entire asset.
Technical Upload Errors
Dimension mismatch (“Image dimensions don’t match”): the canvas was set incorrectly or the file was resized after export. Open the original design file, verify the canvas is exactly 1024 x 500 px, then re-export. Do not resize the exported image file.
File over 1 MB:
- For JPEG: re-export at 70-80% quality in Photoshop or Figma
- For PNG: run through TinyPNG or Squoosh before upload
- Avoid opening and re-saving compressed files repeatedly
Alpha channel rejection: in Photoshop, use Flatten Image before export. In Figma, export as JPEG or confirm the PNG export has no transparency. In Canva, download as JPEG rather than PNG to avoid this entirely.
Policy Violation Flags
These errors appear after upload or during the listing review phase, not at the file validation stage.
Promotional language: remove any instance of “Free,” “Sale,” “#1,” “Best,” “Top,” or “Million Downloads.” Rewrite the tagline to describe the app’s function or benefit without superlatives or pricing language.
Call-to-action text: phrases like “Download now” or “Play free” are policy violations. State what the app does rather than what the user should do.
Third-party brand misuse: remove any logo, character, or trademark you do not own. This includes the Android robot, the Google Play badge, and competitor brand assets. Even a faint watermark from a stock image library can trigger a review hold.
Design Errors That Hurt Conversion Without Triggering Rejection
These do not cause upload failures but reduce the asset’s effectiveness.
Text clipped at edges: move all text and logo elements inside the 924 x 400 px safe zone. Flush-to-edge placement looks fine in the design tool but gets cropped in promotional placements.
Logo behind the play button: if the app has a promo video, the play button renders in the center of the feature graphic. Shift the logo to the upper-left or upper-right quadrant of the safe zone.
Small text at thumbnail size: test the exported file at 50% zoom before upload. Any font below 24 px will be illegible in search result card contexts and smaller promotional surfaces.
How Does Feature Graphic Localization Work on Google Play?
Google Play supports separate feature graphics per language and locale within the same app listing. A default graphic is displayed when no locale-specific version is uploaded.
Android holds 72.77% of the global mobile OS market share as of late 2025 (Statcounter), with countries like India at 95.21% and Brazil at 81.45% Android penetration. For apps targeting those markets, English-only feature graphics leave significant conversion on the table.
Default vs. Localized Feature Graphics
The default graphic is your fallback. Every locale where no specific version has been uploaded will display the default.
How Google determines which graphic to show:
- User’s device language matches a localized listing: localized graphic is shown
- No locale match exists: default graphic is shown
- Localized text exists but no localized graphic: default graphic is shown alongside the translated text
This is worth noting because it is a common trap. Adding translated metadata without uploading a localized feature graphic means users see translated text next to a graphic containing English copy.
App localization research confirms that localized store listings consistently produce higher conversion rates, as users are more likely to install apps that reflect their language and cultural context (AppRadar, 2024).
Technical Specs for Localized Graphics
Identical to the default. No exceptions, no special sizing for specific locales.
| Spec | Localized Graphic | Default Graphic |
|---|---|---|
| Dimensions | 1024 × 500 px | 1024 × 500 px |
| File Format | JPEG or 24-bit PNG | JPEG or 24-bit PNG |
| Maximum File Size | 1 MB | 1 MB |
| Alpha Channel (Transparency) | Not supported | Not supported |
Every locale requires a fresh export from the original design file at the correct image dimensions. Do not resize or re-save previously exported files.
Managing Localized Graphics in Play Console
Localized graphics are uploaded through the same Graphics section as the default, but from within the localized store listing view for each language.
Path: Store presence > Translations > select language > Graphic Assets > Feature graphic.
Google Play Console currently supports adding localized store listings for over 80 language translations (Google Play documentation). The delivery app Rappi uses custom store listings for specific countries like Mexico, showing separate feature graphics tailored to each regional market rather than relying on a single Spanish-language default.
For apps managing many locales, the API integration path through the Google Play Developer API supports bulk uploads, which is faster than uploading through the console interface one language at a time.
Custom Store Listings vs. Localized Translations
These are 2 different systems inside Play Console. They solve different problems.
Localized translations: target users by language, regardless of country. A Spanish-language graphic reaches all Spanish-speaking users globally.
Custom store listings (CSLs): target users by country. A CSL for Mexico can show a different feature graphic than a CSL for Spain, even though both display in Spanish. Google Play supports up to 50 CSL variations per app.
CSLs are the right tool when different countries in the same language group have different user preferences, pricing contexts, or cultural references. Localized translations are sufficient when language adaptation alone closes the gap.
The image file spec (1024 x 500 px, JPEG or 24-bit PNG, 1 MB max) is identical across both systems. The design approach is where they differ.
FAQ on Google Play Feature Graphic Size
What is the required Google Play feature graphic size?
The required size is exactly 1024 x 500 pixels. No auto-resizing happens. Upload a file even 1 pixel off and Play Console rejects it immediately. The aspect ratio works out to approximately 2.048:1.
What file formats does the Google Play feature graphic accept?
Google accepts JPEG or 24-bit PNG only. PNG files must not contain an alpha transparency channel. If your file has transparent layers, flatten them before export or the upload will fail.
What is the maximum file size for a feature graphic?
The file size limit is 1 MB. Most JPEGs at 1024 x 500 px come in well under that. If a PNG is too large, re-export as JPEG at 80-90% quality or compress it with TinyPNG first.
Is the feature graphic required to publish an app on Google Play?
Yes. Google requires a feature graphic for every listing before publishing. Even without a promo video, the asset is mandatory. Google uses it for editorial placements and promotional surfaces across the Play Store.
Where does the feature graphic appear on Google Play?
It appears at the top of your store listing page when a promo video is present, in curated collections, editorial spots, App Campaigns placements, and when your app link is shared externally on other platforms.
What is the safe zone for the Google Play feature graphic?
Keep all critical content inside a central 924 x 400 px area, leaving a 50 px buffer on each edge. Promotional surfaces crop the outer edges unpredictably. Anything outside that zone risks being cut off.
Can I include text in the feature graphic?
Yes, but keep it minimal. Use a font size of at least 24 px so text stays legible at thumbnail size. Avoid promotional language like “Free,” “Sale,” or “Download Now,” as these violate Google Play policy.
Does the feature graphic affect app store conversion rate?
It does. ASO agency data shows swapping the feature graphic alone can move install conversion rate by 7 to 18 percent. Google itself recommends testing it first when running Store Listing Experiments in Play Console.
Can I upload a different feature graphic for each language?
Yes. Google Play supports separate feature graphics per language and locale. If no localized version is uploaded, the default graphic displays instead. The file spec is identical: 1024 x 500 px, JPEG or PNG, 1 MB max.
What content is not allowed in a Google Play feature graphic?
Banned content includes pricing claims, call-to-action text, simulated ratings, Google Play badges, third-party logos without permission, and Android device imagery. Policy violations delay your listing review or trigger removal from the store.
Conclusion
This conclusion is for an article presenting the full picture of Google Play feature graphic size, from the exact 1024 x 500 px canvas requirement to file format rules, safe zone placement, and policy compliance.
Getting the banner image dimensions right is the baseline. The real work is in designing a store listing visual asset that holds up across promotional surfaces, passes editorial review, and drives tap-through rates in competitive app categories.
Test your feature graphic through Store Listing Experiments. Localize it for key markets. Keep critical content inside the safe zone.
A well-executed graphic affects both app store optimization and editorial placement eligibility. Treat it as a conversion asset, not a formality.

- MongoDB Cheat Sheet - October 20, 2026
- Adding AI Video Generation to a Software Product: Architecture, Cost Guardrails and QA - October 20, 2026
- Show Hidden Characters, Spaces, and Line Endings in Notepad++ - October 19, 2026