
Buying the same app six times for every device in your household gets expensive fast.
Learning how to family share apps on iPad saves money and keeps everyone connected through Apple’s Family Sharing feature.
Up to six family members can access shared App Store purchases, subscriptions like Apple Music and Apple TV+, and even iCloud+ storage.
The family organizer controls everything from one device.
This guide walks you through setting up a Family Sharing group, enabling purchase sharing, inviting members, and downloading shared apps.
You will also find troubleshooting fixes for common issues and tips for managing child accounts with parental controls.
Total time needed: about 10 minutes.
How to Family Share Apps on iPad
Family sharing apps on iPad is the process of distributing purchased applications among up to six family members through Apple’s Family Sharing feature.
Users need this when they want to avoid buying the same app multiple times across different devices.
It also helps when managing shared content for children or setting up parental controls.
This guide covers 7 steps requiring approximately 10 minutes and iPadOS 8 or later.
Prerequisites
Before you start, make sure you have everything ready.
- iPad running iPadOS 8 or later (iPadOS 18 recommended)
- Valid Apple Account with payment method on file
- Family organizer role for initial setup
- Apple Account credentials for each family member
- Active internet connection
The family organizer handles all billing responsibilities.
Each member must have their own Apple ID to join the family group.
Step One: How Do You Access Family Settings on iPad?
Open the Settings app on your iPad home screen.
Tap your name at the top of the screen to access Apple Account settings.
Select “Family” from the menu options.
Action:
- Settings app > [Your Name] > Family
- If you see “Set Up Family Sharing,” you haven’t created a group yet
- Existing groups show current family members listed
Purpose: This menu controls all Family Sharing settings, including purchase sharing, subscriptions, and locking apps on iPad for children.
Step Two: How Do You Create a Family Sharing Group?
Tap “Set Up Family Sharing” or “Continue” if prompted.
Follow the onscreen instructions to configure your family group.
The system automatically assigns you as the family organizer.
Action:
- Settings > [Your Name] > Family > Continue
- Confirm your Apple Account credentials when asked
- Choose which features to share: purchases, iCloud+, location
Purpose: Creating the group establishes you as the organizer who manages members and controls the shared payment method for App Store purchases.
You can add up to five other people to your family.
Step Three: How Do You Enable Purchase Sharing for Apps?
Tap “Purchase Sharing” within the Family settings menu.
Toggle on Share My Purchases to make your apps available to family members.
Confirm the payment method that will cover all family purchases.
Action:
- Settings > Family > Purchase Sharing
- Tap your name, then enable “Share My Purchases”
- Verify the shared payment method shows correctly
Purpose: This setting allows downloaded apps and App Store content to appear in each family member’s Purchased page.
Without this enabled, family members cannot access your purchased applications.
The family organizer’s payment method covers all shared purchases automatically.
If you need to manage what kids can access, consider blocking specific apps on iPad through Screen Time.
Step Four: How Do You Invite Family Members to Your Group?
Tap the Add Member button in Family settings.
Choose “Invite People” to send an invitation via Messages, Mail, or AirDrop.
Action:
- Settings > Family > Add Member > Invite People
- Enter the family member’s Apple ID email
- Send invitation through your preferred method
Purpose: Invitations link their Apple Account to your family group, granting access to shared purchases and subscriptions.
Step Five: How Do Family Members Accept the Invitation?
Family members receive the invitation via email or text message.
They tap the link and sign in with their Apple Account credentials.
Action:
- Open invitation from Messages or Mail
- Tap “Accept Invitation” and confirm Apple ID
- Wait for confirmation that they joined the family group
Purpose: Accepting connects their device to the Family Sharing group and enables access to shared content.
Members can only belong to one family at a time.
Step Six: How Do Family Members Enable Their Purchase Sharing?
Each family member must turn on Share My Purchases on their device.
Without this step, their apps remain hidden from other family members.
Action:
- Settings > [Your Name] > Family > Purchase Sharing
- Tap member name, toggle on Share My Purchases
- Confirm the shared payment method displays
Purpose: This setting controls which purchases each person shares with the family group.
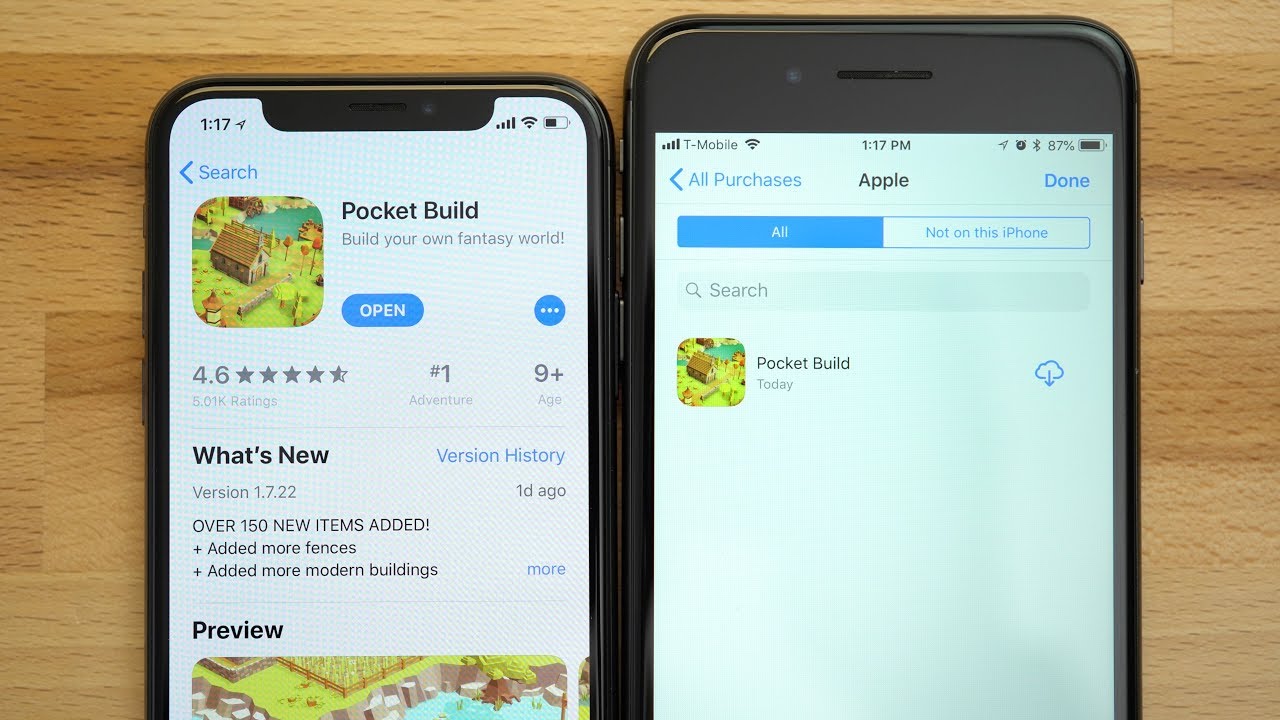
Step Seven: How Do You Download Shared Apps From Family Purchases?
Open the App Store on your iPad.
Tap your profile picture, then select “Purchased” to view family apps.
Action:
- App Store > Profile Picture > Purchased
- Tap a family member’s name to see their shared apps
- Tap the cloud icon to download any app
Purpose: The Purchased page displays all eligible shared applications from family members who enabled purchase sharing.
Downloaded apps appear on your home screen just like regular purchases.
Need to tidy up afterward? Learn how to organize apps on iPad for a cleaner layout.
Verification
Confirm apps are successfully shared by checking the Purchased page in the App Store.
Each family member’s name should appear with their shareable apps listed.
If shared apps show a price instead of a download icon, purchase sharing is not active on one of the devices.
Test by downloading one app from a family member’s purchases.
Troubleshooting
Shared Apps Not Appearing in Purchased Section
Sign out of the App Store and sign back in.
Verify the family member enabled Share My Purchases on their device.
Check that both accounts use the same country or region settings.
Family Member Cannot Accept Invitation
Confirm their Apple ID email was entered correctly.
Resend the invitation from Settings > Family > [Member Name] > Resend Invitation.
They may already belong to another family group, which requires leaving first.
Payment Method Declined for Family Purchases
Update the family organizer’s payment method in Apple Account settings.
Add a new card through Settings > [Your Name] > Payment & Shipping.
The organizer’s default payment method covers all shared purchases automatically.
App Shows Purchase Price Instead of Download Icon
The app may not support Family Sharing due to developer restrictions.
Some in-app purchases and subscriptions cannot be shared between accounts.
Check if the original purchaser still has the app installed on their device.
If you need to remove unwanted apps first, here is how to delete apps on iPad.
Alternative Method: Adding a Child Account
For children under 13, create a Child Account instead of sending an invitation.
This enables Ask to Buy, which requires parental approval for all downloads.
Setup steps:
- Settings > Family > Add Member > Create Child Account
- Enter child’s birthday and agree to Parent Privacy Disclosure
- Create their Apple ID and configure Screen Time controls
Child accounts give parents full control over app permissions and content restrictions.
You can also turn off permissions for specific apps on iPad for added safety.
Related Processes
- Setting up Ask to Buy for parental controls
- Sharing Apple subscriptions like Apple Music and Apple TV+ with family members
- Managing Screen Time for family devices
- Hiding specific purchases from family view
- Removing a member from Family Sharing group
- Transferring apps from old iPad to new iPad
- Clearing cache on iPad for apps to free up storage
FAQ on How To Family Share Apps On iPad
How many family members can share apps on iPad?
Family Sharing supports up to six people total, including the family organizer.
Each member needs their own Apple Account to join the group and access shared App Store purchases.
Can all apps be shared through Family Sharing?
Not all apps support sharing.
Developers decide whether their apps are eligible for purchase sharing. In-app purchases typically cannot be shared, and some subscriptions have restrictions.
Does Family Sharing cost money?
Family Sharing itself is free to set up and use.
The family organizer pays for all shared purchases through their default payment method. Existing purchases from members become shareable at no extra cost.
Can I hide my purchased apps from family members?
Yes. Open the App Store, go to your Purchased page, swipe left on any app, and tap “Hide.”
Hidden apps remain installed but disappear from the family purchases list.
Why can’t my family member see my shared apps?
Both accounts must have Share My Purchases enabled in Settings.
Check that both devices use the same country or region. Try signing out of the App Store and back in.
Can children under 13 join Family Sharing?
Yes. The family organizer creates a Child Account through Settings.
This enables Ask to Buy for parental approval on downloads and activates Screen Time controls automatically.
How do I download apps my family member purchased?
Open the App Store and tap your profile picture.
Select “Purchased,” tap the family member’s name, and tap the cloud icon next to any app to download it.
Can I switch to a different Family Sharing group?
Yes, but Apple limits switches to once per year.
Leave your current family group first through Settings > [Your Name] > Family, then accept an invitation to the new group.
What happens if the family organizer leaves the group?
The entire Family Sharing group disbands when the organizer leaves.
All members lose access to shared purchases, subscriptions, and iCloud+ storage. A new group must be created.
Do shared apps take up storage on my iPad?
Shared apps only use storage after you download them.
They appear in the Purchased section but do not install automatically. You choose which family apps to download to your device.
Conclusion
Knowing how to family share apps on iPad eliminates duplicate purchases and simplifies content management across multiple devices.
The entire setup takes about 10 minutes through the Settings app.
Once your Family Sharing group is active, every member can download shared apps directly from the Purchased page in the App Store.
The process works seamlessly across iPadOS, iPhone, and Mac devices linked to the same Apple Account.
Parents benefit from Ask to Buy and Screen Time controls for managing what children access.
Keep Share My Purchases enabled on all devices to maintain visibility of shared content.
If apps stop appearing, sign out and back into the App Store to refresh the family purchases list.
Start sharing today and cut your app spending immediately.
Many of his resources are available on various design marketplaces and for free on Codepen.
Over the years, he's worked with a range of clients and contributed to design publications like Design Your Way, Designmodo, WebDesignerDepot, WPDean, Speckyboy, and Slider Revolution among others.
- How to Make a Repository Public in GitHub - July 14, 2026
- Production Incident Communication Without Separate Monitoring and Status-Page Systems - July 13, 2026
- How to Set Up Subscriptions on Google Play (Developer Guide) - July 12, 2026


