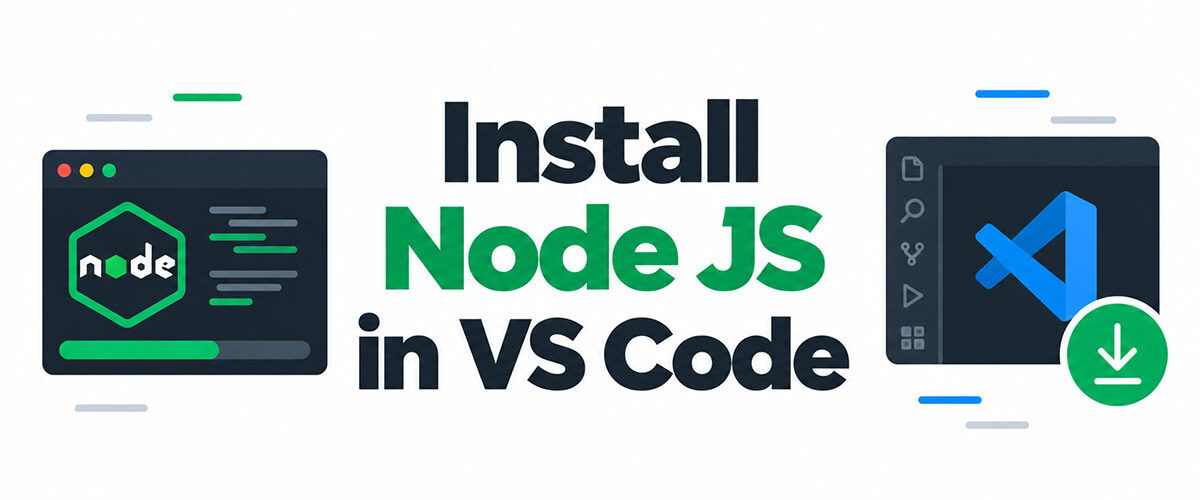
VS Code can’t run Node.js code on its own. It ships without the runtime, so a .js file does nothing in the editor until Node.js is installed and the terminal can find it.
The LTS installer from nodejs.org covers Windows and macOS, and npm comes bundled in the same package. Linux users go through NodeSource or their distribution’s packages.
Which release to pick is changing this month. Node.js 24 moves from Active to Maintenance LTS on 20 October 2026, and Node.js 26 enters LTS on 28 October 2026 (Node.js Release Working Group schedule, 2026).
Which Node.js version should you install, LTS or Current?
Install the LTS line. On 13 October 2026 that means Node.js 24, and Node.js 26 joins it in LTS on 28 October.
Current releases are there to gather feedback before they get promoted, which makes them a poor base for an editor setup you plan to keep.
| Release line | Status on 13 October 2026 | LTS starts | End of life |
|---|---|---|---|
| Node.js 24 | Active LTS (Maintenance from 20 October) | 28 October 2025 | 30 April 2028 |
| Node.js 26 | Current | 28 October 2026 | 30 April 2029 |
| Node.js 27 | Not released, alpha from October 2026 | October 2027 | April 2030 |
Dates come from the Node.js Release Working Group schedule and the project’s “Evolving the Node.js Release Schedule” announcement (last updated 10 March 2026).
Which line to download this week
Before 28 October 2026, download Node.js 24. It sits in Active LTS and runs to April 2028. After that date Node.js 26 is the better download, because its end of life is April 2029 and nothing else on the table has a longer runway.
Node.js 20 or older is out. Node.js 20 reached end of life on 30 April 2026.
Node.js 24 does not turn into a bad pick on 20 October when it moves to Maintenance. The official releases roadmap treats both Active LTS and Maintenance LTS as fit for production.
Pick Current only if you test against upcoming Node.js features. Someone learning JavaScript in VS Code has no use for that.
What the 2026 schedule change alters
Under the old model, odd-numbered lines never reached LTS, per the Release Working Group’s own documentation.
Node.js 27 is the first line under the new model, where a major release ships each April and gets promoted to LTS in October. Every major version becomes LTS.
Each major line gets a 30-month LTS window and 36 months of total support, counted from the first Current release to end of life. From Node.js 27 onward, 1 major release ships per year.
So the old habit of “grab the even number” stops mattering after Node.js 26. From then on, the newest LTS is the answer.
How to install Node.js on Windows, macOS and Linux

On Windows and macOS, the official installer from nodejs.org is the simplest route. On Linux, use a package repository or a version manager.
Every route installs the runtime and npm together, because npm ships inside the Node.js distribution (VS Code documentation). There is no separate npm download.
| Method | System | Best for | Watch out for |
|---|---|---|---|
| nodejs.org installer (.msi, .pkg) | Windows, macOS | First install, one version | Single global version |
| winget install OpenJS.NodeJS.LTS | Windows | Scripted setups | Reopen the terminal afterwards |
| brew install node | macOS | Existing Homebrew users | Installs the newest release, not always LTS |
| NodeSource repository | Debian, Ubuntu, Fedora, RHEL | Current LTS on Linux | Third-party repository |
Package names come from the winget package catalog, the Homebrew formula index and the Node.js package manager page.
Windows
- Download the Windows Installer (.msi) from nodejs.org/download. Pick x64 or ARM64 to match the processor.
- Run the file and accept the licence.
- Leave the default features selected (runtime and npm), and make sure the PATH entry stays ticked.
- Finish the wizard.
- Close every VS Code window and open it again.
The last step looks optional. It’s the one people skip, and it causes most “command not recognized” reports.
Prefer the command line? Run winget install OpenJS.NodeJS.LTS in PowerShell, then reopen the terminal so the change takes effect.
macOS
Download the .pkg from nodejs.org. The download archive offers a single .pkg for both x64 and ARM64, so Intel and Apple Silicon Macs take the same file.
With Homebrew, brew install node pulls the newest release, which is not always the LTS line. A versioned formula such as node@24 keeps you on LTS.
Linux and WSL
Linux has no single answer, and that’s fine.
- NodeSource works by adding its repository with a setup script, then installing the nodejs package through apt or dnf. NodeSource binaries are maintained and supported by NodeSource itself, as the Node.js package manager page notes.
- Your distribution’s own repositories are the easiest route, though the version there follows the distribution’s release cycle.
A version manager such as nvm or fnm makes more sense once two projects need different lines.
On Windows with WSL, VS Code needs the WSL extension, and Node.js goes inside the Linux distribution. The VS Code Node.js tutorial documents this pairing for full editing and debugging in the WSL context.
Check with which node afterwards. A path under /mnt/c means the shell is calling the Windows copy, not the Linux one.
How to check Node.js in the VS Code integrated terminal

Run node -v, then npm -v. Node.js prints a v-prefixed version and npm prints a bare number.
A healthy Node.js 24.10.0 setup shows something like v24.10.0 and 11.6.1, the npm version that release ships with (Node.js 24.10.0 release notes).
Open the terminal
Press Ctrl+` on any platform, or choose Terminal, then New Terminal. It opens at the root of the workspace, according to the VS Code documentation.
The default shell on Windows is PowerShell. macOS and Linux use whatever $SHELL points to, which is zsh on a stock Mac and usually bash on Linux.
The Terminal: Select Default Profile command swaps the shell if you want Command Prompt or Git Bash instead.
Read the output
That pairing is by design, since Node.js 24.10.0 bundles npm 11.6.1 (Node.js 24.10.0 release notes).
A v24 Node.js next to an 11.x npm means the bundled package manager is intact. A much older npm number usually means another Node.js install sits earlier on the PATH.
To see which copy actually runs, use which node on macOS and Linux. Windows needs where node in Command Prompt or Get-Command node in PowerShell.
Why VS Code needs a full restart after installing
VS Code reads PATH once, at launch.
Terminals opened later inherit that old copy, so a Node.js install made while the editor was running stays invisible. Issue 13671 on the VS Code GitHub repository documents this. A user traced the problem to the PATH captured at launch, and a maintainer confirmed that VS Code runs under the environment it started with and that relaunching is the workaround.
Closing a terminal tab does nothing here. Quit every VS Code window and reopen it.
On macOS, put PATH changes in ~/.zprofile, because VS Code starts your shell as a login shell and runs those scripts (VS Code terminal profiles documentation). After a winget install, reopen the terminal and VS Code so the new PATH is picked up.
How to run and debug a Node.js file in VS Code

Save the file with a .js extension and run node app.js in the integrated terminal. Press F5 to debug it. VS Code ships its own Node.js debugger, so no extension is needed (VS Code documentation).
Run a first script
- Create an empty folder, for example hello, and open it with code . or File, then Open Folder.
- Add a file named app.js.
- Type console.log(‘Hello from Node.js’); and save.
- Run node app.js in the integrated terminal.
The .js extension is what makes VS Code load the JavaScript language service for the file, as the VS Code Node.js tutorial explains.
Debug with the Run and Debug view
Click in the gutter to set a breakpoint, then press F5. For a simple file such as app.js, no configuration is needed.
A larger project is where a launch.json comes in. When VS Code first generates it, it reads the start script in package.json to fill in the entry point of the Launch Program configuration.
The file earns its place once you need arguments or environment variables, or a custom working directory. Starting the app through an npm script is another reason, and so is keeping several named configurations in one project.
Open Run and Debug and click the create a launch.json file link. The Node.js snippets in that file include Launch Program and Launch via npm.
Debug any command with the JavaScript Debug Terminal
This is the quickest option, and it needs no configuration.
The JavaScript Debug Terminal debugs any Node.js process you start inside it. Create one with the Debug: Create JavaScript Debug Terminal command, or pick it from the terminal switcher dropdown.
Extra launch.json-style properties go into the debug.javascript.terminalOptions setting.
Why does VS Code say “node is not recognized” and how do you fix it?

The shell cannot find a node executable in any folder on its PATH. A failed install or a stale environment can cause it, and so can a blocked script. Each has its own fix.
| Symptom | Cause | Fix | System |
|---|---|---|---|
| ‘node’ is not recognized | Node.js folder missing from PATH | Reopen VS Code, then repair the install | Windows |
| command not found: node | Install failed or profile not read | Run which node in a new terminal, reinstall if empty | macOS, Linux |
| npm.ps1 cannot be loaded | PowerShell execution policy | Set RemoteSigned for the current user | Windows |
| EACCES: permission denied | Global install writes to a protected folder | Version manager or user-owned npm prefix | macOS, Linux |
Fix order when PATH still fails
- Reopen VS Code completely. If that does nothing, restart the computer so every process picks up a fresh PATH.
- Run the .msi again and choose Repair, keeping the PATH feature selected.
- Add the install folder by hand. The default is %ProgramFiles%\nodejs, and it goes into the Path variable under Edit the system environment variables.
- Open a new VS Code window and run node -v.
PowerShell blocks npm
Microsoft Learn lists Restricted as the effective execution policy on Windows clients when no scope sets one.
PowerShell is the VS Code default on Windows, and npm installs a PowerShell launcher named npm.ps1. That’s why node -v works while npm does not.
To fix it, run Set-ExecutionPolicy -ExecutionPolicy RemoteSigned -Scope CurrentUser. Local scripts then run, and downloaded scripts need a signature.
CurrentUser is the right scope because the default is LocalMachine, which needs an elevated PowerShell.
Or switch the terminal profile to Command Prompt. Microsoft documents execution policies as a PowerShell feature, so cmd.exe is not affected.
EACCES on global installs
The npm documentation names two fixes and ranks them. A node version manager comes first, a different default directory second.
For the directory route, run npm config set prefix ~/.local, then add PATH=~/.local/bin:$PATH to ~/.profile and run source ~/.profile. On zsh, add source ~/.profile to ~/.zprofile as well.
The npm docs mark that route as not applicable to Windows.
Skip sudo. For one-off global commands, npx avoids a global install altogether (npm 5.2 or later).
When should you use a Node.js version manager instead of the installer?

Use one as soon as two projects need different Node.js lines, or when global installs keep hitting permission errors. A single project on one LTS line runs fine on the installer.
| Tool | Runs on | Choose it when |
|---|---|---|
| nvm | macOS, Linux, WSL | You already live in bash or zsh |
| nvm-windows | Windows | You want a native Windows manager |
| fnm | macOS, Windows, Linux | You want one tool and .nvmrc support everywhere |
| Volta | macOS, Linux, Windows | An existing project already pins its version in package.json (the project is unmaintained, so avoid it for new setups) |
Switching versions and pinning a project
With nvm, nvm use 24 switches the current shell, and with no version given it reads .nvmrc.
fnm reads both .node-version and .nvmrc, and the –use-on-cd option in your shell setup switches versions when you enter a folder (fnm README).
On nvm-windows, nvm list releases shows downloadable versions in the current 2.x line (1.x used nvm list available), and nvm use with a version number activates one.
Volta pins a project with volta pin node@24, which writes a volta field into the closest package.json, so anyone using Volta on the project gets the same version (Volta documentation). The Volta repository now states that the project is unmaintained and recommends migrating to mise.
One VS Code detail with nvm: nvm use applies to the shell that ran it. A second terminal tab keeps its old version until you switch there too.
Installing a manager over an existing Node.js
The sources disagree. The npm documentation says you do not need to remove your current Node.js or npm before installing a node version manager. The older nvm-windows 1.x README recommended uninstalling every prior Node.js install to avoid conflicting versions.
The gap was mechanical. The 1.x line created a symlink that would not overwrite an existing folder, even an empty one, so the .msi’s %ProgramFiles%\nodejs directory had to go first. The current nvm-windows 2.x runs in shim mode by default, and its link mode uses NTFS junctions, but removing the .msi copy first is still the cautious route because it leaves a single node.exe on the PATH.
On Windows, that means uninstalling the .msi version, deleting leftover Node.js folders, then installing nvm-windows. On macOS and Linux, npm’s docs say no removal is needed, though it’s worth running which node afterwards. And nvm-windows is a separate project from nvm, not a port of it.
Removing nvm-windows later deletes every Node.js version it manages, global npm modules included, according to its own documentation.
Node.js Installation in VS Code FAQ
Does VS Code come with Node.js?
No. VS Code includes JavaScript language support and a Node.js debugger, but the runtime itself is a separate install.
Without it, node app.js fails in the integrated terminal.
Do I need to install npm separately?
No, npm ships inside the Node.js distribution. Installing Node.js gives you both, and npm -v confirms it.
How do I update Node.js?
Repeat whatever you used to install it. That might be a newer installer for the same line, or winget upgrade OpenJS.NodeJS.LTS on Windows. Homebrew users run brew upgrade node, or brew upgrade node@24 for a versioned formula. With a version manager, install the new version through it.
Restart VS Code afterwards so the terminal sees the new version.
How do I uninstall Node.js?
Remove it the way it arrived. On Windows that means Installed apps or winget uninstall OpenJS.NodeJS.LTS (use OpenJS.NodeJS if that was the package you installed), and on macOS with Homebrew it means brew uninstall node.
Check for a leftover %ProgramFiles%\nodejs folder on Windows and delete it.
Is a Node.js extension or Code Runner required?
No. The integrated terminal and the built-in debugger already run and debug Node.js files.
Code Runner is a third-party extension that adds a run button. It saves a few keystrokes, nothing more.
How do I create a package.json file with npm init?
Open the integrated terminal in the project folder and run npm init. It asks a handful of questions and writes the file.
Add -y to accept every default. Later npm install commands record dependencies in that same file.
How Long Does a Node.js Installation Stay Supported?
A Node.js installation receives fixes until its release line reaches end of life. A copy of Node.js 24 installed today has about 18 months left.
The copy keeps running afterwards, but the project provides no support for it.
Node.js 26 enters LTS while Node.js 24 still has those 18 months, so both lines receive fixes during the overlap. The upgrade becomes a scheduled task, not an emergency.
Write down the end-of-life date of whichever line you installed, and move to the next LTS inside the overlap. Reopen VS Code afterwards and rerun the version check.
The advice holds as of 13 October 2026 and changes only if the Node.js Release Working Group revises its schedule.

- How to Install Node JS in VS Code and Run Your First Script - November 11, 2026
- Protecting Users and Brand Standards Across Image-Driven Platforms - November 10, 2026
- Go Cheat Sheet - November 9, 2026