Most people use Notepad++ for years without knowing it has two completely separate highlighting systems.
Knowing how to highlight in Notepad++ the right way cuts review time significantly, whether you are scanning log files, annotating code, or tracking variables across a large document.
This guide covers every method available:
- The Mark tab for persistent color marks
- Style tokens for instant, selection-based highlighting
- Syntax highlighting and custom language schemes
- Plugin options and dark mode color fixes
By the end, you will know exactly which tool to reach for and when.
What Is Highlighting in Notepad++

Highlighting in Notepad++ refers to 2 different features that people often confuse. One is syntax highlighting, which automatically color-codes code based on language rules. The other is manual text marking, where you apply background colors to specific words or phrases yourself.
Knowing which type you need determines which tool to use. Using the Mark tab when you actually need syntax highlighting (or vice versa) wastes time and produces confusing results.
| Type | Triggered by | Persists after save? | Best for |
|---|---|---|---|
| Syntax highlighting | File extension or Language menu | Yes (language setting saves) | Code readability, error spotting |
| Manual text marking | Mark tab, style tokens, or right-click | No (session only) | Log review, code comparison, annotation |
According to the 2025 Stack Overflow Developer Survey, Notepad++ ranks third in IDE usage at 27.4% across more than 60,000 developers surveyed. That’s a significant chunk of developers who interact with these highlighting features daily.
Notepad++ runs on the Scintilla editing component, which handles both rendering modes separately. That separation is why clearing your manual marks doesn’t affect syntax colors, and why changing your language setting doesn’t remove search highlights.
How Does the Mark Feature Highlight Text in Notepad++
The Mark tab applies persistent background color to every instance of a searched word or phrase in the document. It sits inside the Find & Replace dialog and uses up to 5 distinct color slots labeled Style 1 through Style 5.
How to open the Mark tab
Press Ctrl+F to open the Find dialog, then click the “Mark” tab at the top of the dialog window.
Alternatively, use Ctrl+H to open Find & Replace and navigate to the same Mark tab from there.
How to apply a highlight color
- Type the word or phrase in the “Find what” field
- Check the “Highlight all” checkbox
- Click “Mark All”
- All matching instances receive a background color from the active style slot
The color applied depends on which style is active. Notepad++ cycles through Style 1, 2, 3, 4, and 5 in sequence unless you manually pick a specific one via Search > Mark All.
How to clear Mark highlights
Clear All Marks button inside the Mark tab removes every color mark in the document at once.
You can also use Search > Clear All Marks from the menu bar without reopening the dialog. Individual style marks can be removed via Search > Remove Marks > Remove Style 1 (through 5).
Note: highlights do not save when you close the file. Reopen the document and you start fresh with no marks applied.
How Do You Highlight Multiple Words with Different Colors
Notepad++ supports 5 simultaneous highlight colors for different search terms. Each style slot holds one set of marked text independently, so you can track 5 different terms at the same time without overlap confusion.
Applying different colors per term
Via the Mark tab: Each time you run “Mark All,” Notepad++ uses the next available style slot. Run it 5 times with 5 different search terms to fill all slots with distinct colors.
Via the menu: Go to Search > Mark All > Using 1st Style (or 2nd through 5th Style) to pick a specific slot manually. This gives you full control over which color goes on which word.
Practical use: log file review
Say you’re reviewing a server log. You can mark “ERROR” in Style 1, “WARNING” in Style 2, and “TIMEOUT” in Style 3.
All 3 terms stay visible simultaneously with distinct colors, so you can scan the file and immediately spot which type of issue clusters in which sections. Sysadmins do this constantly with Notepad++ for exactly this reason.
If the same text matches 2 overlapping style applications, the last-applied style takes visual precedence.
How Do You Highlight a Whole Line in Notepad++
Notepad++ doesn’t have a dedicated “highlight entire line” button. But there are 3 practical ways to do it, depending on whether you need a permanent visual mark or just want to select the line.
| Method | How to do it | Persistent? |
|---|---|---|
| Regex via Mark tab | Use .+ in Find field with “Regular expression” + “Highlight all” | No |
| Click line number | Click the gutter number to select the full line | No (selection only) |
| Bookmark | Ctrl + F2 to bookmark, visible as dot in margin | Yes (session) |
The regex approach with .+ matches every non-empty line and marks them all. If you want to mark specific lines matching a pattern, replace .+ with your actual pattern and run “Mark All” to apply color only to matching lines.
Bookmarks are worth considering if you need to return to specific lines later. They don’t produce a background color change, but they persist across the session and let you jump between marked lines with F2.
How Do You Use Find and Replace to Highlight Text
Find in Notepad++ produces 2 types of visual results: transient search highlights (temporary, disappear when you close the dialog or press Escape) and Mark-applied highlights (persistent until manually cleared).
Transient search highlights
Press Ctrl+F and type a search term. Notepad++ immediately highlights all matches in a default blue or yellow (depending on your theme).
These highlights exist only while the search is active. Press Escape to close the Find bar and the highlights disappear. They don’t use the style slots and can’t be customized per-search without switching to the Mark tab.
Find All in Current Document
In the Find tab, click “Find All in Current Document” instead of “Find Next.” This opens a Search Results panel at the bottom showing every match with line numbers and context.
The matches also get highlighted in the document. This is especially useful when you need to review all occurrences before deciding whether to replace them.
Switching to persistent highlights
If you need the highlights to stay after closing the Find dialog, switch to the Mark tab and use “Highlight all” + “Mark All” instead. That moves you from transient search mode into the persistent marking system.
How Does Syntax Highlighting Work in Notepad++
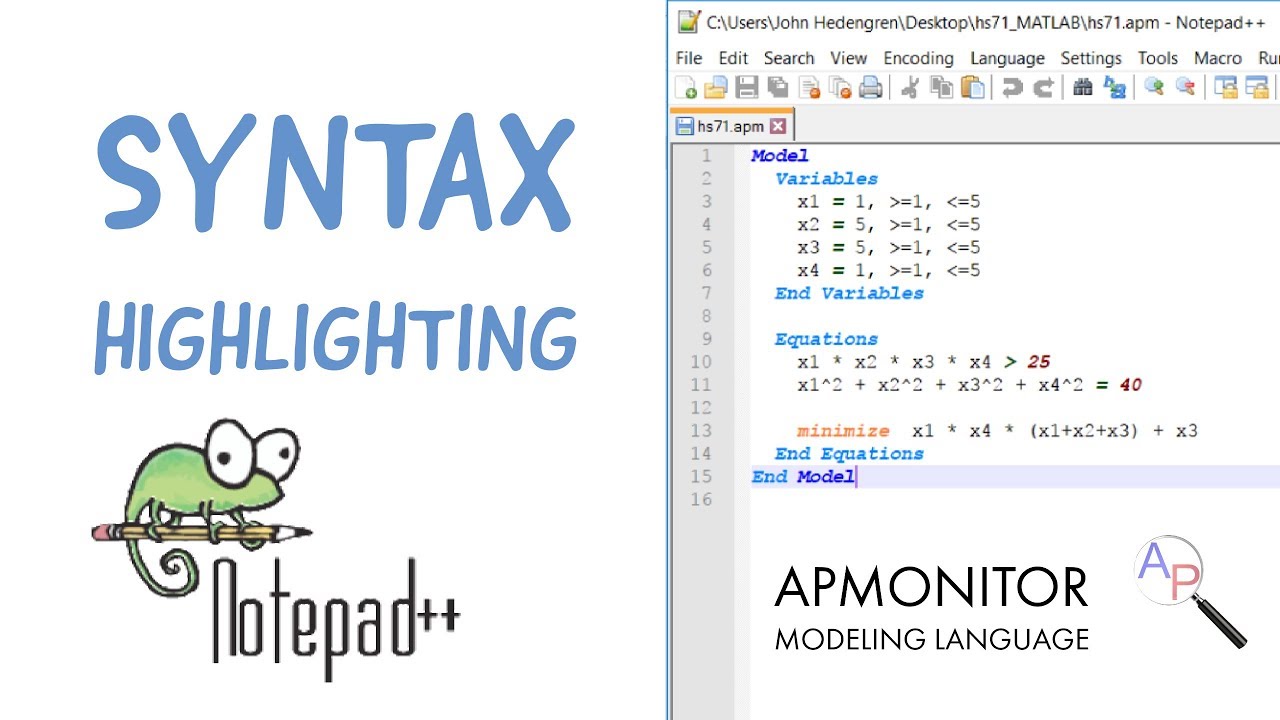
Syntax highlighting in Notepad++ color-codes source code based on language grammar rules. It applies automatically when you open a file with a recognized extension, and it covers 87 pre-configured languages out of the box (Technipages).
Auto-detection and manual selection
When you open a .py file, Notepad++ sets the language to Python automatically. Same for .js, .html, .xml, and every other supported extension.
If auto-detection fails (say you’re editing a file with a non-standard extension), go to Language > [first letter of language] > [language name] and set it manually. The highlighting updates immediately.
What gets color-coded
Each language definition includes rules for:
- Keywords and reserved words
- String literals and character constants
- Comments (line and block)
- Numbers and operators
- Function or class names (language-dependent)
Syntax highlighting applies to the whole document. You can’t apply one language’s rules to a section while using a different language for the rest of the file.
Performance note
Scintilla handles syntax rendering efficiently on most files, but very large files (above ~100MB) can cause rendering slowdowns. If you’re working with massive log files, consider disabling syntax highlighting via Language > Normal Text to restore scroll speed.
How Do You Create a Custom Syntax Highlighting Scheme

Notepad++ provides the User Defined Language (UDL) system for creating custom color rules. This is how you’d add highlighting for a scripting language, a config file format, or any text structure Notepad++ doesn’t support by default.
Opening the UDL editor
Go to Language > User Defined Language > Define your language. A dialog opens with tabs for keyword groups, operators, comment styles, and folding rules.
Each category has a “Styler” button. Clicking it opens a color and font picker where you set the foreground color, background color, bold, and italic for that token type.
Defining keywords and token groups
Keyword groups: You get 8 keyword lists (Keywords1 through Keywords8). Each list can hold space-separated terms that share a color style. A custom config language might put section headers in Keywords1 and boolean values in Keywords2.
Operators and delimiters: Define characters like = : { } that should receive special color treatment.
Comments: Set line comment prefixes (like # or //) and block comment delimiters so Notepad++ colors comment blocks correctly.
Saving and reusing UDL files
Completed UDL definitions export as XML files. Save them to share with teammates or reimport on a fresh Notepad++ install.
The Notepad++ vs UltraEdit comparison shows one of Notepad++’s real advantages here: the UDL community has published hundreds of ready-made language definitions. Downloading a pre-built XML file is faster than building one from scratch. The Notepad++ UDL library at GitHub hosts definitions for Markdown, TOML, Dockerfile syntax, and dozens more.
How Do Style Tokens Highlight Selected Text Instantly

Style tokens are the fastest way to apply a background color in Notepad++. No dialog, no search. Select the text, right-click, choose “Style all occurrences of token”, and pick a style from 1 through 5.
By default, these commands have no keyboard shortcuts assigned. You set them yourself through Settings > Shortcut Mapper, filter by “style,” and bind each one to a key combination you’ll actually remember (Notepad++ Community, 2023).
How style tokens differ from the Mark tab
The Mark tab requires you to type a search term. Style tokens work from whatever you’ve already selected.
Key differences:
- Style tokens apply instantly on selection, no dialog needed
- Mark tab lets you highlight terms you haven’t selected yet
- Both use the same 5 style slots and same color assignments
- Both clear with Search > Clear All Marks
How to apply and remove a style token
Right-click any selected text. Go to “Style all occurrences of token” and choose a style number. Every matching instance in the document gets colored immediately.
To remove a single style, go to Search > Clear Style > Clear Style N (where N is 1 through 5). This removes that specific color from all occurrences without touching the other style slots.
Practical use: quick code review annotation
Say you’re reviewing a pull request pasted into Notepad++. Select a variable name, apply Style 1. Select a suspicious function call, apply Style 2. No typing required, and both colors stay visible simultaneously while you read through the rest of the file.
Teams reviewing config files or data exports use this constantly. It’s genuinely faster than the Mark tab for terms you can already see on screen.
Which Plugins Add Highlighting Features to Notepad++
The built-in 5-style system covers most cases, but 3 plugins extend highlighting in ways the native tools don’t support: more than 5 colors, line-level marking, and log-pattern-based coloring.
| Plugin | What it adds | Install via Plugin Admin? |
|---|---|---|
| LineHighlighter | Up to 10 background colors per line content filter | Manual install (GitHub) |
| Python Script | Custom indicator styles beyond Style 5, scriptable highlighting | Yes |
| ComparePlus | Color-diff highlighting for added, deleted, and moved lines | Yes |
LineHighlighter
LineHighlighter colors entire lines based on whether they contain a keyword or phrase you define. Up to 10 filters available per document, each with its own background color (GitHub, xquintana).
Installation is manual: create a LineHighlighter folder in the Notepad++ plugins directory, drop in the DLL, restart. Not in Plugin Admin, but the setup takes under 2 minutes.
Python Script plugin
For power users only. Python Script exposes Scintilla’s indicator API directly, which means you can define custom color styles beyond the built-in 5 and apply them programmatically.
The Notepad++ Community forum has documented approaches using indicator index 8 with INDICATORSTYLE.ROUNDBOX for rounded highlight boxes in custom colors. Overkill for most use cases, but the option exists.
ComparePlus
ComparePlus is the go-to plugin for comparing two files in Notepad++. It presents files side by side with color-coded highlights: green for additions, red for deletions, and yellow for moved lines.
It also integrates with Git and SVN, so you can diff the current file against a previous commit without leaving the editor (MakeUseOf, 2025).
How Do You Remove or Reset All Highlights in Notepad++

3 different actions clear highlights in Notepad++, and they don’t all do the same thing. Using the wrong one leaves behind color marks you didn’t expect to keep.
Clearing Mark tab highlights
Option 1: Click “Clear All Marks” inside the Mark tab dialog.
Option 2: Use Search > Clear All Marks from the menu bar. Same result, no dialog required.
Both remove every Mark-applied color from the document at once. There’s no undo for this, so if you want to keep some marks and remove others, use Search > Clear Style > Clear Style N to remove one slot at a time.
Clearing style token highlights
Style tokens clear per-slot.
- Search > Clear Style > Clear Style 1 (removes Style 1 color only)
- Search > Clear Style > Clear Style 2 through 5 (same for each slot)
- Search > Clear All Marks (removes all style slots at once)
What persists after saving and closing
Manual highlights (both Mark tab and style tokens) do not save when you close the file. Reopen the document and all color marks are gone.
Bookmarks behave differently. Set via Ctrl+F2, they persist across the session and survive file saves. They don’t add background color, but they let you jump back to specific lines with F2. Worth using when you need to return to flagged lines the next time you open the file.
How Does Highlighting Behave with Dark Mode and Themes
Notepad++ added native Dark Mode in v8.0.0, and it introduced a real problem with highlight visibility. The default Mark Style colors (especially yellow for Style 3) disappear or lose contrast against dark backgrounds.
Why highlight colors clash in dark themes
Mark Style colors are stored in the theme file. When you switch to a dark theme like DarkModeDefault, Obsidian, or Dracula, the style slot colors don’t automatically adjust for contrast against the new background (Notepad++ User Manual).
Yellow text marks on a dark gray background are nearly unreadable. This is a known issue in the community, particularly with themes that use near-black backgrounds like rgb(43, 43, 43).
How to fix highlight colors for dark themes
Go to Settings > Style Configurator > Global Styles. Scroll down to “Mark Style 1” through “Mark Style 5.” For each slot, click the background color swatch and pick a color with enough contrast against your dark theme background.
Recommended replacements for dark themes:
- Style 1: Deep teal or blue (#005577 range)
- Style 3: Replace yellow with orange-brown (#CC7700) for dark backgrounds
- Style 5: Muted red works better than bright pink on dark backgrounds
Save changes by clicking “Save & Close.” Changes apply immediately to any open document with existing marks.
UDL colors and dark themes: a separate issue
Changing your theme does not update User Defined Language colors. This catches people off guard when they switch to Dark Mode and their custom syntax highlighting suddenly clashes with the new background.
You need to edit each UDL definition separately under Language > User Defined Language > Define your language, updating foreground and background colors to match your dark theme. The Notepad++ manual covers this explicitly, noting that UDL and theme systems are independent of each other.
If you regularly work across Notepad++ and VS Code, you’ll notice VS Code handles dark mode theme switching more cleanly since extensions inherit the active theme automatically.
FAQ on How To Highlight In Notepad++
Does Notepad++ have a built-in highlight feature?
Yes. Notepad++ includes 2 native systems: the Mark tab inside the Find dialog for search-based color marking, and style tokens via the right-click context menu for selection-based highlighting. Both use 5 color slots.
Why is my syntax highlighting not working in Notepad++?
The file extension probably isn’t recognized. Go to Language menu and set it manually. If highlighting still fails, delete the configuration XML files in %AppData%Notepad++ and restart. Corrupt config files are the most common cause.
Can I highlight text in Notepad++ without opening the Find dialog?
Yes. Select the text, right-click, and choose “Style all occurrences of token.” Pick a style from 1 to 5. No dialog required. You can also assign keyboard shortcuts via Settings > Shortcut Mapper for faster access.
Do highlights save when I close a file in Notepad++?
No. Manual highlights from the Mark tab and style tokens are session-only. They disappear when you close the file. Bookmarks (Ctrl+F2) are the only marking method that persists across sessions in Notepad++.
How do I highlight multiple different words in different colors?
Use the Mark tab repeatedly with different search terms. Each run uses the next available style slot (1 through 5), applying a distinct color per term. Alternatively, use Search > Mark All > Using Nth Style to pick specific slots manually.
How do I change the highlight colors in Notepad++?
Go to Settings > Style Configurator > Global Styles. Select “Mark Style 1” through “Mark Style 5” and change the background color for each slot. This is especially useful when default colors clash with dark themes.
Can I highlight an entire line in Notepad++?
Not with a single button. Use the Mark tab with a regex pattern like .+ and “Highlight all” to color all non-empty lines. For specific lines, the LineHighlighter plugin supports up to 10 keyword-based line color filters.
How do I create custom syntax highlighting in Notepad++?
Open Language > User Defined Language > Define your language. Set keywords, operators, and comment rules, then assign colors via the Styler button for each token group. Export the result as an XML file to reuse or share.
Which Notepad++ plugins extend the highlighting feature?
3 plugins are worth knowing: LineHighlighter for line-level color filters, Python Script for custom indicator styles beyond the built-in 5, and ComparePlus for diff-based color highlighting when comparing two files side by side.
How do I remove all highlights in Notepad++ at once?
Use Search > Clear All Marks from the menu bar. This removes every style token and Mark tab color in the active document instantly. To clear one color slot only, use Search > Clear Style > Clear Style N.
Conclusion
This conclusion is for an article presenting every practical method for text marking and color coding in Notepad++, from the Mark tab to style tokens, syntax highlighting, and plugin-based solutions.
The right tool depends on your situation. The Mark tab works best for search-based marking across large files. Style tokens are faster for terms you can already see. The User Defined Language system handles anything the built-in language list misses.
Dark theme users should adjust Mark Style colors in the Style Configurator to maintain contrast. Manual highlights don’t persist after closing, so use bookmarks when you need to return to flagged lines.
Pick the method that fits your workflow and stick with it.

- MongoDB Cheat Sheet - October 20, 2026
- Adding AI Video Generation to a Software Product: Architecture, Cost Guardrails and QA - October 20, 2026
- Show Hidden Characters, Spaces, and Line Endings in Notepad++ - October 19, 2026